by James | Aug 1, 2023 | Welding
Welding with a torch, also known as oxy-fuel welding or gas welding, is a versatile and commonly used method for joining various metals. Whether you need to weld aluminum, steel, copper, or other materials, using a torch can provide excellent results with the right techniques. In this comprehensive guide, we will walk you through the step-by-step process of how to weld with a torch, including tips for welding different metals and common FAQs related to torch welding.
Understanding Oxy-Fuel Welding
Oxy-fuel welding is a fusion welding process that uses a mixture of oxygen and fuel gas (such as acetylene, propane, or natural gas) to generate a high-temperature flame. This flame is directed onto the workpiece, melting the edges and creating a pool of molten metal. When the molten metal cools and solidifies, it forms a strong bond between the two pieces being welded.
Can You Weld With A Torch?
Yes, you can weld with a torch. Torch welding, also known as gas welding or oxy-fuel welding, is a common and versatile welding process used to join various metals. The torch flame is directed onto the edges of the metal pieces being joined, causing them to melt and form a molten pool. As the pool cools and solidifies, a strong and durable weld is created, fusing the two pieces together.
Torch welding is suitable for welding a wide range of materials, including steel, aluminum, copper, brass, and more. It is commonly used in various applications, such as metal fabrication, repairs, construction, and artistic work. The versatility of torch welding makes it a valuable skill for both professional welders and DIY enthusiasts.
However, it is essential to prioritize safety when engaging in any welding activity, as torch welding involves working with high temperatures and potentially hazardous gases. Proper safety gear like excellent welding helmets ventilation, and precautions are necessary to ensure a safe welding environment. Whether you need to weld thin sheets of aluminum, repair steel structures, or create artistic metalwork, learning how to weld with a torch can open up numerous possibilities for metal joining and fabrication projects.
Safety Precautions for Torch Welding
Before diving into the welding process, it’s crucial to prioritize safety. Welding with a torch involves working with high temperatures and potentially hazardous materials. Follow these safety precautions to protect yourself and others:
- Wear Appropriate Safety Gear: Always wear a welding helmet with a proper shade, welding gloves, flame-resistant clothing, and safety goggles to shield your eyes from harmful UV radiation and sparks.
- Ensure Adequate Ventilation: Welding produces harmful fumes, so work in a well-ventilated area or use exhaust fans to prevent inhalation of toxic gases.
- Use Fire-Resistant Welding Blankets: Cover flammable materials nearby with fire-resistant welding blankets to avoid accidental fires.
- Have a Fire Extinguisher Ready: Keep a fire extinguisher nearby in case of any unexpected fires.
Step-by-Step Guide to Welding with a Torch
Step 1: Prepare the Work Area
Before you start welding, set up your work area. Ensure it is clean, organized, and free from any flammable materials. Securely clamp the metal pieces you intend to weld to prevent any movement during the welding process.
Step 2: Set Up the Torch
Assemble the torch according to the manufacturer’s instructions and connect the appropriate gas and oxygen cylinders. Adjust the gas and oxygen pressures to the recommended levels for the type of metal you are welding and the torch tip size you are using.
Step 3: Lighting the Torch
To light the torch, open the oxygen valve slightly and ignite the fuel gas using a spark lighter or a striker. Gradually open the oxygen valve further until a neutral flame is achieved.
Step 4: Preheat the Workpiece
For thicker metals, preheating is essential to ensure proper fusion. Move the torch flame evenly across the metal until it reaches the desired preheat temperature.
Step 5: Welding the Metal
Hold the torch at a 45-degree angle to the joint and direct the flame towards the edge of the metal. Gradually move the torch along the joint, adding filler metal as needed to create a uniform weld pool. Keep a steady pace to avoid overheating and melting the metal excessively.
Step 6: Finishing the Weld
Once the weld is complete, slowly reduce the torch flame to allow the metal to cool gradually. After cooling, inspect the weld for any defects or imperfections.
Read More: Can You Weld Stainless Steel With Flux Core
How to Weld Different Metals with a Torch
Below are some tips for welding specific metals with a torch:
- How to Weld Aluminum with a Torch:
- Use a propane torch for thin aluminum sheets and an oxy-acetylene torch for thicker aluminum pieces.
- Clean the aluminum surface thoroughly and use a flux designed for aluminum welding to improve the weld quality.
- How to Weld a Muffler with a Torch:
- Use an oxy-acetylene torch for welding mufflers as it provides precise control over the flame.
- Clean the muffler surfaces and make sure there are no gaps or holes in the joint.
- How to Cut a Weld with a Torch:
- To cut through welds, use a cutting torch attachment with a different tip.
- Position the torch at a 90-degree angle to the metal and follow the line you want to cut.
- How to Remove a Weld with a Torch:
- To remove a weld, heat the weld joint until it becomes red hot and then use a chisel or hammer to break the weld apart.
- How to Weld Aluminum with a Propane Torch:
- Preheat the aluminum to achieve the proper temperature for welding with a propane torch.
- Use aluminum welding rods or filler wire suitable for propane torch welding.
- How to Weld Copper with a Torch:
- Use an oxy-acetylene torch for copper welding, as it produces the required high temperature.
- Clean the copper surfaces thoroughly and use a flux designed for copper welding to improve the weld quality.
- How to Weld Metal with a Torch:
- Ensure the metal surfaces are clean and free from rust, paint, or other contaminants.
- Adjust the torch flame to achieve the right heat for the specific metal you are welding.
- How to Weld Rebar with a Torch:
- Preheat the rebar to the recommended temperature to achieve proper fusion.
- Use a welding rod compatible with the type of rebar you are welding.
- How to Weld Steel with a Propane Torch:
- Preheat the steel to the required temperature before starting the welding process.
- Use a neutral or slightly reducing flame for welding steel with a propane torch.
- How to Weld Steel with a Torch:
- Clean the steel surfaces thoroughly and use a flux designed for steel welding.
- Use a slightly reducing flame for welding steel to avoid excessive oxidation.
FAQs
Can I weld aluminum with a propane torch?
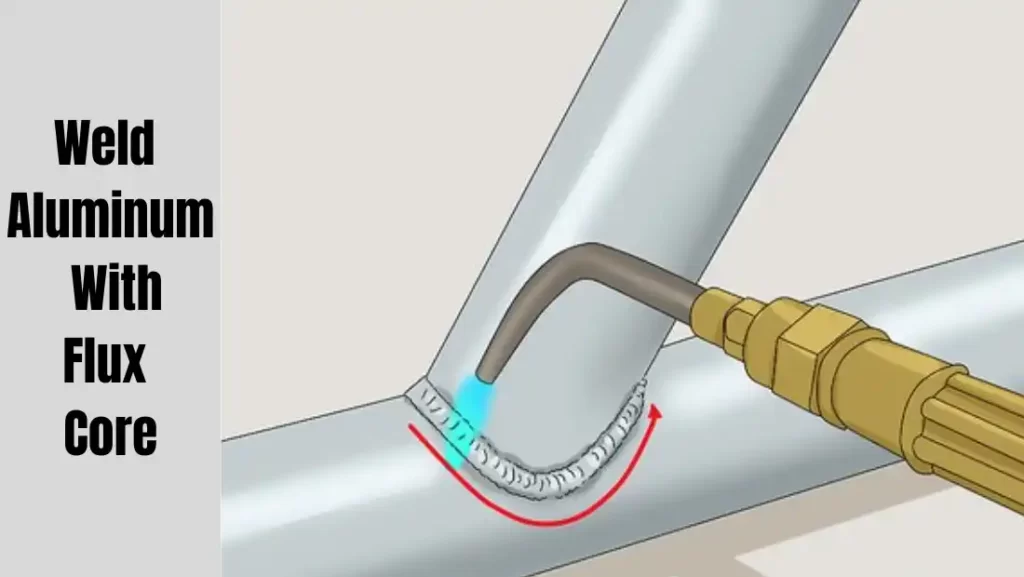
Yes, you can weld thin aluminum with a propane torch. However, for thicker aluminum, it is recommended to use an oxy-acetylene torch for better control and higher heat output. Also read how to weld aluminum with a flux core.
How can I cut a weld with a torch?
To cut through welds, use a cutting torch attachment with a different tip. Position the torch at a 90-degree angle to the metal and follow the line you want to cut.
How do I remove a weld with a torch?
To remove a weld, heat the weld joint until it becomes red hot and then use a chisel or hammer to break the weld apart.
Can I weld copper with a torch?
Yes, you can weld copper with a torch. Use an oxy-acetylene torch for copper welding, as it produces the required high temperature.
What is the best torch for welding steel?
An oxy-acetylene torch is ideal for welding steel due to its high heat output and precise control.
Conclusion:
Welding with a torch is a valuable skill for joining various metals, and mastering this technique requires practice, patience, and attention to safety. Whether you need to weld aluminum, steel, copper, or other materials, following the proper steps and using the right torch and welding techniques will yield strong and reliable welds.
Remember to prioritize safety at all times and consult with experienced welders or professionals if you encounter challenges or have specific welding requirements. With the knowledge gained from this comprehensive guide, you can confidently embark on your torch welding journey and achieve outstanding results in your metalworking projects. Happy welding!
James is a welding expert, accomplished author, and trusted guide with over 8 years of experience in the industry. With his in-depth knowledge and engaging writing style, James has become a true authority in the field, offering readers and clients invaluable expertise and insights to take their welding skills to new heights.
by James | Jul 31, 2023 | Welding
MIG welding, also known as Gas Metal Arc Welding (GMAW), is a popular and versatile welding process used in various industries for its efficiency and ease of use. One of the essential aspects of becoming a skilled MIG welder is mastering different MIG welding pattern techniques. Understanding and applying various MIG welding patterns can significantly impact the quality of your welds, leading to stronger, more aesthetically pleasing results. So to get excellent results, use the best MIG welders because they help to boost productivity.
These patterns refer to the way the welder moves the MIG welding gun during the welding process. Proper understanding and application of welding patterns are crucial as they significantly influence the appearance and strength of the weld. Here is the complete guide on the advantages of MIG welding over other types of welding.
For both beginners and experienced welders, mastering MIG welding patterns can lead to improved welding outcomes, enhanced weld aesthetics, and increased efficiency. In this comprehensive guide, we will explore various MIG welding patterns, their applications, and essential tips to help you become proficient in MIG welding patterns.
Understanding Beginner MIG Welding Patterns
As a beginner MIG welder, learning and practicing foundational welding patterns is crucial for developing consistency and control in your welds. These patterns are relatively simple and easy to execute, making them perfect for newcomers to the world of MIG welding.
a. Straight-Line Welding
Straight-line welding is one of the most basic welding patterns, and it forms the foundation for many other welding techniques. To execute a straight-line weld, simply move the welding torch or gun in a straight path along the joint. This pattern is commonly used for butt joints and can be practiced on scrap metal before attempting it on your project.
b. Circular Patterns
Circular patterns involve creating welds in a circular or semi-circular motion. This pattern is particularly useful for welding fillet joints and corner joints. When performing circular welds, it’s essential to maintain a consistent speed and maintain a steady arc length to achieve a uniform bead.
c. Zigzag Techniques
Zigzag welding is achieved by moving the welding torch back and forth in a zigzag pattern along the joint. This pattern is ideal for welding lap joints and T-joints. Beginners should focus on maintaining a steady motion and avoid excessive weaving, as it may lead to inconsistent weld beads.
d. Oscillation Patterns
Oscillation patterns involve creating a weaving motion while moving forward along the joint. This technique helps distribute the heat evenly and ensures proper fusion between the base metals. Oscillation is commonly used in welding thicker materials and can be varied in width and frequency to achieve different bead profiles.
Exploring MIG Welding Weave Patterns
As you gain confidence in the basic welding patterns, it’s time to explore more advanced techniques involving weaving motions. Welding weave patterns are used to control the weld’s width and penetration, making them essential for achieving high-quality welds in various applications.
a. Stringer Beads
A stringer bead is a straightforward welding pattern where the weld is made in a straight line without any weaving motion. This pattern is commonly used for producing strong and narrow welds in applications where a wider bead is not required.
b. Oscillation Weaving
Oscillation weaving, also known as “whipping,” involves a side-to-side motion while maintaining a forward motion along the joint. This pattern is used to widen the weld bead, which is beneficial for filling wider gaps or welding thicker materials.
c. Cursive Techniques
Cursive weaving creates a smooth and aesthetically pleasing weld bead by forming a series of small circles or loops. This pattern is often used in applications where appearance is crucial, such as decorative metalwork.
d. Triangle Weave
The triangle weave pattern involves creating triangular-shaped weld beads by weaving the torch in a zigzag motion. This technique helps achieve deeper penetration and broader bead profiles, making it suitable for thicker materials and heavy-duty welding.
Advantages and Applications of Weave Patterns
Weave patterns offer several advantages in MIG welding and find extensive applications in various welding scenarios:
- Improved Heat Distribution: Weave patterns distribute heat more evenly across the weld joint, reducing the risk of warping and distortion, especially in thin materials.
- Enhanced Penetration Control: By adjusting the width and speed of the weave pattern, welders can control the depth of penetration, achieving the desired weld strength for different materials and joint configurations.
- Versatility: Weave patterns can be adapted to different welding positions, making them suitable for flat, horizontal, vertical, and overhead welding.
Stringer Patterns and their Applications
Stringer patterns are less common than weave patterns but are equally important, especially for welds that require a narrow bead, such as fillet welds. This technique involves moving the MIG welding gun in a straight line along the weld joint. Stringer patterns are typically used for welding thick materials, as the narrow bead produced is less likely to crack and provides adequate strength.
a. Mig Welding Pattern Techniques: Stringer patterns require a steady hand and consistent travel speed. The proper technique ensures uniform and strong welds, making them ideal for critical joints.
b. Best Mig Welding Pattern: The stringer pattern is often the best choice for vertical welding due to its ability to control heat and minimize potential defects.
Advantages and Applications of Stringer Patterns
Stringer patterns offer unique advantages in MIG welding and find applications in specific welding scenarios:
- Narrow Bead Formation: Stringer patterns produce a thin, precise bead, making them suitable for welding joints with limited space or tight clearances.
- High-Quality Welds: The focused heat input from a stringer pattern results in minimal distortion and reduced chances of defects, ensuring high-quality welds.
- Fillet Welds: Stringer patterns excel in creating strong and aesthetically pleasing fillet welds, commonly used in structural and fabrication work.
Tips for Mastering MIG Welding Pattern Techniques
- Practice Regularly: Like any skill, proficiency in MIG welding pattern techniques comes with practice. Set aside dedicated time for welding practice, and focus on honing your weaving and stringer techniques. Regular practice will help you gain muscle memory and improve your welding control.
- Use the Right Welding Parameters: The welding parameters, including wire feed speed, voltage, and shielding gas flow rate, greatly influence the welding process. Experiment with different settings to find the optimal parameters that produce the best results for your specific welds.
- Observe the Weld Pool: While welding, pay close attention to the weld pool. Ensure that it remains consistent and free from undercuts or overlaps. Monitoring the weld pool allows you to make real-time adjustments and achieve smoother and cleaner welds.
- Clean the Weld Joint: Before starting the welding process, ensure the weld joint is thoroughly cleaned. Remove any rust, paint, grease, or other contaminants that may affect the quality of the weld. A clean joint provides better fusion and contributes to a high-quality weld.
- Maintain a Consistent Travel Speed: The travel speed of the welding gun is crucial for controlling the heat input and the width of the weld bead. Aim for a steady and consistent travel speed to ensure uniform welds without overheating or underheating the joint.
- Avoid Overlapping Passes: When making multiple passes on a weld joint, wait for the previous pass to cool down before starting the next one. Overlapping passes can cause undesirable defects, such as excessive buildup or lack of fusion.
- Use a Consistent Arc Length: The distance between the welding gun and the workpiece, known as the arc length, plays a critical role in controlling the heat input. Maintain a consistent arc length to achieve the proper melting of the wire and workpiece without compromising the weld quality.
- Seek Feedback and Guidance: Don’t hesitate to seek guidance from experienced welders or instructors. Constructive feedback and tips from experts can significantly accelerate your learning and help you overcome common challenges.
Choosing the Right MIG Welding Pattern
Selecting the appropriate MIG welding pattern depends on various factors, including the material being welded, its thickness, and the desired appearance and strength of the weld. Before starting work, the welder also knows about the best shade lens for MIG welding.
Welding Thin Materials:
For thin materials, a narrow weave pattern is typically preferred. This pattern helps distribute the heat evenly, reducing the risk of warping and achieving adequate penetration without excessive heat input.
Welding Thick Materials:
When welding thick materials, a stringer pattern is often the best choice. The focused heat from the narrow bead minimizes the chances of cracking and produces a strong and reliable weld.
Fillet Welds:
For fillet welds, especially in structural and fabrication work, the stringer pattern is commonly used. It provides the precision and strength required for these critical joints.
Vertical Welding:
When welding in the vertical position, the weave pattern becomes crucial. Maintaining control and avoiding excessive buildup at the bottom of the joint is essential to prevent potential defects.
Final Words
Mastering MIG welding pattern techniques is an essential skill for welders of all levels. Whether you’re a beginner or an experienced welder, understanding the intricacies of weave patterns and stringer patterns can significantly impact the quality and aesthetics of your welds.
By regularly practicing different MIG welding patterns, using the right welding parameters, and maintaining consistent techniques, you can achieve high-quality welds that are both strong and visually appealing. Remember to prioritize safety, seek feedback, and continually improve your skills to become a proficient MIG welder.
With dedication, practice, a thorough understanding of MIG welding pattern techniques and using the best voltage MIG welders, you can embark on a rewarding journey toward becoming an accomplished welder capable of tackling various welding challenges with confidence. Happy welding!
James is a welding expert, accomplished author, and trusted guide with over 8 years of experience in the industry. With his in-depth knowledge and engaging writing style, James has become a true authority in the field, offering readers and clients invaluable expertise and insights to take their welding skills to new heights.
by James | Jul 28, 2023 | Welding
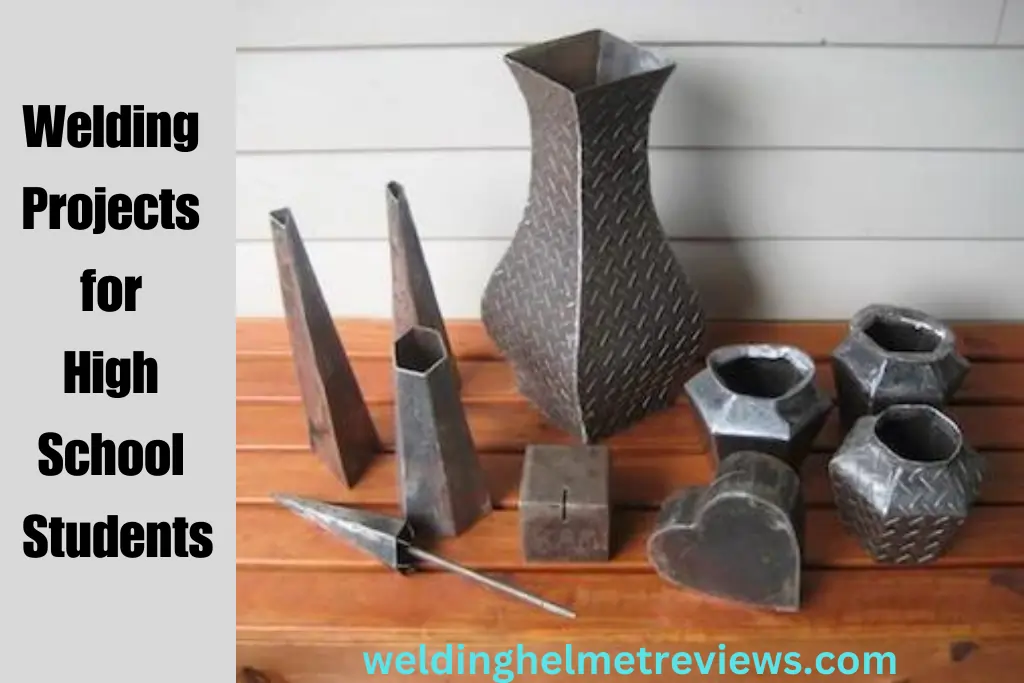
Welding, the art of joining metals through heat and pressure, offers an exciting and hands-on experience for high school students. Engaging in welding projects not only sparks creativity but also fosters practical skills that can be valuable for future career paths. In this article, we will explore some exciting and achievable welding projects tailored for high school students, encouraging them to dive into the world of metal fabrication and explore their potential.
Welding Project Ideas for High School Students
Before embarking on any welding project, safety should always be the foremost concern. High school students must be taught the importance of wearing appropriate personal protective equipment (PPE), including welding helmets, gloves, and safety glasses. Additionally, proper ventilation in the welding area and safe handling of welding equipment should be emphasized to create a secure learning environment.
Metal Art Sculptures
Creating metal art sculptures is an excellent way for high school students to explore their creativity and welding skills. They can design and fabricate sculptures using various metal pieces, such as scrap metal, nuts, bolts, and steel rods. These sculptures can range from abstract designs to animals, plants, or human figures, allowing students to express their artistic flair through metalwork.
Bookends or Paperweights
Bookends and paperweights are practical welding projects that high school students can make as gifts or for personal use. By welding metal pieces together, they can craft unique and functional accessories for organizing books or keeping papers in place.
Welded Jewelry
Welding delicate metal pieces to create jewelry items like rings, bracelets, or pendants is another exciting project idea for high school students. With proper guidance and safety precautions, they can explore different metals and techniques to design wearable art pieces.
Welded Plant Holders
High school students can elevate their gardening skills with welded plant holders. By welding metal rods and plates into creative designs, they can craft unique holders to display potted plants, adding a touch of beauty to gardens or indoor spaces.
Metal Toolboxes
Designing and constructing metal toolboxes is a practical welding project that serves as both storage and a learning tool. High school students can customize the size and compartments of the toolbox, gaining valuable experience in measuring, cutting, and welding metal components.
Skill Development and Educational Benefits
Hands-On Learning
Engaging in welding projects provides high school students with hands-on learning experiences. As they work with metal and welding equipment, they develop problem-solving skills and gain a deeper understanding of metal fabrication processes.
Career Exploration
For students interested in pursuing careers in welding, these projects offer a glimpse into the world of metalworking and fabrication. It allows them to explore various welding techniques and understand the versatility of welding in different industries.
Teamwork and Collaboration
Welding projects often involve teamwork, where students can collaborate to design and build larger projects. This fosters communication skills, cooperation, and the ability to work effectively in a group setting.
Creative Expression
Welding projects offer a platform for high school students to express their creativity and originality. They can experiment with different designs and materials, turning their ideas into tangible metal creations.
Community Engagement and Beyond
Welding projects for high school students can extend beyond the school environment. Students can use their newly acquired skills to contribute to their community by creating metal art installations or assisting in local repair projects. Such initiatives provide a sense of pride and accomplishment, showing students that their welding skills can have a positive impact on the world around them.
Conclusion
Welding projects for high school students offer a unique blend of creativity, skill development, and practical knowledge. By engaging in these hands-on projects, students can explore the world of metal fabrication, express their creativity, and gain valuable insights into potential career paths. Moreover, these projects foster a strong foundation in safety practices, teamwork, and problem-solving skills, preparing students for success in both their personal and professional lives. Whether they pursue welding as a career or simply as a lifelong hobby, these projects can ignite a passion for metalworking that lasts a lifetime.
James is a welding expert, accomplished author, and trusted guide with over 8 years of experience in the industry. With his in-depth knowledge and engaging writing style, James has become a true authority in the field, offering readers and clients invaluable expertise and insights to take their welding skills to new heights.
by James | Jul 24, 2023 | Welding
Tack welding is a fundamental technique in the welding industry that plays a crucial role in ensuring precise and secure weldment alignment. This article aims to provide a comprehensive guide to tack welding, covering its definition, applications, and step-by-step instructions for beginners. Whether you are a novice welder or a seasoned professional looking to refine your skills, understanding tack welding is essential for successful welding projects.
Understanding Tack Welding
Tack welding is a temporary welding process used to hold workpieces together before the final welds are made. It involves creating small welds at strategic points to prevent misalignment during the welding process. By using tack welds, welders can secure the components in their intended positions, ensuring accurate and high-quality welds in the final assembly. This technique is widely employed in various welding applications, including fabrication, shipbuilding, automotive, and construction industries.
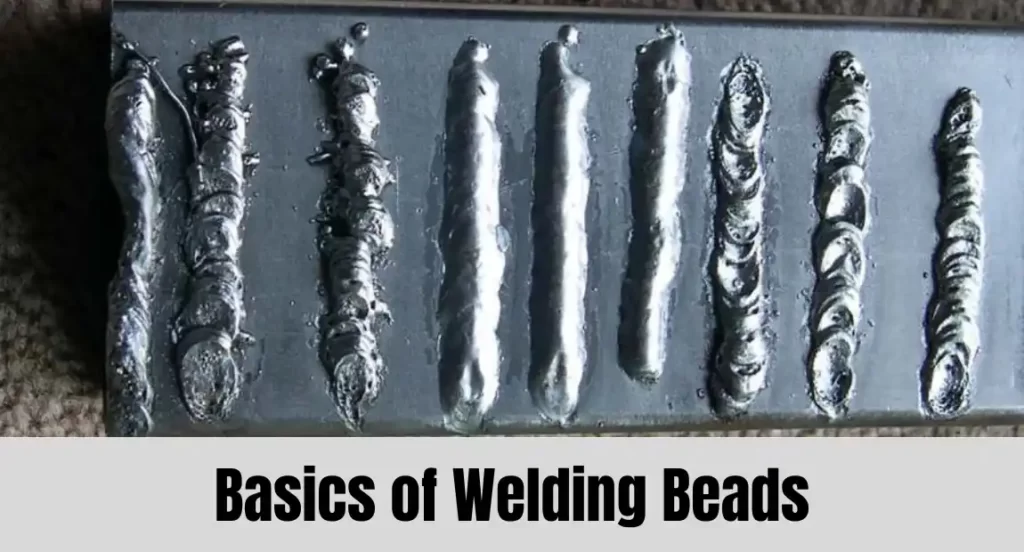
Read More: Basics of Welding Beads
Tack Welders and Machines
To perform tack welding efficiently, welders use specialized tack welders or tack welding machines. These machines are designed to deliver precise and controlled welds, ensuring consistent results. Tack welders come in various types, such as portable handheld units or bench-mounted models. They are equipped with essential features like adjustable amperage, duty cycle, and electrode options to cater to different welding needs.
How to Tack Weld: Step-by-Step Guide
Tack welding requires a methodical approach to achieve accurate results. Follow these step-by-step instructions to master the art of tack welding:
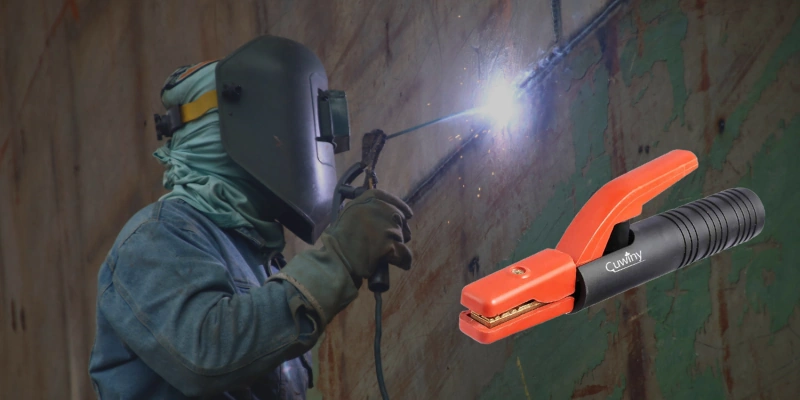
Step 1: Safety First Before you begin tack welding, ensure you are wearing appropriate safety gear, including a welding helmet, welding gloves, and protective clothing.
Step 2: Set Up Your Welding Area Clean the workpieces to be joined, removing any rust, paint, or debris. Position the components precisely, ensuring they are aligned as intended for the final weld.
Step 3: Select Electrode and Welding Machine Choose the appropriate electrode and tack welding machine based on the material and thickness of the workpieces. Refer to the machine’s manual for recommended settings.
Step 4: Tack Welding Technique Hold the electrode at a slight angle and make quick, controlled welds at strategic points to hold the workpieces together. Use intermittent tacks to minimize heat distortion.
Step 5: Inspect Tack Welds After tack welding, inspect the joints to ensure they are secure and properly aligned. Make any adjustments if necessary.
Tack Welding vs. Spot Welding: Which is Better?
While both tack welding and spot welding serve essential roles in welding processes, they differ in their applications and techniques. Tack welding is more versatile, allowing for precise alignment of workpieces before final welding, whereas spot welding is ideal for joining thin sheets of metal with no filler material. The choice between the two techniques depends on the specific welding requirements of the project.
Read More: What is Heliarc Welding
Tack Welding with MIG Welders
MIG (Metal Inert Gas) welding is a popular method for tack welding due to its ease of use and speed. To tack weld with a MIG welder, follow these additional steps:
Step 1: Prepare the Welder Set the MIG welder to the appropriate settings for the material and thickness of the workpieces. Ensure the wire feed speed and voltage are adjusted correctly.
Step 2: Tack Welding Technique with MIG Hold the welding gun at a 15 to 45-degree angle and create small, controlled welds to tack the workpieces together. Remember to use intermittent tacks for better results.
Conclusion
Tack welding is a fundamental skill that every welder must master to achieve precise and secure weldments. By understanding the basics of tack welding, selecting the right equipment, and following the step-by-step guide, you can improve your welding techniques and ensure successful welding projects. Remember to prioritize safety at all times and practice regularly to enhance your tack welding proficiency. Whether you are a hobbyist or a professional welder, the knowledge gained from this comprehensive guide will undoubtedly contribute to your welding expertise.
Read More: What is Arc Blow in Welding
James is a welding expert, accomplished author, and trusted guide with over 8 years of experience in the industry. With his in-depth knowledge and engaging writing style, James has become a true authority in the field, offering readers and clients invaluable expertise and insights to take their welding skills to new heights.
by James | Jul 22, 2023 | Welding
Fractal wood burning with a welder, also known as Lichtenberg wood burning, is a unique form of pyrography that creates intricate patterns and designs on wood using high-voltage electrical currents. This technique involves passing an electrical current through the wood, creating a lightning-like pattern that follows the path of least resistance. The result is a fractal or tree-like pattern that is unique and mesmerizing.
To create fractal wood burning with a welder, a special tool called a fractal burner is needed. This tool consists of a transformer that steps up the voltage from a standard electrical outlet to several thousand volts and a pair of probes that are used to apply the electrical current to the wood surface. Once the probes are in place, the electrical current will flow through the wood, creating a path of burned wood.
What is Fractal Wood Burning with Welder?
Fractal wood burning with a welder requires skill, patience, and a steady hand. It is a dangerous process, as high-voltage electrical currents can cause serious injury or death if not handled properly. Therefore, it is important to take proper safety precautions, including wearing protective gear and following proper procedures.
The finished product of fractal wood burning with a welder is a stunning piece of art that showcases the natural beauty and unique grain patterns of the wood, combined with the intricate fractal patterns created by the electrical current. It can be used to create a variety of items, including wall art, furniture, and even household items like coasters or cutting boards.
Read More: Best Welding Stringers in the Market
Importance of Fractal Wood Burning with Welder
Fractal wood burning with a welder is an important art form that has gained popularity in recent years. Not only is it a unique and mesmerizing technique that creates stunning patterns on wood, but it also promotes creativity and artistic expression. It can also be a sustainable art form when using salvaged or repurposed wood.
Additionally, fractal burning with a welder can serve as a therapeutic activity that provides a sense of calm and relaxation for those who practice it. Overall, fractal wood burning with a welder is an important art form that combines science, art, and sustainability to create beautiful and meaningful pieces.
Tips and Tricks of Succeeding in Fractal Wood Burning with a Welder
Using a welder for wood burning can be a challenging but rewarding experience that allows you to create intricate designs and patterns on wood. With the right tools and techniques, you can create stunning pieces of art that showcase the natural beauty of the wood while also incorporating unique fractal patterns. Here are some tips and tricks to help you achieve success with this technique.
-
Use the Right Type of Wood
Not all types of wood are suitable for fractal wood burning with a welder. Generally, you should use hardwood that is at least 1 inch thick and has a relatively straight grain pattern. Popular choices include maple, oak, and birch. Avoid using softwoods like pine or cedar, as they may not hold up well under the heat of the welder.
Before you begin the wood-burning process, it’s important to prepare the surface of the wood. Sand it smooth to remove any bumps or imperfections, and wipe it down with a damp cloth to remove any dust or debris. This will ensure that the electrical current flows evenly across the surface of the wood.
A fractal burner is a specialized tool that is designed specifically for wood burning with a welder. It consists of a transformer that steps up the voltage from a standard electrical outlet to several thousand volts and a pair of probes that are used to apply the electrical current to the wood surface. A fractal burner allows you to control the intensity and direction of the electrical current, resulting in more precise and intricate patterns.
-
Practice Safety Precautions
Fractal wood burning with a welder can be a dangerous process if not handled properly. Make sure to wear protective gear, including gloves and eye protection. Keep the work area clear of flammable materials, and always use the fractal burner according to the manufacturer’s instructions.
-
Experiment with Different Techniques
There are a variety of techniques that you can use to create different types of patterns and designs with a fractal burner. For example, you can vary the intensity and duration of the electrical current, or use different types of probes to create different shapes and lines. Experimenting with different techniques can help you discover new and interesting ways to create unique pieces of art.
Once you have completed the wood-burning process, it’s important to finish the wood to protect it and bring out its natural beauty. You can use a clear sealant or stain to protect the wood and enhance its grain pattern. Alternatively, you can leave the wood unfinished to showcase the natural beauty of the fractal patterns.
Conclusion
Using a welder for wood burning can be a rewarding and challenging art form that allows you to create unique and beautiful pieces of art. By using the right tools and techniques, practicing safety precautions, and experimenting with different approaches, you can achieve success and create stunning works of art that showcase the natural beauty of the wood and the intricate patterns created by the electrical current.
Also Read: What is Heliarc Welding
FAQs
Q: How is fractal wood burning with a MIG welder different from other techniques?
Fractal wood burning with a MIG welder is a technique that uses a Metal Inert Gas (MIG) welder to create intricate designs on wood. Unlike other techniques, which use high or low-voltage electrical currents, fractal wood burning with a MIG welder uses the heat generated by the MIG welder’s arc to burn the wood’s surface. This technique can be more precise than other methods, as it allows for more control over the temperature and intensity of the burns.
Q: Can any type of wood be used for fractal wood burning with a welder?
Not all types of wood are suitable for fractal wood burning with a welder. Generally, you should use hardwood that is at least 1 inch thick and has a relatively straight grain pattern. Popular choices include maple, oak, and birch. Softwoods like pine or cedar are not recommended as they may not hold up well under the heat of the welder.
Q: How does fractal wood burning with an arc welder work?
Fractal wood burning with an arc welder involves using a high-amperage electrical current to create unique patterns and designs on wood. The process involves making small, successive burns on the wood’s surface, creating a fractal-like pattern. The electrical current heats up the metal electrode on the arc welder, which in turn heats up the wood’s surface.
Q: What is low-voltage fractal wood burning?
Low-voltage fractal wood burning is a variation of the traditional high-voltage fractal wood burning technique that uses a lower-voltage electrical current. This technique involves using a variable DC power supply to create intricate designs on wood. Low-voltage fractal wood burning is generally considered to be a safer and more beginner-friendly alternative to high-voltage fractal wood burning.
James is a welding expert, accomplished author, and trusted guide with over 8 years of experience in the industry. With his in-depth knowledge and engaging writing style, James has become a true authority in the field, offering readers and clients invaluable expertise and insights to take their welding skills to new heights.
by James | May 13, 2023 | Welding
Are you looking for simple welding projects for beginners? If so, you’ve come to the right place! Learning to weld is a fun and educational way to expand your skills and create unique items. It’s also a great way to build confidence and gain valuable skills that can be used in a variety of projects.
With the right resources and a bit of practice, anyone can get started with welding projects for beginners. In this blog post, we’ll look at some of the basics of welding and provide some great and cool welding project ideas that are perfect for beginners.
Materials and Tools for Beginner Welding Projects
Before diving into your DIY welding projects for beginners, it is important to have the proper tools and materials on hand. Here is a list of the essentials:
- Welding machine – the heart of your welding setup. You can opt for a stick, MIG, or TIG welder depending on your preference and the project you’re working on.
- Safety gear – welding involves sparks and high temperatures, so protect yourself with welding gloves, a welding helmet, safety glasses, and long-sleeved clothing.
- Metal – you’ll need metal for your projects. This can include scrap metal, sheet metal, or metal pipes, depending on what you’re making.
- Clamps and magnets – to hold your metal pieces in place while welding.
- Angle grinder – for cleaning up your welds and smoothing out rough edges.
- Welding wire – if you’re using a MIG welder, you’ll need welding wire specific to the type of metal you’re welding.
- Welding flux – if you’re using a stick welder, you’ll need flux-coated welding rods.
With these tools and materials, you’ll be ready to tackle some fun welding projects for beginners. But remember, safety first! Always wear your safety gear and follow proper welding techniques for successful and safe results.
What are some easy welding projects for beginners?
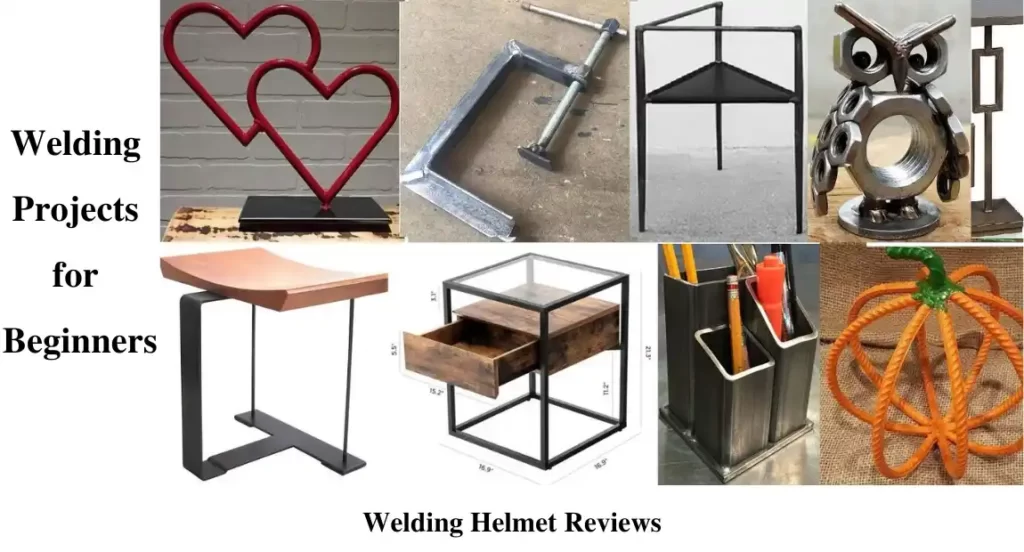
These enjoyable DIY, MIG, and ARC welding projects are for beginners who have some creative thinking and basic welding abilities. Here is a list of easy welding projects for beginners:
1. Welded Plant Stand
A welded plant stand is a perfect project for a plant lover who wants to add a touch of modernity and style to their plant display. It is one of the fun welding projects for beginners. To create this project, you’ll need metal bars and plates that you can weld together. You’ll also need a welding machine and safety equipment like gloves and goggles.
First, design the plant stand, measuring the dimensions of your pots and the desired height of the stand. Cut the metal bars to the appropriate length using a metal saw or grinder. Then, weld the bars and plates together, creating a sturdy and stable structure. You can add finishing touches by sanding and painting the stand to match your décor.
2. BBQ Grill
A welded BBQ grill is an excellent addition to any backyard, especially for those who love to host BBQ parties. To make this project, you’ll need metal sheets, grill grates, and legs. Start by designing the grill, taking into account the size and shape of your grill grates. Cut the metal sheets to size and weld them together to create the body of the grill.
Then, weld the grill grates onto the top of the grill body. Next, weld the legs onto the bottom of the grill, making sure they’re sturdy enough to support the weight of the grill and the food being cooked. Finally, sand and paint the grill to protect it from rust and add some color.
3. Wall Art
A welded wall art piece is a great way to showcase your creativity, add some personality to your home décor, and fun welding project for beginners. To make this project, you’ll need metal sheets and bars that you can cut and weld into various shapes and designs.
Start by sketching your design on paper, then transfer it onto the metal sheets using a marker. Cut the metal sheets into the desired shapes using a metal saw or grinder. Then, weld the pieces together, creating a unique and eye-catching sculpture. You can finish the piece by sanding and painting it to match your wall color and style.
4. Fire Pit
A welded fire pit is a must-have for outdoor gatherings and camping trips. It is the of the ARC welding project for beginners. To create this project, you’ll need metal sheets and plates that you can weld together. Start by designing the fire pit, taking into account the desired size and shape. Cut the metal sheets to size and weld them together to create the body of the fire pit.
Then, add legs to the bottom of the fire pit, making sure they’re sturdy enough to support the weight of the fire pit and the firewood. You can add a grill top or mesh screen to the fire pit for cooking or safety. Finish the fire pit by sanding and painting it with high-heat paint to protect it from rust and fire damage.
5. Bike Rack
A welded bike rack is a useful and practical storage solution for your garage or outdoor space. To make this project, you’ll need metal pipes and plates that you can cut and weld together. Start by designing the bike rack, taking into account the number of bikes you want to store and the available space.
Cut the metal pipes and plates to the desired length and shape using a metal saw or grinder. Then, weld the pieces together, creating a sturdy and stable rack that can support the weight of the bikes. You can finish the rack by sanding and painting it to match your garage or outdoor décor.
6. Metal Box
A welded metal box is a versatile and practical item that can be used for storage or as a decorative element in your home. It is a DIY welding project for beginners. To create this project, you’ll need metal sheets that you can cut and weld together.
Start by designing the box, taking into account the desired size and shape. Cut the metal sheets to size using a metal saw or grinder. Then, weld the pieces together, creating a sturdy and durable box. You can add some hinges and a latch to create a lid for the box. Sand and paint the box to match your décor, or leave it bare for an industrial look.
7. Coat Rack
A welded coat rack is a functional and stylish addition to any entryway or mudroom. To create this project, you’ll need metal bars and hooks that you can cut and weld together. Start by designing the coat rack, taking into account the number of hooks and the available space.
Cut the metal bars and hooks to the desired length using a metal saw or grinder. Then, weld the pieces together, creating a sturdy and stable rack. You can add finishing touches by sanding and painting the rack to match your décor.
8. Garden Sculpture
A welded garden sculpture is a unique and creative way to add personality and art to your outdoor space. To make this project, you’ll need metal sheets and bars that you can cut and weld into various shapes and designs.
Start by sketching your design on paper, then transfer it onto the metal sheets using a marker. Cut the metal sheets into the desired shapes using a metal saw or grinder. Then, weld the pieces together, creating a one-of-a-kind sculpture. You can finish the sculpture by sanding and painting it to match your garden décor.
9. Welded Jewellery
A welded jewellery project is a great way to create unique and customized pieces that reflect your style and personality. To make this project, you’ll need metal wire and beads that you can cut and weld together. Start by designing your jewellery piece, taking into account the desired size and shape.
Cut the metal wire to size using wire cutters, then shape it into the desired design. Use a welding machine to weld the wire together, creating a sturdy and durable piece. Add beads or other embellishments to your design, then finish the piece by sanding and polishing it.
10. Metal Furniture
A welded metal furniture project is a statement piece that can add an industrial and modern look to your home décor. This is a MIG welding project for beginners. To make this project, you’ll need metal sheets and bars that you can cut and weld together. Start by designing the furniture piece, taking into account the desired size and shape.
Cut the metal sheets and bars to size using a metal saw or grinder. Then, weld the pieces together, creating a sturdy and stable piece. You can add finishing touches by sanding and painting the furniture to match your décor. Note that this project may require some advanced welding skills and tools.
These welding project ideas for beginners are excellent for getting started with welding. Remember to always follow safety precautions when working with welding equipment and materials. Practice these projects with care and enjoy the process of learning a new skill and creating something beautiful.
Safety Tips
When it comes to small welding projects for beginners, safety should be a top priority. While welding can be a fun and rewarding DIY activity, it can also be dangerous if proper precautions are not taken. Here are some important safety tips to keep in mind before starting any easy welding projects for beginners:
- Always wear protective gear, including gloves, a welding helmet with a filter lens, a long-sleeved shirt, and closed-toe shoes.
- Keep your work area clean and organized. Make sure there are no flammable materials nearby and that your workspace is well-ventilated.
- Use a welding table or workbench, rather than welding on the floor. This will help keep your work stable and reduce the risk of tripping or falling.
- Make sure your welding machine is properly grounded and that all cables and connections are secure.
- Never touch the electrode, wire, or welding metal while it’s still hot. Allow it to cool down first before handling it.
By taking these simple precautions, you can ensure a safe and enjoyable experience with your mig welding projects for beginners, arc welding projects for beginners, and other welding project ideas for beginners. Remember, safety is always the first step to creating cool welding projects for beginners!
Conclusion
Welding is a rewarding skill to learn, both for personal projects and potentially for future career opportunities. By starting with easy projects, beginners can build their confidence and skill set. Remember to always prioritize safety and wear proper gear, and seek guidance and training from experienced welders when necessary. With time and practice, welding can become a fun and fulfilling hobby. So why not give it a try and see where it takes you? Happy welding!
FAQs
Do I need to have any prior experience before starting to learn welding?
No, you do not need to have any prior experience before starting to learn welding. It is a skill that can be learned by anyone with an interest in it.
What type of welding should I start with as a beginner?
MIG welding is a good type of welding to start with as a beginner. It is relatively easy to learn, and the equipment is readily available at most welding supply stores.
How can I ensure my safety while welding?
To ensure your safety while welding, you should wear appropriate safety gear such as gloves, goggles, and a welding helmet. You should also work in a well-ventilated area to avoid inhaling fumes.
Can I weld at home, or do I need to go to a welding shop?
You can weld at home, but you will need to ensure that you have a suitable workspace and that you are following safety guidelines. It is also a good idea to take a welding class or to have someone who is experienced in welding to guide you.
What are some good resources for learning welding as a beginner?
Some good resources for learning welding as a beginner include welding classes, online tutorials, and books about welding. It is also helpful to have access to a mentor who can guide you and answer any questions you may have.
James is a welding expert, accomplished author, and trusted guide with over 8 years of experience in the industry. With his in-depth knowledge and engaging writing style, James has become a true authority in the field, offering readers and clients invaluable expertise and insights to take their welding skills to new heights.