Welding is a craft that demands precision, and you can not lay down a clean bead if you can not see what you are doing. Many welders, especially beginners, struggle with a dark, unclear view of the weld puddle. Figuring out how to improve visibility while welding does not always require expensive gear. Often, the solution lies in helmet settings, proper lens maintenance, and a few smart adjustments to your work area. This guide walks you through the most effective ways to get a crystal-clear view every time you strike an arc.
Poor visibility leads to off-track welds, undercut, and excessive grinding. The good news is that the fixes are straightforward once you understand what is stealing your sight. From choosing the right auto-darkening lens to cleaning your cover plate the right way, each tip below will help you see exactly where the filler metal meets the base material.
Table of Contents
Why Visibility Matters More Than You Think
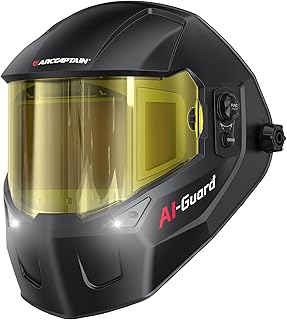
ARCCAPTAIN Intelligent Auto-Darkening Welding Helmet, 180° True Color Hood
Check PriceWelding visibility is about more than comfort. It directly impacts weld quality, safety, and your body position. When you can not see the joint clearly, you tend to lean in closer, often putting your face directly in the plume of fumes. A hazy view also makes it impossible to monitor the weld pool’s size and the wetting action at the toes of the weld. This leads to a poor bead profile that might fail inspection or require costly rework.
The human eye reacts to the intense arc light by closing down the iris. Even a fraction of a second of glare before the lens darkens causes eye fatigue. After hours of welding, that strain reduces your ability to distinguish subtle puddle movements. Clear, consistent visibility reduces squinting, keeps your neck relaxed, and lets you maintain a steady travel speed. That steady hand is what creates the stacked dimes appearance everyone chases.
Select a Helmet Designed for Clarity
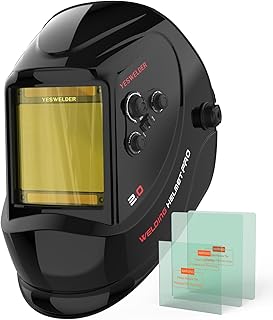
YESWELDER Auto Darkening Welding Helmet, Large View LYG-M800H
Check PriceThe single biggest factor in how well you see the arc is the helmet itself. Modern auto-darkening welding helmets offer far more control than older passive shades. If you are still using a fixed shade 10 lens for every process, you are missing out on a huge visibility upgrade. Variable shade, multiple arc sensors, and high optical clarity ratings all work together to give you a sharper image of the weld zone.
Auto-Darkening Filters and Optical Class
Every auto-darkening filter carries an optical clarity rating expressed as 1/1/1/1. The first three numbers refer to distortion, shade uniformity, and angular dependence. The fourth number is light transmittance when the lens is in its light state. A true 1/1/1/2 or 1/1/1/1 rating eliminates the blurry, distorted view that cheap lenses produce. High clarity helps you see the wire or electrode tip and the molten puddle without constant readjustment.
When shopping for a new hood, look for helmets with top-tier visibility ratings. Our guide on helmets with superior visibility can help you find models that perform well under real shop conditions. A quality lens turns what used to feel like a guess into a controlled, intentional weld.
Shade Selection for Each Process
Many welders set their shade once and never touch it again. That approach kills visibility. MIG welding at 200 amps needs a darker shade than TIG welding thin stainless steel at 60 amps. You need to see the arc without overpowering brightness. Start around shade 10 for low-amp TIG, shade 11 or 12 for MIG and stick, and up to 13 for high-amperage flux-core or carbon arc gouging. Adjust until you see a bright puddle with clear separation between the slag and the metal.
Cheater Lenses for Close-Up Work
If you are over 40 or simply have trouble focusing on small details, do not fight it. A magnifying cheater lens slips behind the standard filter and brings the weld puddle into sharp focus. Cheaters are available in diopter strengths from 1.00 to 3.00, and they make a dramatic difference for pipe welders and anyone doing intricate TIG work. You can find more details in our article about magnifying cheater lenses.
Set Up Your Work Area Lighting
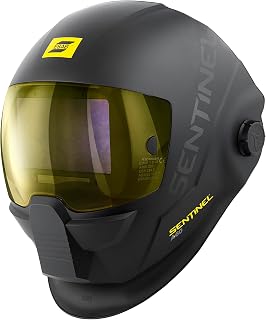
ESAB Sentinel A60 Welding Helmet, Black Low-Profile Design
Check PriceWelding in the dark or in a dim corner of the shop forces your eyes to work overtime. Before the arc starts, you need enough ambient light to line up the electrode with the joint. After the arc extinguishes, the sudden return to darkness can cause you to lose your reference point entirely. Good lighting around your workpiece helps your eyes transition smoothly and reduces the shock of the bright arc.
Add Task Lighting Directly on the Joint
Clip-on LED work lights or magnetic base lamps allow you to aim a focused beam right on the seam. Position the light from the side or slightly behind your helmet so it does not reflect off the inside of the lens. The additional illumination makes the edges of the joint pop, even when the arc is off. This helps you maintain a straight travel line and consistent stick-out.
Reduce Backlight and Glare
Bright light coming from behind you can overwhelm the auto-darkening sensors and cause them to stay light or flicker. If your helmet is not consistently darkening, check for strong overhead lights or a shop door behind you. Hang a welding curtain or position your body to block the stray light. Sensors work best when they receive only the arc light they are meant to detect.
Clean and Maintain Your Lens System
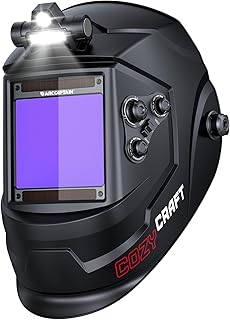
ARCCAPTAIN Auto Darkening Welding Helmet with Light, 3.94″X3.66″ Large View
Check PriceNothing wrecks visibility faster than a dirty, scratched, or foggy lens. Every welder knows the frustration of trying to see through a haze of spatter, dust, and scratched plastic. A clear outer cover lens is cheap, replaceable, and yet many welders run them until they look like frosted glass. You need a regular cleaning routine that protects the expensive auto-darkening filter inside.
Daily Cleaning Without Damage
Use a microfiber cloth and a mild lens cleaning solution designed for coated optics. Never wipe a dry lens with a dirty rag, that scratches the anti-fog or reflective coatings. Spray the cleaner onto the cloth, not directly on the lens, to avoid liquid seeping into the cartridge. For heavy spatter, soak the cover lens in warm soapy water and gently wipe with your fingers before drying with a clean cloth.
For a complete step-by-step cleaning guide, see our instructions on how to clean a welding helmet lens. A clean lens transmits more light and shows true colors of the puddle, making it easier to read the weld.
Replace Cover Lenses Before They Haze Over
Outer and inner cover lenses are sacrificial. Order a bulk pack and replace them as soon as you notice scratches in your line of sight. A single deep scratch distorts light and creates a halo effect around the arc. Even fine micro-scratches from wiping build up over time, reducing contrast. Fresh cover lenses feel like getting a new pair of glasses.
Fine-Tune Helmet Settings and Fit
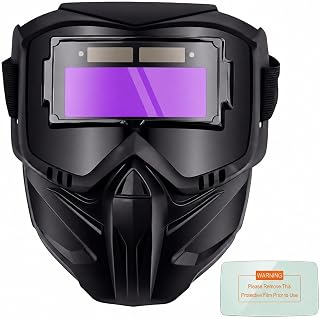
Auto-Darkening Welding Helmet, True Color View UV IR Adjustable Headband
Check PriceEven with a top-rated helmet, the wrong settings can leave you blinking at a black square or getting flashed repeatedly. Spend ten minutes adjusting the controls before you start welding for the day. Sensitivity, delay, and the helmet’s resting position all play a role in what you see.
Get the Sensitivity and Delay Right
Sensitivity controls how much light triggers the dark state. Set it high enough to darken from the welding arc but not so high that nearby grinders or sunlight trigger it. Delay controls how long the lens stays dark after the arc stops. For high-amperage welding, a longer delay prevents your eyes from being exposed to the glowing hot metal. For tack welding or rapid stitch work, shorten the delay so you can see your positioning between quick arcs.
Helmet Position and Headgear Tension
A helmet that slips down your nose or sits crooked changes the viewing angle through the lens. When the lens is not square to your eyes, you get distortion and internal reflections. Adjust the headgear so the helmet stays firmly in place without excessive pressure. The tighter and more stable the fit, the less you will need to use your hand to hold the hood up. Stable fit equals stable vision.
Use the Grind Mode When Needed
Many auto-darkening helmets have a grind mode that locks the lens in its light state. Use it when prepping metal or cleaning a tack. It prevents the lens from darkening from sparks and allows you to see the full workpiece without lifting the hood. Just remember to switch it back to weld mode before striking an arc.
Manage Fume and Smoke Extraction
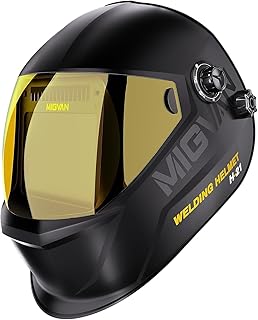
MIGVAN Welding Helmet Auto Darkening True Color Large Viewing
Check PriceWelding fumes do more than harm your lungs; they block your view. A cloud of smoke hovering over the puddle obscures the weld pool and makes you guess where the arc is digging. Portable fume extractors or even a strategically placed fan can pull the plume away from your face and clear the air directly above the arc.
Position the extraction nozzle behind and slightly above the weld zone, so it draws fumes away without disturbing the shielding gas. Even a small moveable extractor keeps the air clear and your vision sharp for flux-core and stick welding where smoke is heavy. In outdoor settings, let the breeze work for you, but make sure it does not blow the shielding gas away.
Check Your Eyes and Prescription
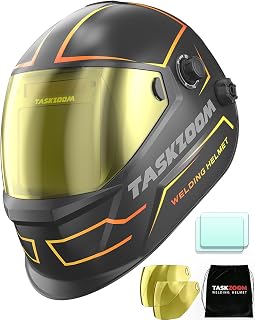
TASKZOOM Auto Darkening Welding Helmet True Color Large View
Check PriceSometimes the problem is not your gear, it is your eyes. Uncorrected astigmatism or simple nearsightedness can make a clear weld pool look fuzzy. A welding-specific eye exam can pinpoint issues that general glasses may not address. If you wear prescription glasses inside the helmet, ensure they sit securely and do not fog up from your breath. Anti-fog wipes and a well-ventilated hood make a big difference.
Your helmet must also comply with recognized safety standards to ensure proper UV/IR filtration while maintaining optical quality. The OSHA welding safety guidelines outline what constitutes adequate eye protection and workplace practices. Staying compliant not only protects your vision but guarantees that your equipment is up to the task.
Frequently Asked Questions
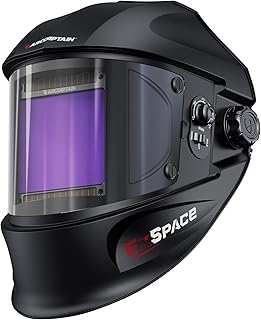
ARCCAPTAIN Welding Helmet, 3.94″×3.66″ Auto Darkening Welding Hood
Check PriceWhat shade lens should I use for MIG welding?
For most MIG welding in the 130 to 250 amp range, shade 11 or 12 provides a good balance between visibility and eye protection. If you are running lower amperage on thin sheet metal, try shade 10 and see if the puddle is clear without excessive glare. Adjust upward if you feel eye strain after a full day of welding.
Can a cheater lens really improve my visibility?
Yes, a cheater lens acts like reading glasses inside your helmet. It magnifies the immediate work area, making small weld puddles and fine details much easier to see. Many experienced welders use a 1.50 or 2.00 diopter cheater to reduce eye fatigue and improve bead control on close-up TIG and stick work.
Why does my auto-darkening lens seem cloudy?
Cloudiness usually comes from three sources: a dirty or scratched cover lens, low batteries, or a damaged auto-darkening cartridge. Clean the outer cover lens first, replace the inner lens if needed, and check the battery status. If the cloudiness persists with new batteries and clean lenses, the liquid crystal shutter may be degrading and the cartridge might need replacement.
How often should I replace my helmet’s cover lens?
Replace the outer cover lens as soon as you notice scratches in your line of sight or heavy spatter that will not clean off. For daily welders, that could be every week or even every few days. Inner cover lenses last longer but should be swapped out if they develop a haze. Keeping a stack of spares is cheap insurance for clear vision.
Conclusion
Improving visibility while welding comes down to a combination of the right equipment, careful setup, and consistent maintenance. A high-clarity auto-darkening helmet with the correct shade, a clean lens system, proper task lighting, and a few tweaks to your headgear all stack up to give you a remarkably clear view of the weld puddle. Do not settle for squinting and hoping the bead is straight. Start with a fresh cover lens, dial in your shade, and add a cheater if your eyes need the help. Your welds will show the difference immediately, and your eyes will thank you after a long shift under the hood.