Many welders ask how to clean welding helmet lens without causing damage. A dirty or scratched lens forces your eyes to work harder and can hide defects in the weld puddle. This guide covers safe cleaning methods for passive and auto-darkening helmets. You will learn which supplies to use, what to avoid, and how to make your lenses last longer.
Table of Contents
Why Cleaning Your Welding Helmet Lens Matters
A clean lens is not just about looks, it directly affects your safety and weld quality. Welding arcs produce intense ultraviolet and infrared radiation. If your view is hazy, you might miss a weld defect or lose your weld puddle. Regular cleaning also helps the auto-darkening sensors respond faster.
According to OSHA eye and face protection standards, welders must use proper filter lenses and keep them in good condition. Dust, smoke, and spatter reduce optical clarity over time. A film of grime on the outer cover lens can make a good helmet seem broken. Simple maintenance prevents unnecessary frustration and extends lens life.
Tools and Supplies You Need
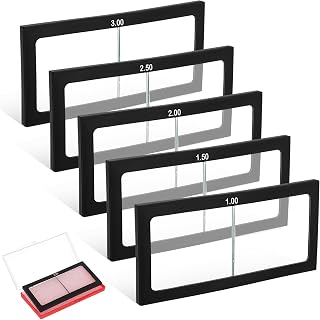
Welding Cheater Lens, 1.0/1.5/2.0/2.5/3.0 Diopter,2″ X 4.25″, Glass, 5 Pcs
Check PriceUsing the right cleaning supplies prevents micro scratches and coating damage. Gather these items before you start. Avoid aggressive solvents that can cloud polycarbonate lenses.
- Microfiber cloth or soft lint-free cloth
- Mild dish soap or dedicated lens cleaning solution
- Distilled water in a spray bottle
- Isopropyl alcohol, 70 percent or less
- Canned air or a manual air blower
- Cotton swabs for hard to reach edges
- Replacement outer cover lens if yours is deeply pitted
How to Clean a Welding Helmet Lens Step by Step
Follow these steps for both passive and auto-darkening helmet lenses. The process is gentle and removes everyday grime without causing damage.
Step 1: Remove the Helmet and Inspect the Lens
Take the helmet off and place it on a clean, flat surface. Look for cracks, deep pits, or burn marks on the outer cover lens. If the outer lens is heavily damaged, replace it before cleaning because cleaner cannot fix deep scratches.
Step 2: Blow Away Loose Particles
Use canned air or a manual air blower to remove dry dust and metal flakes. Never wipe a dry lens with a cloth first. Fine grit can scratch the surface and damage anti-fog coatings.
Step 3: Wash the Outer Cover Lens
Mix a few drops of mild dish soap with warm distilled water. Dampen a microfiber cloth and gently wipe the outer cover lens in a circular motion. Rinse the cloth often to avoid dragging particles across the surface.
Step 4: Rinse and Dry
Rinse the lens with clean distilled water to remove soap residue. Pat it dry with a dry microfiber cloth. Do not use paper towels because wood fibers can leave fine scratches.
Step 5: Clean the Auto-Darkening Lens and Sensors
For an auto-darkening helmet, gently wipe the inner auto-darkening cartridge with a microfiber cloth slightly dampened with lens cleaning solution. Avoid pushing liquid into the seams. Use a dry cotton swab to remove dust from the sensors near the front of the cartridge. If your auto-darkening lens has permanent haze after cleaning, read this auto-darkening lens buying guide to compare new options.
Step 6: Reassemble and Store Properly
Make sure all parts are completely dry before reassembling the helmet. Store the helmet in a clean bag or cabinet away from dust and humidity. A dedicated welding helmet bag helps keep the lens clean between jobs.
Passive vs Auto-Darkening Lens Cleaning Considerations
Passive glass lenses are simpler because they have no electronics. You can use the same gentle cleaning method with mild soap and water. Auto-darkening lenses require extra care around sensors, battery compartments, and control buttons. Keep moisture away from these areas to avoid short circuits and shade delays.
Auto-darkening helmets have an outer cover lens that takes most spatter. Replacing this cover lens frequently protects the more expensive cartridge. Passive lenses usually need a separate shade lens and clear cover plate. Clean both sides of each layer for the clearest view.
Common Mistakes to Avoid
Many welders accidentally shorten the life of their helmet lens with poor cleaning habits. Avoid these common errors to keep your view crystal clear.
- Wiping a dry lens with a shop rag
- Using acetone, paint thinner, or ammonia-based glass cleaner
- Submerging the auto-darkening cartridge in water
- Scraping weld spatter with a metal blade
- Spraying liquid directly onto the cartridge
- Using paper towels or rough shop rags
How Often Should You Clean Your Welding Helmet Lens?
Inspect the lens before every welding session and clean it as soon as spatter or haze appears. For daily welders, a quick wipe after each shift prevents grime from hardening. If you weld in dusty or high-spatter environments, clean the outer cover lens more often. A clean cover lens is cheaper to maintain than a damaged auto-darkening cartridge.
Tips for Extending Welding Helmet Lens Life
Protect your lens from unnecessary wear with simple habits. Small changes in how you handle and store the helmet make a big difference over time.
- Replace the outer cover lens as soon as pitting appears
- Keep the helmet in a clean bag or closed cabinet
- Avoid touching the inner lens with bare fingers
- Apply anti-spatter spray carefully to the outer cover lens only
- Check the lens gasket fit to prevent dust intrusion
When to Replace Instead of Clean
Sometimes cleaning is not enough. Deep scratches, cracks, or burn holes in the outer cover lens reduce clarity and can block the sensors. Auto-darkening lenses with flickering, slow shade changes, or dead spots need professional service or replacement. For a more detailed process on handling heavily soiled helmets, check this helmet lens care walkthrough.
Frequently Asked Questions About Cleaning Welding Helmet Lenses
Can I use Windex on a welding helmet lens?
Yes, but only if it is ammonia-free and formulated for coated optics. Many household glass cleaners contain ammonia, which can cloud polycarbonate lenses over time. A mild soap and water solution or dedicated lens cleaner is safer.
How do I remove weld spatter from a welding helmet lens?
Let the spatter cool, then gently scrape with a plastic lens scraper or your fingernail. Never use a metal scraper or wire brush. If the spatter leaves a pit or crack, replace the outer cover lens.
Can I clean the inside of an auto-darkening cartridge?
You can gently wipe the outside surfaces of the cartridge with a dry or slightly damp microfiber cloth. Do not open the cartridge or soak it in liquid. Moisture inside the electronics can ruin the auto-darkening function.
Does toothpaste remove scratches from a welding helmet lens?
Toothpaste may reduce very fine haze on polycarbonate, but it is not recommended for welding helmet lenses. It can leave micro abrasions and remove protective coatings. Replacing the cover lens is more reliable.
How do I keep my welding helmet lens from fogging?
Use an anti-fog solution made for welding or safety lenses. Keep the helmet dry and store it in a breathable bag. Some welders use a small helmet fan to improve airflow and reduce fog.
Can I use alcohol to clean an auto-darkening lens?
Yes, but use isopropyl alcohol at 70 percent or less and apply it to the cloth, not the lens. Alcohol evaporates quickly and can help remove oily residue. Avoid soaking the edges where it can seep into the electronics.
Conclusion
Now you know how to clean welding helmet lens surfaces without causing damage. Start with a gentle cleaning routine before every session, and replace outer cover lenses when pits or cracks appear. Your eyes and weld quality depend on clear vision. Simple maintenance keeps your helmet responsive and extends its service life.