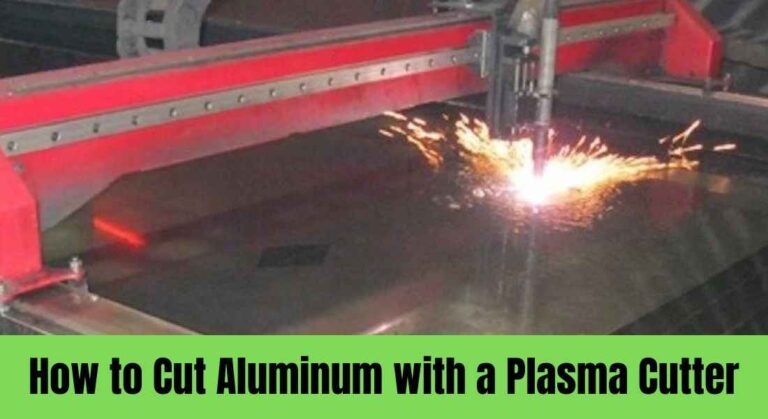
Cutting metal isn’t easy, and it gets even more challenging when you need to cut through something as tough as aluminum. Thankfully, there are ways to make this much easier without sacrificing quality or strength. Instead of using standard tools like shears or a saw with blades that have a tendency to snap on thin metal sheets, you must use best-budget plasma cutters to even get through thick materials with ease. Here, we discuss in detail how to cut aluminum with a plasma cutter. What factors must be considered while plasma cutting?
Plasma cutters are one of the most versatile tools that a mechanic or manufacturer can have in their toolkit. Capable of cutting through almost any metal with ease, plasma cutters can be used for a wide variety of tasks. However, even though they are so versatile, there are still some materials that will give your plasma cutter trouble.
Plastic and aluminum are two common materials that may cause you problems when cutting with a plasma cutter. While plastic is fairly easy to cut with a hand-held device, aluminum needs special techniques to get the job done safely and efficiently. Below you will find everything you need to know about reducing the risk when working with this tricky material.
[affiamsh_amazon keyword=”Plasma Cutter”]
Table of Contents
What is Plasma Cutting?
Plasma cutting is a process that uses a high-voltage arc to ionize a stream of gas, which then melts and vaporizes the metal being cut. Plasma cutting is a very versatile process that can be used to cut metals of all shapes and sizes. It is commonly used in welding and fabricating applications.
Plasma cutters ionize the atoms in compressed air by heating them to a very high temperature using DC voltage, which results in the formation of a plasma arc. This moves through the cutting tip’s small hole, which is typically 0.9 mm to 1.5 mm wide, at a temperature of between 25,000 and 30,000 degrees Fahrenheit.
The tiny plasma jet pushes through, melting the metal, and ejecting the molten metal. When compared to outcomes from oxy-fuel cutting, it is extremely targeted.
[affiamsh_amazon keyword=”LOTOS Plasma Cutter”]
What You Need to Know About Cutting Aluminum with a Plasma Cutter
If you’ve ever tried to cut aluminum with a plasma cutter, you know it can be a frustrating experience. The aluminum seems to melt before the cutter can even make a dent. But with the right settings, you can actually cut through aluminum with a plasma cutter – you just need to know how to adjust the settings.
We’ll give you a quick overview of how to cut aluminum with a plasma cutter. We’ll cover the different settings you need to adjust, as well as some tips and tricks to help you get the best results. With this information, you should be able to cut through aluminum like a pro.
There are a few things you need to know before you start cutting aluminum. First, you need to make sure that you are using the correct settings on your plasma cutter. Second, you need to be aware of the fact that aluminum can reflect the cutting torch, so you need to take precautions to avoid injury. Finally, you need to be aware of the fact that aluminum can create a lot of heat when it is being cut, so you need to be careful not to overheat the metal.
Can You Cut Aluminum with a Plasma Cutter
You absolutely can cut aluminum with a plasma cutter. In fact, plasma is often faster and more flexible than mechanical cutting methods for many thicknesses of aluminum plate and sheet.
However, aluminum has properties that make it more challenging than mild steel
- It conducts heat quickly, pulling heat away from the cut area, which can widen the kerf and change cut quality
- It forms a tough oxide layer with a higher melting point than the base metal
- It reflects heat more than steel, which can affect arc stability and consumable life
Because of this, successful cutting of aluminum with plasma depends on correct preparation, gas choice, machine settings, and cutting technique.
[affiamsh_amazon keyword=”S7 Plasma Cutter”]
How to Cut Aluminum with a Plasma Cutter Step by Step
Follow this process when cutting aluminum with plasma.
1 Set up the machine
- Connect the ground clamp to clean bare metal on the workpiece
- Confirm airflow or gas flow is correct and free of moisture
- Set the amperage and air pressure for your material thickness
- Check that consumables are new or in good condition
2 Position the torch
- Hold the torch vertically 90 degrees to the surface for a straight cut
- Place the nozzle just off the start of your line
- Maintain the recommended distance if your torch uses a standoff
3 Start the pierce
- Activate the trigger to establish the pilot arc
- Once the main arc transfers to the metal hold steady until the arc fully pierces through
- For a thicker plate, consider starting the pierce at the edge rather than in the middle when possible
4 Move along the cut
- Begin moving forward smoothly along the marked line
- Watch the sparks; they should exit mainly from the bottom of the cut, slightly trailing behind your direction of travel
- If sparks spray back toward yo,u your speed is too slow or amps too low
5 Finish and release
- As you approach the end, slow slightly to complete penetration
- Release the trigger at the end of the path
- Allow consumables to cool briefly between cuts to extend their life
Techniques for Better Cut Quality on Aluminum
Here are practical tips to improve results when you are cutting aluminum with plasma.
- Use a guide fence or straightedge clamp for long straight cuts
- Practice on scrap to dial in amperage and speed before cutting valuable parts
- Maintain consistent torch height; uneven standoff leads to a wavy edge
- Avoid pausing in one spot,t which can widen the kerf and increase dross
- For small holes, start at a low amperage and move quickly to reduce distortion
If you see heavy dross under the cut, try increasing travel speed slightly or raising amperage. If the kerf is too wide or the top edge is badly rounded, reduce amperage or speed up.
[affiamsh_amazon keyword=”YESWELDER Plasma Cutter”]
Plasma Cutter Safety
When using a plasma cutter, there are a few safety precautions you should take to ensure you don’t injure yourself or damage the equipment. First, always wear an excellent welding helmet or safety glasses to protect your eyes from the bright light given off by the plasma cutter. Second, be sure to wear welding gloves to protect your hands from the heat. Third, make sure the area you’re working in is well-ventilated, as the plasma cutter emits fumes that can be harmful if inhaled. And finally, always read the instructions carefully before using the plasma cutter, to ensure you understand how to properly operate the equipment.
Equipment Recommendations
There are a few key things you’ll need in order to do plasma cutting, including a plasma cutter, a power source, and a metal table. You’ll also need some sort of personal protective equipment. Most welders use the best welding mask and welding jeans for their protection.
As for the plasma cutter, we recommend getting a cutter that is at least 40 amps. Anything less than that will likely be too weak to cut through thicker materials. For the power source, you can use either an AC or DC power source. AC is usually cheaper, but DC has a steadier power output, which can be helpful when cutting through tougher materials.
As for the metal table, you can either buy one or build one yourself. If you’re going to be doing a lot of plasma cutting, we recommend buying a table for plasma cutting. But if you’re just starting out or rarely do such work. It’s not mandatory for you.
Choosing an Aluminum Cutting Process
There are a variety of aluminum cutting processes available, and each has its own advantages and disadvantages. The best way to choose an aluminum cutting process is to first understand the different options and then decide which one is best suited for your specific project. Here is a quick overview of the most common aluminum-cutting processes:
Waterjet cutting: Waterjet cutting is a popular choice for aluminum cutting because it is very precise and can be used to cut very intricate shapes. The downside of waterjet cutting is that it is slower than other methods and can be costly.
Laser cutting: Laser cutting is a fast and precise aluminum cutting method that can be used for a variety of projects. However, laser cutting can be expensive and is not always the best choice for thicker aluminum pieces.
Using a Hookless Cord and Hanger
Most plasma-cutting machines come with a hook on the end of the power cord so that you can hang the machine from a hook on the wall or elsewhere. However, some people find that using a hookless cord and hanger is a better option.
There are a few advantages to using a hookless cord and hanger. First, it can be easier to set up and take down. Second, it can be more comfortable to use, since you don’t have to worry about the hook digging into your back or shoulders. Finally, it can be more versatile, since you can use it in a variety of different positions.
If you’re considering using a hookless cord and hanger for your plasma-cutting machine, there are a few things you should keep in mind. First, make sure that the hanger is rated for the machine’s amp.
Using an Oxygen Process
Plasma cutting is a process that uses a stream of hot plasma to cut through materials. This process is typically used to cut through metals, but it can also be used to cut through other materials like wood and acrylic. Here is the complete guide on the hotness of the plasma cutter.
One of the benefits of using an oxygen plasma process in plasma cutting is that it can help to improve the quality of the cut. Oxygen plasma cutting produces a cleaner, more precise cut than other methods of plasma cutting. Additionally, the use of oxygen in the plasma-cutting process can help to extend the life of the cutting equipment.
Grind the Edges
Plasma cutting is a great way to quickly and easily cut metal. But if you want a clean, professional-looking edge, you’ll need to take a few extra steps. Here’s a quick guide on how to grind the edges of your plasma-cut metal for a smooth, finished look.
First, start by setting up your work area. You’ll need a grinder, a dust mask, safety glasses, and a few other tools. Next, prep your metal by cleaning it and removing any burrs or sharp edges. Once your metal is ready, start grinding the edges in a slow, steady motion. Be careful not to overheat the metal, and make sure to wear your safety gear while you work. With a little time and effort, you can create beautiful, smooth edges on your plasma-cut metal. So get started
Plasma Cutting Complete Setup
Now you know all about plasma cutting, it’s time to learn how to set up and operate your machine safely. You’ll need to choose a location and set up your machine according to your needs. Set up your metal table in a well-ventilated space (like a garage or storage space), and make sure it won’t get cluttered with lint or debris. After that, you’re ready to get to work.
To set up your plasma cutter, simply attach the resistors and power cord to the machine, then screw in the cylinder headpiece. Next, attach the protective nozzle cover plate to the cylinder head, and make sure to tighten it securely. Now you’re ready to start plasma cutting.
To begin plasma cutting, make sure that the air intake is fully open, and then plug your plasma cutter into the power source. If your plasma cutter only comes with an AC power source, plug in your machine to an outlet that is controlled by a single switch (so it doesn’t get turned off accidentally). If your plasma cutter comes with a DC power source, you can use a simple battery charger to power your machine.
Once you’ve set up your plasma cutter, it’s time to fire up the machine. Press the button on the side of the machine to turn it on, wait for it to warm up, and then reach in and turn off the air intake.
Frequently Asked Questions About Cutting Aluminum with Plasma
Can you cut aluminum with a plasma cutter at home?
Yes, many home workshops use entry-level plasma cutters to cut thin to medium-thickness aluminum. Make sure your electrical service and air compressor can support the machine, and always follow safety guidance.
What thickness of aluminum can plasma cut?
It depends on the power of your plasma cutter. Small 30 to 40 amp units typically handle up to about 6 mm or 1 4 inch in aluminum at good quality. Larger 60 to 80 amp units can cut thicker sections, though edge quality and speed will vary.
Do I need special gas for aluminum?
You can cut aluminum with compressed air on most air plasma systems. For higher-end industrial applications, nitrogen or argon-hydrogen mixes can give smoother edges and narrower kerfs but require more advanced equipment.
Is cutting aluminum with plasma accurate enough for welding?
Yes, for most fabrication work, plasma-cut aluminum edges are suitable for welding after light grinding or deburring. For precise fit ups use good fixturing and cut slightly oversize, then finish tothe final dimension.
Final Thoughts
So, can you cut aluminum with a plasma cutter? Yes, and when you understand how aluminum behaves and how to set up your machine, cutting aluminum with plasma becomes a fast, reliable method for many jobs. Choose a machine sized for your thickness, clean the metal well, use sharp consumables, and take time to tune travel speed and amperage.
With consistent practice, you will get clean cuts ready for welding, bending, or assembly, and you will be able to handle a wide range of aluminum projects confidently using your plasma cutter.

James is a welding expert, accomplished author, and trusted guide with over 8 years of experience in the industry. With his in-depth knowledge and engaging writing style, James has become a true authority in the field, offering readers and clients invaluable expertise and insights to take their welding skills to new heights.