Staring at the intense arc of a MIG welder without the right protection is like looking directly at the sun. You know you need a welding helmet, but choosing the specific lens shade can feel overwhelming. If you grab a lens that is too light, you risk serious eye strain and long-term damage from arc flash. If the shade is too dark, you will be welding blind, struggling to see the puddle and follow the joint.
Finding the sweet spot is about balancing safety with visibility. The question what shade lens for mig welding is one of the most critical safety decisions you will make before pulling the trigger. The answer is not a single number, it depends heavily on the heat you are running and the specific process parameters. This guide will walk you through exactly how to read the arc and pick the perfect protection every time.
Table of Contents
Understanding Welding Lens Shade Numbers
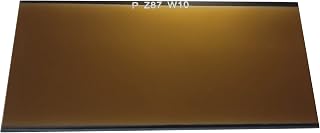
Best Welds Hardened Glass Gold Replacement Welding Lens – Advanced Passive Filter Plate 2" x 4-1/4" – Shade 9, 10, 11 & 12
Check PriceBefore diving into the specifics of MIG, it helps to understand what those numbers on a lens actually mean. Welding shade numbers indicate how dark the filter is, determining how much light radiation passes through to your eyes. The scale is standardized, so a shade 10 lens blocks the same percentage of light regardless of the brand.
The higher the number, the darker the lens and the more protection it offers. However, the jump between shades is not a simple linear scale. A shade 10 filter allows roughly 0.037% of light through, while a shade 12 cuts that down to about 0.0019%. This exponential reduction is crucial because MIG arcs can vary wildly in brightness depending on the wire feed speed and voltage.
For general manual welding, OSHA and ANSI Z87.1 standards define the minimum protective shades required. Starting at the bare minimum of shade 7 for light gas welding, the range extends up to shade 14 for heavy carbon arc gouging. MIG welding typically sits in the middle of this range, but jumping straight to the darkest lens often hurts your technique by making the work area invisible.
What Shade Lens for MIG Welding Based on Amperage

Forney 57061 Shade-10 Gold Welding Filter Lens | Premium gold-coated replacement welding lens measuring 2-inch-by-4-1/4-inch. Provides clear eye protection.
Check PriceWhen welders ask what shade lens for mig welding, the real question should be, What amperage am I running? The electrical current is the primary driver of arc brightness. To keep your eyes safe and your weld bead straight, you must match the shade to the heat. The industry standard recommendation chart gives clear starting points based on how many amps you are using.
Low Amperage MIG Welding (Under 100 Amps)
When tinkering with thin sheet metal, exhaust pipes, or body panels on a 110-volt machine, you are usually operating under 100 amps. These arcs are significantly less intense than heavy industrial fabrication. For this low-end heat range, a minimum shade 10 lens is widely accepted. While shade 10 provides solid protection against UV/IR radiation at these lower outputs, many welders find that a shade 11 offers a more comfortable experience during long sessions without killing the visibility of the puddle.
Medium Amperage MIG Welding (100 to 175 Amps)
This is the sweet spot for most home enthusiasts and light fabrication shops running .030 or .035 wire. Whether you are patching a utility trailer or building a gate, you are likely in the 100 to 175 amp range. Here, the arc becomes noticeably hotter and more brilliant. A shade 11 is generally the required minimum, though the vast majority of experienced welders automatically reach for a shade 12 to avoid fatigue and the feeling of sand in the eyes after a day of work.
Heavy Duty MIG Welding (175 to 300+ Amps)
Industrial spray transfer and heavy structural welding using thick wire demand high voltage and amperage that often exceeds 200 amps. The plasma arc at this level is devastating to unprotected eyes, emitting extreme visible light and radiation. For these hot passes, you should never use less than a shade 12. Stepping up to a shade 13 or 14 is common. You must ensure you can still see the wire tip, if the puddle is just a tiny dot of light, you are likely using a shade that is too dark, even for high amperage work.
Fixed Shade vs. Auto-Darkening Lenses for MIG

Tefuawe 2×4 1/4 Gold Automatic Welding Lens, 2 Amp TIG Rating, Variable Shade with Multiple Settings, For Stick Mig Tig
Check PriceThe debate between passive and auto-darkening helmets is central to selecting the best protective equipment for MIG. A passive lens, typically a green or gold-coated glass filter rated at shade 10, 11, or 12, stays permanently dark. This is a robust, affordable option that never fails to protect due to dead batteries. However, for MIG welding, where precise starts are critical to avoid cold lap, an auto-darkening lens offers a massive advantage by shifting from a light state, often shade 3 or 4, to the preset dark state the instant the arc strikes.
With an auto-darkening filter, your hands and the torch stay perfectly positioned before you squeeze the trigger, eliminating guesswork and the dreaded head snap used to flip a hood down. This precision reduces wire waste and grinding time. If you choose an auto-darkening helmet for MIG, check that the sensors can detect the arc even if the sensors are partially blocked by the nozzle, a common issue in out-of-position welding.
The Shade Range Advantage
One of the biggest mistakes beginners make is buying an auto-darkening helmet with a very limited shade range. If a helmet offers only a fixed shade 10 dark state, you lose the versatility needed as your skills grow. A variable shade range, like 9-13, lets you dial in the lens sensitivity exactly. If you switch from short-circuit MIG on body panels to high-power flux-core work, you can simply rotate the knob rather than buying a second helmet or swapping out lenses.
The Critical Role of Amp Sensitivity and Sensors
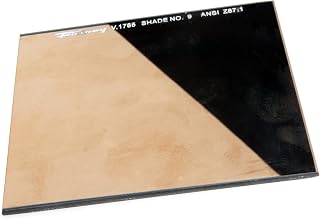
Forney 57070 Lens Replacement Gold Welding Filter, 4-1/2-Inch-by-5-1/4-Inch, Shade-9
Check PriceMIG welding, particularly low-amp short-circuit MIG, can sometimes confuse older auto-darkening technology. When the wire physically touches the metal and short circuits dozens of times per second, the arc momentarily dims before the pinch effect explodes the wire tip again. Poor quality lenses might flicker, briefly turning clear during these short-circuit cycles. This rapid fluctuation between dark and light is a recipe for severe eye fatigue.
When testing a helmet for MIG welding, look for one with strong high-speed sensors and an adjustable delay control. You need the lens to stay dark during those microsecond interruptions that occur during short-circuiting transfer. A rating of 1/25,000 of a second switching speed is excellent. Furthermore, always select a helmet with a grind mode feature, it allows you to safely use the same lid for pre-cleaning metal or knocking down the sharp edges of your finished weld bead without removing the helmet and risking a flash from a nearby worker.
Practical Tips for Testing Your Shade Selection

Forney 57005 Lens Replacement Hardened Glass, 4-1/4-Inch-by-2-Inch, Shade-5 , Green
Check PriceCharts are a starting point, but the final test is what your eyes tell you and how your weld looks. You should not feel flash blindness or see spots for minutes after welding. If you sense a scratchy feeling in your eyes at night, your lens is too light. The visible blue-white arc core should be the only bright spot, while the surrounding puddle of molten metal should glow with a clear, deep amber or orange color.
If you cannot clearly distinguish the solid metal from the liquid metal trailing the arc, your lens is probably too dark. Many welders try to overprotect by cranking to shade 13 for low heat, but this forces them to lean in too close to the fume plume just to see. You want the darkest shade that still allows full puddle clarity. To help you settle in at the bench, here are a few signs you have dialed in the perfect number:
- You can clearly distinguish the solidified weld metal from the liquid puddle.
- You do not feel the need to squint or move your face dangerously close to the arc.
- You are shielded from spatter glare but can still see the wire stick-out.
- The color of the arc appears crisp blue-white, not washed out or impossibly dim.
Shade Comparisons Across Welding Processes

ArcOne T240-10 Tradesman Horizontal Auto-Darkening Filter for Welding Helmets, 2 x 4.25 x 0.2
Check PriceIf you operate a multi-process machine, understanding the contrast between processes helps prevent memory lapses. A shade that works for stick welding might not work for MIG. Stick welding on a 1/8-inch 7018 rod at 125 amps often requires one shade darker than MIG welding at the same exact amperage. This is because stick arcs generate a different spectral output and heavier slag reactions. Similarly, TIG welding on aluminum uses a different balance and visible light spectrum, often forcing welders up to a shade 13 to see the puddle clearly without the arc blooming.
A common mistake is using a shade 10 lens for flux-core welding simply because the voltage is low. Self-shielded flux-core has a violent, sputtering arc that is extremely bright. Always treat flux-core like stick welding recommendations. Choosing the correct lens for MIG should always be done against a process-specific mental checklist, not a habit from a different electrode type.
Frequently Asked Questions

Shade 5-13 Adjustable Red Auto Darkening Welding Lens | Duke 1.0 | Best For Stick, MIG, FCAW | Red Front – Light Green Weld Puddle | 2" x 4 1/4" x 0.3" | Not Recommended For TIG
Check PriceIs shade 10 dark enough for MIG welding?
Shade 10 is acceptable if you are primarily welding thin metal at very low amperages, typically under 80 amps. Repairing rusty exhaust pipes or sticking razor-thin patch panels might fall here. However, for any general fabrication with a 140-amp compact machine, shade 10 quickly becomes tiring. Your eyesight is worth the comfort, so moving up to shade 11 is highly advisable if you weld for more than 20 minutes at a time.
Can you use shade 13 for MIG welding?
Yes, you can use a shade 13 for MIG, but only in specific high-heat scenarios. If you are running dual-shield flux-core or spray transfer at 250 amps or more, the arc is so bright that a shade 13 prevents irritation. Do not use a shade 13 for standard hobby-grade welding at 120 amps. It will make the weld zone so dark you risk dragging the gun out of position or creating excessive convexity because you cannot see the edges of the toes washing out.
What shade lens is recommended for beginners learning MIG?
A variable shade auto-darkening helmet with a range of 9-13 is the single best investment for a beginner. Start on shade 10 or 11 for thin coupon tests. As you increase the wire speed, step up the shade. The key for beginners is often not just darkness but optical clarity. A lens rated at a 1/1/1/1 optical class ensures you see the puddle without distortion, stopping you from fighting blurry sight lines that cause bad muscle memory.
Why do my eyes hurt even with a shade 11 lens?
Eye strain while wearing a shade 11 usually comes from three sources. First, the helmet may not have side coverage, allowing ambient light from windows or another welder to flood the back of the lens, washing out the contrast. Second, a cheap auto-darkening mask might not filter infrared (IR) or ultraviolet (UV) adequately, allowing invisible heat radiation to dry your eyes. Third, the delay setting might be too fast, flickering clear during short-circuit events and overworking your pupil.
Conclusion
Figuring out what shade lens for mig welding ultimately comes down to respecting the amperage chart while listening to your unique eyes. Start with a shade 10 for low-power work, a shade 11 for general repairs, and a shade 12 or higher for industrial structural welding. Do not let your ego keep you on a dangerously light shade just because you feel tough, arc flash injuries compound over time.
The golden standard for hobbyists and professionals alike is a quality auto-darkening welding helmet with a variable shade control. This allows you to tune the glass exactly to the conditions. If you are still squinting or feeling fatigue, visit an eye doctor who understands the visual demands of welding to check for corrective lenses. Your welding helmet for mig work is not just a face shield, it is a precision optical device. Treat it as such, and your welds will lay down cleaner and straighter every time.
According to the American Welding Society, proper eye protection is non-negotiable to prevent immediate temporary blindness and long-term retinal damage. Staying proactive by changing out scratched cover lenses and replacing aging solar panels keeps your vision crisp. When in doubt, swap to a darker shade on the dial for a few inches of weld, then dial it back if you lose the puddle. Better to fix a minor bead ripple than a lifetime of eye trouble.