Firing up a plasma cutter for the first time feels a little like holding a lightsaber. The bright arc, the hiss of compressed air, and the ability to slice through steel like butter makes it one of the most satisfying tools in a metal shop. Using a plasma cutter for the first time can seem intimidating, but with a little knowledge and the right precautions, you can make clean, precise cuts right away. This guide walks you through everything you need to know, from basic theory to your first successful cut.

ARCCAPTAIN 50A Plasma Cutter with Large LED Display
Check PriceTable of Contents
What Is a Plasma Cutter and How Does It Work?
A plasma cutter uses a high-velocity jet of ionized gas, called plasma, to melt and blow away metal. Inside the torch, an electric arc passes through a constricted opening, superheating the gas and turning it into a plasma stream that can reach temperatures over 20,000°F. Compressed air or another gas pushes the plasma out of the nozzle at high speed, cutting through electrically conductive materials like steel, stainless steel, and aluminum. Understanding this basic process helps you troubleshoot later and makes your first attempts much easier.
Most entry-level machines use ordinary compressed air and a 110V or 220V power supply. You do not need a separate gas bottle for basic work, which simplifies the setup. If you want a deeper look at the science, Miller Electric’s plasma cutting basics explain how the arc and gas interact to produce a clean cut. Right now, focus on the fact that plasma only cuts metal that conducts electricity, so wood and plastic are off the table.
Essential Safety Gear for First-Time Users
Bestarc 50A Pilot Arc Plasma Cutter
Check PriceBefore you ever pull the trigger, understand the risks. I’ve seen too many beginners skip safety and end up with painful sunburns or eye strain. Following proven plasma cutter safety precautions keeps you focused on learning, not nursing an injury. Invest in good gear from the start, and use it every single time you cut.
- Auto-darkening welding helmet: A shade 5 lens works for lower amperage cutting, but shade 8 offers better protection above 40 amps. Your helmet should react quickly to the arc’s start.
- Safety glasses: Wear them under the helmet. Sparks and grinding dust can bounce under the visor, and you will lift the helmet often.
- Flame-resistant clothing: A leather welding jacket or a treated cotton jacket stops sparks from burning through. Avoid synthetic fabrics that can melt onto your skin.
- Heavy leather gloves: Choose gloves long enough to cover your wrists. Plasma cutting throws hot metal at high speed, and a stray spark can cause a serious burn.
- Hearing protection and ventilation: Plasma cutters are loud, and the process produces fumes and fine metal dust. Earplugs and at least a fan to pull fumes away from your breathing zone are non-negotiable.
Setting Up Your Plasma Cutter for the First Time
YESWELDER CUT-55DS
Check PriceA sloppy setup leads to poor cuts, damaged consumables, and a lot of frustration. Take your time here, and double-check each connection. I always recommend new users read through our detailed guide on setting up your plasma cutter correctly before plugging anything in. The steps below cover the absolute basics.
Checking Your Power Source
Determine whether your machine needs 110V or 220V. Many dual-voltage units require you to flip a switch or change a plug adapter. Plugging a 110V machine into a 220V outlet without adjusting the setting will damage the internal electronics. Look at the nameplate on the back, and never use an undersized extension cord. A thick, short cord prevents voltage drop and keeps the arc stable.
Connecting the Air Supply
Dry, clean compressed air is critical. Any moisture or oil in the line will ruin your cut quality, destroy consumables, and leave a rusty mess inside the torch. Attach a moisture filter and a regulator directly at the machine. Set the air pressure to the manufacturer’s specification, typically between 60 and 70 PSI for small portable cutters. Let the air run for a few seconds to blow out any condensation before you start cutting.
Assembling the Torch and Consumables
Your torch has a set of consumable parts: an electrode, a swirl ring, a nozzle, and often a shield cup. Inspect each piece for wear or debris. The electrode must seat completely flat against the swirl ring, and the nozzle threads on smoothly. For a first cut, use the standard drag shield. It lets you rest the torch right on the workpiece, making speed control much easier.
Setting Amperage and Air Pressure
Match the amperage to the thickness of the metal. A general rule is that 20 amps can cut about 1/8 inch mild steel cleanly, while 40 amps handles 1/2 inch. Start with the recommended setting from the chart printed on many machine lids. Then adjust air pressure until you hear a crisp, steady hiss when the trigger is pulled, not a sputtering or weak flow.
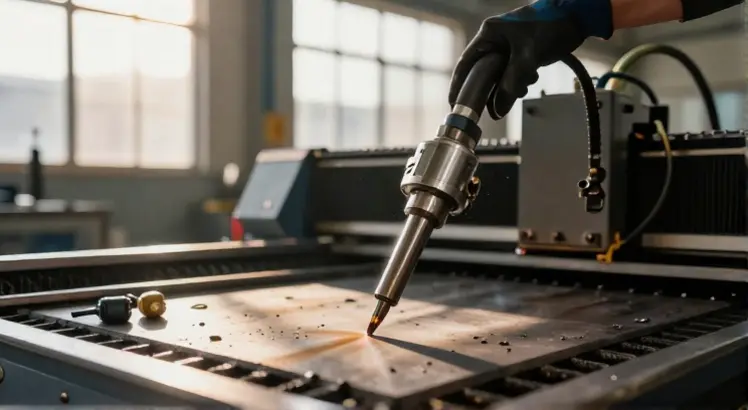
Step-by-Step Guide to Making Your First Cut
Bestarc 80A CNC Plasma Cutter
Check PriceYou are now ready to actually cut metal. The first few tries rarely look perfect, and that is completely normal. Focus on keeping the torch steady and moving at a consistent pace. With practice, the muscle memory builds faster than you expect.
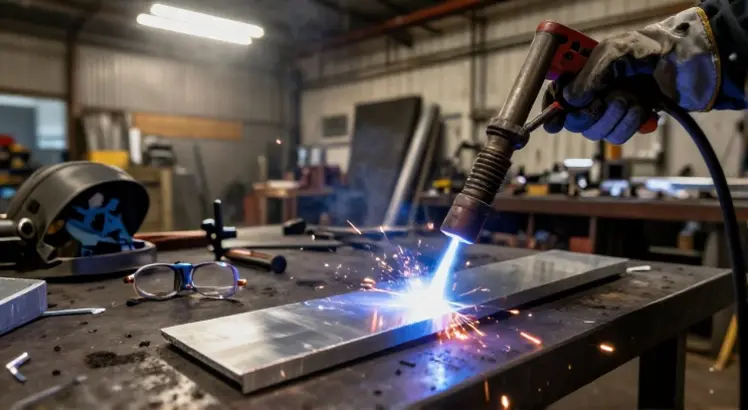
Preparing the Workpiece
Clean a patch of bare metal where the ground clamp will attach. Rust, paint, or mill scale act as insulators. A poor ground connection makes the arc stutter and forces the machine to work harder. Clamp the ground directly to the workpiece, or to a clean spot on a metal welding table. Then lay out your cut line with soapstone or a silver marker, and clamp a straight edge if you need a perfectly straight line.
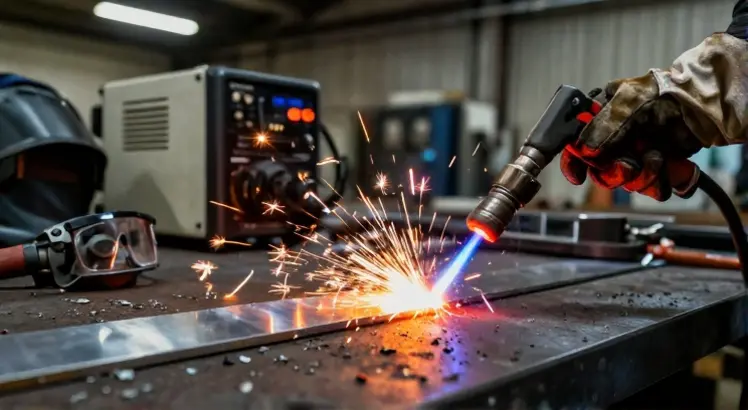
Positioning the Torch and Starting the Arc
Hold the torch at a slight 5 to 10 degree angle, leaning away from the direction you will move. Place the drag shield flat on the metal if you are using a drag tip. Position the tip right at the edge of the plate. Press the trigger firmly. A burst of sparks means the pilot arc has ignited, and the main cutting arc transfers the moment the metal completes the circuit.
Moving the Torch: Speed and Angle Tips
Once the arc is established, begin moving the torch forward at a steady walking speed. Watch the sparks: they should exit from the bottom of the cut in a straight, 15 to 20 degree spray. If sparks blow back toward you or spit upward, you are moving too fast. Reduce speed until the spray angles down consistently. Keep your torch tip perpendicular to the plate, and let the drag shield take the weight.
Piercing vs. Edge Start
For your very first attempts, always start from the edge. Piercing the middle of a sheet requires holding the torch at an angle and slowly tilting it upright as the plasma breaks through. This technique wears consumables faster and splashes molten metal back at the nozzle. Master edge starts first, then practice piercing on thinner scrap plate once you feel comfortable.
Common First-Time Mistakes and How to Avoid Them
Bestarc 50A Pilot Arc Plasma Cutter
Check PriceEvery beginner makes at least two or three of these. Recognizing them early saves you a pile of ruined consumables and jagged cuts.
- Moving too fast. The arc does not fully penetrate, and you get a rough, incomplete cut with a lot of top dross. Slow down until the sparks exit straight down.
- Incorrect standoff distance. Holding the tip too high weakens the arc and widens the kerf. Use the drag shield or a standoff guide to maintain about 1/8 inch gap.
- Dragging the nozzle tip on the metal. If you are not using a drag shield, never let the nozzle touch the plate. It will short out and ruin the nozzle instantly.
- Neglecting the straight edge. Freehand cutting looks cool, but it almost always wanders. Clamp a piece of angle iron or a thick ruler to guide your torch while you learn.
- Forgetting the ground clamp. A loose or dirty ground clamp causes the arc to flicker and cut poorly. Secure it to clean, bare metal every single time.
Plasma Cutting vs. Other Cutting Methods
Understanding where plasma excels helps you choose the right tool for the job. Compared to an oxy-fuel torch, plasma cuts faster on thin to medium thickness steel, and it can cut stainless steel and aluminum that oxy-fuel simply cannot. However, oxy-fuel reaches thicker material economically, and a plasma cutter is limited by its amperage rating. Laser cutting achieves higher precision and a thinner kerf on thin sheets but costs far more than a home plasma unit. For most first-timers in a garage or small shop, a plasma cutter offers the best balance of speed, versatility, and clean cut quality.
Frequently Asked Questions About Using a Plasma Cutter
Bestarc 80A CNC Plasma Cutter
Check PriceWhat shade lens should I use for plasma cutting?
For most hobby cutters under 40 amps, a shade 5 lens is comfortable and safe. As current increases, the arc becomes brighter. Move up to shade 8 if you are cutting above 60 amps. An auto-darkening helmet set to the correct shade lets you see the workpiece clearly before the arc strikes and protects your eyes instantly.
Can I cut aluminum with a plasma cutter?
Absolutely. Plasma cutters slice through aluminum very effectively because aluminum conducts electricity well. You may notice a slightly rougher edge and more dross compared to mild steel. A little sanding cleans it up. Just make sure your air is extra dry, as moisture promotes oxidation that makes the cut line harder to follow.
Why does my plasma cutter sputter and stop?
Sputtering usually points to a problem with air flow or consumables. Check for moisture in the air line, clogged filters, or a damaged swirl ring. Worn electrodes cause erratic arcs too. Replace the electrode and nozzle as a set, and confirm your air pressure is steady under flowing conditions, not just static.
Do I need a special air compressor for plasma cutting?
Not necessarily, but your compressor must deliver enough volume at the required pressure. Many small portable cutters need around 4 to 5 CFM at 70 PSI. A typical home compressor with a 20-gallon tank works for short cuts. If you plan to cut continuously, a larger tank and a high-flow filter are worth the investment.
Conclusion
Using a plasma cutter for the first time opens a door to fast, creative metalwork. Respect the tool, wear your safety gear every time, and do not rush the setup. Start with straight edge cuts on scrap steel, watch the arc and sparks to gauge your speed, and keep your consumables dry and clean. You will make messy cuts at first, everyone does, but within an afternoon you can produce parts that look professional. The key is repetition and paying attention to those small details like air pressure and torch angle. Now grab some metal, fire up that machine, and enjoy the process.