You flip the switch on your trusty Lincoln MIG welder, squeeze the trigger, and nothing happens. Your wire does not feed, the arc sputters, or the machine stays completely silent. A Lincoln MIG welder not working can bring any project to a grinding halt. Before you haul it to the service center, take a deep breath. Most common problems have straightforward fixes you can handle right in your garage or shop.
Lincoln Electric builds reliable machines, but like any tool, a MIG welder can act up from time to time. The root cause is often simpler than you think: a loose connection, a dirty liner, or a setting that drifted out of place. In this guide, we walk you through a systematic troubleshooting process that moves from the easiest checks to deeper, component-level inspection.
You do not need an electrical engineering degree to fix many of these issues. We wrote this for hobbyists, weekend warriors, and entry-level fabricators who want clear, actionable steps. By the time you finish reading, you will know exactly where to start and what to do next when your Lincoln MIG welder is not working.
Table of Contents
Safety First: Power Down Before You Troubleshoot
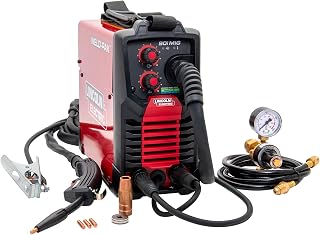
90i MIG and Flux Core Wire Feed Weld-PAK Welder, 120V Welding Machine, Portable w/Shoulder Strap, Protective Metal Case
Check PriceUnplug the machine and let the capacitors discharge for several minutes before you touch anything inside the case. MIG welders store energy even when turned off, and a surprise shock is no way to start a repair session. Put on safety glasses whenever you inspect the wire feed mechanism or remove the nozzle. Clear your workspace of flammable materials, and make sure there is plenty of light.
Treat every component as live until you have verified it is dead. If you need to open the cabinet to check internal connections, ground yourself on the metal chassis first to avoid static damage to the control board. These small habits keep you safe and protect the welder’s sensitive electronics.
Check the Input Power and Power Switch
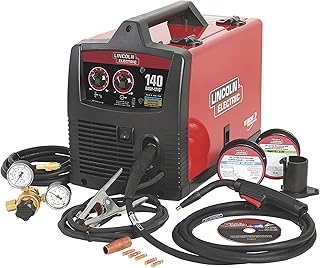
EASY MIG 140 Welder
Check PriceConfirm the Outlet and Cord
The first stop is always the wall plug. Plug a lamp or a power tool into the same outlet and verify that you have voltage at the receptacle. For 220-volt machines, use a multimeter to test both hot legs. A tripped breaker, a loose outlet terminal, or a damaged extension cord can mimic a dead welder perfectly.
Inspect the welder’s power cord from end to end. Look for cuts, melted spots, or prongs that wiggle. A cord that has been pinched under a welding cart or run over by a cherry picker may break internally. If the cord gets bent at a sharp angle near the strain relief and the machine briefly flickers on, you have found a classic intermittent fault.
Do not overlook the power switch. Rock it firmly a few times. On older Lincoln models, contact oxidation inside the switch can prevent the machine from turning on. If the switch feels mushy or does not click cleanly, it may need replacement.
Wire Feed Problems and Drive System Checks
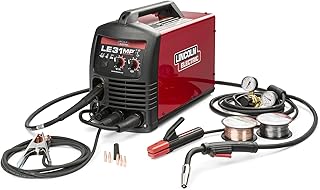
140 Amp LE31MP Multi-Process Stick/MIG/Flux-Core/TIG, 120V, Aluminum Welder with Spool Gun Sold Separately K3461-1
Check PriceMany welders type Lincoln MIG welder not working into a search bar because the wire refuses to feed, feeds erratically, or birdsnests right at the drive rolls. The wire drive system has several moving parts, and each one deserves a few minutes of attention.
Is the Trigger Switch Sending a Signal?
When you pull the gun trigger, the contactor should close, the gas valve should click open, and the wire should advance. If absolutely nothing moves, the trigger circuit might be the culprit. Disconnect the gun from the machine and check the trigger pins with a multimeter set to continuity. Pull the trigger and watch for zero resistance. No beep means a broken trigger wire, usually where the cable enters the handle.
Also inspect the trigger connector plug at the front panel. Bent pins or corrosion inside the socket can interrupt the control signal. Straighten any bent pins gently with a small screwdriver and apply a thin film of dielectric grease to keep moisture out.
Drive Roll Tension and Alignment
Open the wire feed compartment and find the drive rolls. They should push the wire with consistent pressure but not crush it. Tighten the tension knob until you can just prevent the wire from slipping when you pinch it between your fingers near the drive rolls. Too much tension flattens the wire, creates metal shavings, and clogs the liner. Too little lets the rolls slip on the wire surface, and the feed stutters.
Check that the drive roll groove matches the wire diameter you are running. A 0.030-inch wire in a 0.035-inch groove will slide around. And make sure the roll aligns straight with the inlet and outlet guides. Misalignment bends the wire slightly and adds drag that mimics a clogged liner.
Spool Hub Brake and Wire Path
The spool hub brake should apply just enough drag to stop the wire spool from freewheeling when you release the trigger. If it is too tight, the drive motor works against massive friction and overheats. Loosen the hub nut until the spool rotates smoothly but stops without unwinding on its own. A wire spool that tangles the instant you let go of the gun can yank the wire out of the drive rolls and cause a birdsnest.
Trace the wire path from the spool to the inlet guide. A tiny burr on the inlet tube can shred the wire and fill the liner with metal dust. Use fine sandpaper to smooth any rough edges you find.
Liner, Contact Tip, and Gun Cable Troubles
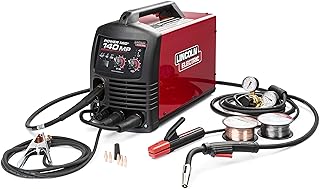
K4498-1 – MIG Welder 140MP Power MIG Multi-Process Welder
Check PriceGun Liner Clogs and Kinks
A kinked or dirty gun liner is the single most common reason a Lincoln MIG welder is not feeding wire. Remove the contact tip and nozzle, then blow compressed air through the gun cable from the machine end toward the front. You may see a cloud of black dust come out. That dust is abrasive and increases friction dramatically.
If you can pull the wire through by hand while the machine is off, the liner is probably okay. If the wire binds halfway, unhook the liner from the power pin and slide it out. Run a dedicated liner cleaning brush or a long pipe cleaner through it until it pulls clean. For severely clogged liners, replacement is the only real fix. Keep a spare liner on hand, especially if you weld in a dirty environment or run cheap flux-cored wire that sheds filler.
Contact Tip Condition
A worn or partially clogged contact tip causes arc stumbling, an erratic hissing sound, and wire burnback. Unscrew the tip and hold it up to the light. You should see a perfectly round hole that matches your wire size. If the hole looks oblong or has a lip of metal inside, toss it. Contact tips are inexpensive, and a fresh one instantly improves arc stability.
Spatter can weld the contact tip to the nozzle or insulate the tip from the wire. Scrape the inside of the nozzle with the appropriate tool and dunk the tip in anti-spatter dip if your application allows it. Keep the nozzle threads clean so heat transfers properly.
Arc Quality and Ground Connection Issues
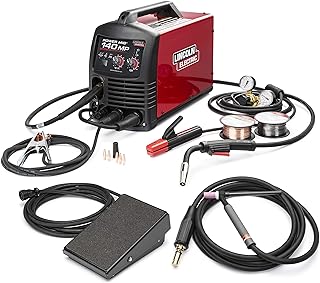
Lincoln Power MIG 140MP Multi-Process Welder TIG One Pak K4499-1
Check PriceWork Lead and Ground Clamp
A wandering, weak arc often traces back to a poor work connection. Unclamp the ground from your workpiece and sand the contact point to bare, shiny metal. Rust, mill scale, and paint add resistance that steals welding voltage. The ground clamp itself may have a broken jaw or a weak spring that prevents solid contact. Give the clamp a wiggle on the metal to confirm it bites tight.
Inspect both ends of the work lead cable. The brass terminal lug at the machine can loosen over time from vibration. Tighten it with a wrench and check for heat discoloration that indicates high resistance. Move the cable around while someone watches the arc, if it sputters when you bend the lead, the internal copper strands are broken.
Polarity and Voltage Settings
Lincoln MIG welders let you swap polarity for gas-shielded solid wire versus self-shielded flux-cored wire. Solid wire requires electrode positive (DCEP), while most flux-core wire runs electrode negative (DCEN). If your arc sounds angry, pops excessively, and leaves black soot, you may have the polarity backward. Check the jumpers inside the wire feed compartment and compare them to the door chart.
Also confirm your voltage tap or digital display settings match the material thickness and wire diameter you are using. Overly high voltage burns the wire into a ball before it reaches the puddle, while low voltage makes the wire stub into the plate and push back. Revisit the top Lincoln MIG machines and their recommended setups to see where your settings should land.
Gas Flow and Shielding Problems

K4877-1 POWER MIG 215 MPi Multi-Process Welder Aluminum One Pak
Check PricePorosity and heavy spatter often point to a shielding gas issue rather than an outright machine failure. Check the regulator flow gauge while you pull the trigger. On a typical Lincoln MIG welder, you want about 20 to 30 cubic feet per hour depending on nozzle size and shop conditions. If the ball floats at zero, make sure the tank valve is open and the regulator is not frozen or damaged.
Listen for a hissing sound from the gas solenoid inside the machine. It should click immediately when you touch the trigger. No click and no flow suggest a failed solenoid or a broken wire going to the solenoid coil. You can test the solenoid with a multimeter and replace it if it reads open. Trace the gas hose for kinks, cracks, and leaks. A spray bottle filled with soapy water makes tiny leaks visible in seconds.
Internal Components and the Control Board
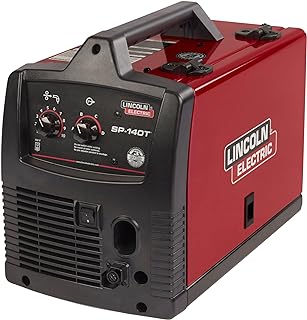
SP-140T MIG Welder, K5261-1
Check PriceCapacitor and Rectifier Health
Once you have ruled out external causes, you may need to peek inside the cabinet. Look for bulging capacitors, burnt snubber resistors, or scorch marks around the rectifier diodes. A Lincoln MIG welder not working on the high voltage setting while fine on low power can point to a shorted capacitor that brings the whole bank down under load.
If you are comfortable using a multimeter on live circuits, measure the DC voltage at the output studs while the contactor is closed. A reading that is significantly lower than the selected tap suggests a rectifier issue. Capacitor testing requires discharging them safely first, so consult a professional if this sounds outside your comfort zone.
Most DIY users should stop internal inspection at the printed circuit board. Cracked solder joints are common on larger machines that vibrate on carts. Look under a bright light for ring-shaped cracks around relay pins and large connector headers. A cracked joint on the trigger relay can cause intermittent wire feed that drives you crazy. Reflow these joints with a fine soldering iron if you have the skill, or take the board to an electronics repair shop.
When to Call a Lincoln Service Center
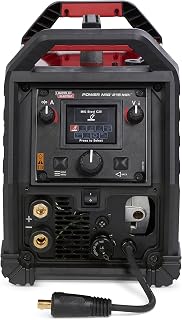
K4878-1 Power Mig 215 MPi Multi-Process Welder TIG One-Pak
Check PriceSome symptoms scream for professional help. If you smell burning electronics, hear loud pops unrelated to welding, or see flames inside the cabinet, stop immediately. A shorted transformer or a blown main control board is not a weekend repair project. Lincoln Electric maintains a network of authorized service centers that stock genuine parts and have the diagnostic equipment to bench-test your machine thoroughly.
The official Lincoln Electric troubleshooting resource lists error codes and step-by-step flowcharts for many models. Bookmark it for quick reference when your welder throws a code you do not recognize. And before you send the unit off, take a photo of the data plate and serial number so the service desk can pull up the exact schematic.
Preventive Maintenance That Keeps a Lincoln MIG Welder Running

Weld-Pak 225i Stick Welder, Dual Voltage
Check Price- Blow out the wire drive compartment with low-pressure compressed air after every spool change to stop metallic dust from piling up.
- Replace the liner every 50 to 100 pounds of wire, or sooner if you run flux-core wire that sheds heavily.
- Check and clean the gun nozzle and contact tip at the start of each welding session.
- Inspect the power cord, ground lead, and gun trigger connector for damage monthly.
- Store the welder in a dry, clean space, and cover it when not in use to keep grinding dust and moisture out of the ventilation slots.
Following these habits will prevent many Lincoln MIG welder not working scenarios before they interrupt your workflow. A small amount of regular care goes a long way toward years of trouble-free arcs.
Frequently Asked Questions
Why does my Lincoln MIG welder feed wire but not arc?
If the wire advances but you get no arc, the issue is almost always on the secondary side of the circuit. Start by cleaning the ground clamp connection and inspecting the work lead for tightness at both ends. Then verify the polarity jumpers match your wire type. A tripped internal breaker or faulty contactor can also prevent the main welding current from reaching the gun.
What makes the wire burn back to the contact tip repeatedly?
Burnback happens when the wire melts faster than it can feed. Lower the voltage setting slightly and increase the wire feed speed. Make sure the contact tip is the correct size and not worn into a funnel shape. Sticky drive rolls or excessive spool hub drag can also cause the wire to pause momentarily, which instantly welds the wire to the tip.
Can a bad capacitor cause my Lincoln welder to stop working completely?
Yes, a shorted capacitor can drag down the entire output circuit and trip the main breaker or burn a fuse on the control board. When capacitors fail, you may hear a loud hum, see a flickering pilot light, or notice that the machine tries to start but immediately shuts down. Suspect capacitor trouble if the welder was fine yesterday and simply refuses to energize today.
How can I test the trigger circuit on my Lincoln MIG gun?
Unplug the gun connector from the machine and set a multimeter to continuity or low ohms. Place the probes across the two trigger pins, then squeeze the gun trigger. A reading close to zero ohms means the switch and wiring are intact. An open reading that never changes points to a broken trigger wire, usually inside the handle housing where the cable flexes the most.
Conclusion
A Lincoln MIG welder not working rarely means the end of the road. By following a logical path, starting with input power, moving through the wire drive system, and finally checking the gun liner and electrical connections, you will find the cause in under 30 minutes most of the time. Keep spare contact tips, a clean liner, and a properly tensioned drive roll, and your Lincoln will reward you with smooth, steady beads.
If your machine is still not ready to lay down metal after you work through every step here, reach out to a Lincoln-certified service tech. The problem may be deep inside the rectifier or control board, where specialized tools and parts make the difference. In the meantime, double-check your setup by reviewing our beginner MIG welding tips to rule out simple operator errors that mimic hardware failure.