Walking into a welding supply store or scrolling through online listings, you will quickly notice a massive price gap between helmets. A high-end auto-darkening hood can cost over $400, while a basic budget model sits at just $25. This price difference naturally raises a critical question: Are cheap welding helmets safe to use for daily fabrication work? The short answer is yes, a cheap helmet can absolutely be safe, but only if you know exactly what to look for. It is not the price tag that protects your eyes, it is the certification and the lens technology.
Many beginners assume that spending less money means sacrificing all protection. This is a dangerous myth that leads some to weld without a helmet at all, which is a sure path to a painful flash burn. The truth is more nuanced. The market is flooded with affordable helmets that meet strict safety standards, but it is also flooded with counterfeit toys that look like welding helmets and offer zero defense against ultraviolet (UV) and infrared (IR) radiation.
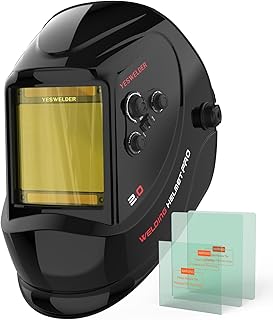
YESWELDER Auto Darkening Welding Helmet, Large View, LYG-M800H
Check PriceYour eyesight is irreplaceable. A single arc flash without proper protection can cause photokeratitis, a condition often described as having hot sand poured into your eyes. Because of this, you cannot afford to gamble on a mystery brand. In this guide, we will break down the difference between a cost-effective safety tool and a dangerous piece of plastic, helping you protect your face without emptying your wallet.
Table of Contents
What Makes a Welding Helmet Safe?

ARCCAPTAIN Auto Darkening Welding Helmet with Light, 3.94″X3.66″ Large View
Check PriceSafety in welding helmets is not determined by the price, the brand name, or the cool graphics on the hood. It is determined by physics and government standards. A safe helmet, whether it costs $30 or $300, must perform one non-negotiable task: blocking 100% of harmful UV and IR rays, even when the auto-darkening filter is turned off. This is called passive protection, and it is a feature that should exist in every modern lens.
In the United States, the benchmark for safety is the ANSI Z87.1 standard. This certification ensures the helmet has been tested for impact resistance and optical radiation filtering. Before you buy a cheap helmet, flip it over and look for the ANSI Z87.1 stamp. If you cannot find it, put the helmet back on the shelf. Without that stamp, you are not holding a safety device, you are holding a costume accessory.
Beyond the stamp, you need to understand the lens classification. Manufacturers use a rating system of 1/1/1/1 to indicate optical clarity. A rating of 1/1/1/1 means the lens has zero distortion, minimal light diffusion, and consistent shading across the entire viewing area. Some cheap helmets use a 1/2/1/2 rating, which can cause eye strain and blurry vision over a long day of welding. This does not make them immediately dangerous, but it certainly reduces the quality of your work and your comfort.
The Risks of Cutting Corners on Safety
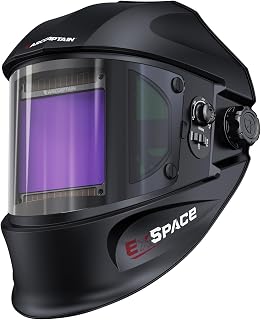
ARCCAPTAIN Welding Hood, 180° Panoramic View Auto Darkening Welding Helmet (LY800Js-BK)
Check PriceIf you ignore the safety standards and buy the absolute cheapest, unbranded helmet you can find, you are rolling the dice on a few serious injuries. The most common risk is arc eye, a burn to the cornea that feels like a sunburn on your eyeball. It usually sets in hours after exposure, peaking in the middle of the night with intense pain, tearing, and the sensation of grit in your eyes. While arc eye is usually temporary, repeated exposure can lead to permanent vision loss.
Another risk is skin damage. A welding arc emits intense UV radiation, exactly like the sun. A fragile or poorly fitted cheap helmet might leave gaps around your neck or ears. Over time, this exposure acts like a severe sunburn, increasing the risk of skin cancer. Welders often forget that the face is not the only part of the head that needs shading, the neck and throat are just as vulnerable.
Finally, a cheap helmet with a slow reaction time can cause micro-flashes. If the auto-darkening lens takes too long to switch from a light state to a dark state, you get a split-second zap of the full arc brightness. You might not notice these micro-flashes consciously, but they add up. Your eyes will feel tired, gritty, and dry by the end of the shift. This is a sign that the helmet’s circuitry is too slow to be safe.
Key Features to Look for in a Budget Welding Helmet

ARCCAPTAIN Intelligent Auto-Darkening Welding Helmet, 180° True Color Hood
Check PriceYou do not need to break the bank to get a helmet that performs well. In fact, the budget segment has become incredibly competitive, and many $50 helmets now offer features that were exclusive to $300 helmets a decade ago. However, you must know which features to prioritize. When choosing the right welding helmet, focusing on the lens technology is far more important than focusing on the graphic design.
Optical Clarity and Lens Quality
Optical clarity is the most important metric for a budget helmet. A lens with a rating of 1/1/1/2 is perfectly acceptable for a hobbyist. It means you might see a very slight shadow distortion at the far edges of the lens, but the center will be crisp. Avoid lenses that have a 3 in any of the four categories, as these indicate significant distortion that can make it hard to see the weld puddle.
Look for helmets that use a true color or high-definition lens technology. Even in the budget range, you can find lenses that reduce the greenish tint typical of older auto-darkening filters. Seeing the weld puddle in natural color helps you control the arc better and reduces eye fatigue. A clear view means you are less likely to put your face too close to the arc, which is a safety hazard on its own.
Reaction Time and Switching Speed
The speed at which the lens darkens is measured in fractions of a second. Professional helmets often switch at 1/25,000 of a second. A safe budget helmet should switch at least at 1/10,000 of a second. Anything slower than that, like 1/3,600, can cause those micro-flashes we discussed earlier. Check the specifications carefully. If the manufacturer does not list the switching speed, that is a red flag.
You also need to check the delay and sensitivity controls. These are dials, usually on the inside of the helmet, that allow you to adjust how long the lens stays dark after the arc stops. These controls are not just luxury features, they are safety features. If you cannot adjust the sensitivity, the lens might flicker and flash you when you are welding at low amperage TIG, which is extremely dangerous for your eyes.
Comfort and Fit
A helmet that hurts your head is a safety hazard because you will be tempted to lift it up between welds. A good budget helmet should have a ratcheting headband that adjusts to your head size. The weight is also a factor. While many people worry about weight, lightweight welding helmets can still be safe if they use proper materials. A heavy helmet strains your neck, but a flimsy one might crack upon impact.
Look for helmets with replaceable sweatbands and padding. If the padding is cheap paper-thin foam, it will disintegrate within a week, leaving you with hard plastic rubbing against your forehead. This is a common pain point with the absolute cheapest helmets. Investing just a few extra dollars usually gets you a much more comfortable suspension system that makes you forget you are even wearing a hood.
Reliable Power Source
Cheap auto-darkening helmets either run on replaceable batteries, solar power, or a combination of both. A helmet with a non-replaceable, sealed battery has a finite lifespan. Once that battery dies, the helmet is a paperweight. A safer budget approach is to buy a helmet with a replaceable lithium battery and a solar assist panel. The solar panel ensures the helmet stays on even if the battery is low, but the replaceable battery guarantees you can swap it out instead of buying a new hood.
Before you start welding, always test the helmet. Put it on and strike an arc. If the lens flickers, darkens intermittently, or does not darken at all, the battery is likely dead. Never weld with a helmet that is not responding correctly. The cost of a new battery is nothing compared to the cost of a trip to the emergency room.
Cheap vs. Expensive Helmets: What You Really Get

Welding Helmet Auto Darkening True Color Large Viewing, MIGVAN Solar/Rechargeable
Check PriceWhen you pay more for a premium helmet, you are not necessarily paying for more safety. A $40 helmet from a reputable budget brand can block UV rays just as effectively as a $400 Miller or Lincoln helmet. The safety standard is a pass or fail test. You are paying for the user experience. High-end helmets have larger viewing areas, which is a huge productivity boost. They also have better optics, often rated at 1/1/1/1, which reduces eye strain significantly over eight hours.
Expensive helmets also offer robust build quality. The shell material is thicker and better able to withstand a dropped tool or a piece of slag. They also have better headgear that distributes weight evenly. However, if you are a weekend warrior or a hobbyist working on a car project, you simply do not need that industrial-grade durability. A mid-range budget helmet will serve you perfectly well for years.
Here is a quick breakdown of what you can expect in different price brackets:
- Under $30: Often fixed shade or very slow auto-darkening. These are risky. Check the ANSI stamp carefully. Suitable only for very rare, emergency use.
- $30 to $60: The sweet spot for beginners. You get a reliable auto-darkening lens, adjustable sensitivity, and decent comfort. This is the safest entry point for most hobbyists.
- $60 to $100: You start getting true color lenses, larger viewing areas, and replaceable batteries. The build quality is noticeably better, and the headgear is more robust.
- $100 and above: Professional features. 4C lens technology, grind modes, and extreme durability. These are for daily, heavy-use industrial environments.
How to Test a Cheap Helmet Before You Trust It

TOPDC Welding Helmet 3.86″x1.61″, Flip Front Welding Mask with Shade 11
Check PriceYou should never pull a fresh helmet out of the box and immediately start a high-amperage structural weld. You need to test the functionality first. The simplest test is the strike test. Put the helmet on and look at a bright light source, like a 60-watt bulb or a window. A functioning auto-darkening lens should slightly dim or flicker when exposed to a sudden bright light. However, this is not a perfect test, as the UV sensor in the helmet needs the actual arc intensity to trigger fully.
A better test is to use a remote control or a lighter. Point a TV remote at the sensors and press a button. The infrared light from the remote should trigger the helmet to darken. This confirms the sensors and the electronics are functioning. Finally, do a test weld on a piece of scrap metal. Start with the shade set to 10 or 11. Look for flickering. The arc should look steady and comfortable. If you see a greenish strobing effect, the helmet is not safe.
Always inspect the physical shell. Bend it slightly. The shell should flex but not crack. Check the lens cover plates. The helmet must have a front clear lens to protect the expensive auto-darkening filter from spatter. A cheap helmet that skips the outer protective lens is a waste of money because the first drop of molten steel will ruin the filter permanently.
Common Myths About Affordable Welding Helmets

ARCCAPTAIN Welding Helmet, 3.94″×3.66″ Auto Darkening Welding Hood, 1/1/1/1 Optical Clarity
Check PriceThere is a lot of bad advice floating around welding forums about cheap gear. One of the most stubborn myths is that auto-darkening helmets are bad for your eyes. This is completely false. A quality auto-darkening lens protects your eyes just as well as a passive lens. The difference is that the auto-darkening lens is clear when you are not welding, so you do not have to flip the hood up and down, which reduces neck strain and improves safety.
Another myth is that you need a huge viewing area to be safe. While a large viewing area is nice, it is not a safety feature. A small lens rated at 1/1/1/1 is safer than a large lens with a distorted optical rating. Your peripheral vision is still your peripheral vision, you should not be relying on the lens to see where your hands are. You should be looking directly at the arc.
Finally, many people believe that a heavier helmet is a tougher helmet. This is not true. Modern materials like nylon and polyamide are incredibly strong and much lighter than the bakelite and fiberglass used decades ago. A heavy helmet is a strain on your cervical spine, and a fatigued welder is a careless welder. A cheap, lightweight helmet that meets ANSI standards is a valid safety tool.
Frequently Asked Questions
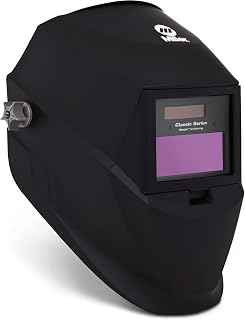
Miller Classic Series Welding Helmet, ClearLight™, Shade 8-13, Black
Check PriceCan a cheap auto-darkening helmet fail mid-weld?
Yes, it can. The most common failure is a dead battery. This is why a helmet with a low-battery indicator is so valuable. However, even if the electronics fail, the liquid crystal display (LCD) in the lens defaults to a dark state. The glass substrate still provides permanent UV and IR protection. You will be temporarily blinded by the visible light, which is startling, but your eyes will not receive a UV burn. That said, you should stop welding immediately and replace the battery.
What shade number is safe for a beginner?
For most hobbyist MIG and stick welding in the 100 to 150 amp range, a shade 10 or 11 is standard. If you are using a plasma cutter or doing low-amp TIG welding, you can drop to a shade 8 or 9. The general rule is simple: if you cannot see the weld puddle clearly, you are too dark. If you see spots after the weld, you are too light. A variable shade helmet, even a cheap one, allows you to dial in the perfect darkness for the job.
Do cheap welding helmets meet ANSI standards?
Many of them do, but you must verify it yourself. The stamp is usually printed on the inside of the shell or on the lens box. Do not trust the printed advertisement on the website, trust the physical stamp on the product. If you buy a helmet and the stamp is missing, return it immediately. It is a common trick for overseas manufacturers to claim ANSI compliance without actually meeting the testing requirements.
Is a passive lens safer than a cheap auto-darkening lens?
A passive lens, which is just a piece of dark glass, is virtually indestructible and has no electronics to fail. In that sense, it is safer from a mechanical failure standpoint. However, a passive lens is dangerous in a different way. It requires you to snap your head to flip the hood down, which can cause you to lose your exact starting point and strike the arc outside the joint. For a beginner, a cheap auto-darkening lens usually results in better welds and less frustration, provided it is a quality unit.
Conclusion
So, are cheap welding helmets safe? The answer is a confident yes, provided you shop with your brain, not just your wallet. A $40 helmet with an ANSI Z87.1 certification, a 1/1/1/2 optical rating, and a switching speed of 1/10,000 of a second is a perfectly safe tool for a beginner or hobbyist. You do not need to spend $300 to protect your eyes from an arc flash. The danger lies not in the price, but in the lack of proper labeling and the absence of functional sensors.
Always remember that your safety gear is a system. The helmet is just one part of the puzzle. You also need a welding cap, safety glasses worn underneath the hood, and a OSHA guidelines for welding safety compliant work environment. Never weld with a helmet that flickers, even once. Trust your eyes. If the light feels harsh or you see spots after lifting the hood, increase the shade number or retire the helmet. Start with a reputable budget brand, perform the basic tests, and you can weld with confidence without burning your savings.