Finding the right welding helmet as a beginner can be overwhelming. You need a helmet that protects your eyes from UV and infrared rays, is comfortable, easy to adjust, and lets you see your work clearly. With so many options, beginners often struggle to balance safety, comfort, and budget.
This guide walks through 20 beginner‑friendly welding helmets, from very cheap starter options to more advanced panoramic models. For each one, you’ll see what makes it different, key specs in plain language, honest pros and cons, and who it suits best, so you can match your first helmet to your workshop, budget, and welding goals.
Best Welding Helmet for Beginners (Short Answer)
For most beginners, the best welding helmet is a true‑color, auto‑darkening model with a medium‑large viewing area, four sensors, and a 4/5–13 shade range with grind mode.
Excellent beginner‑friendly choices that meet this include:
- MIGVAN Auto Darkening Welding Helmet (Large Viewing): Big, clear window, 4 sensors, solar + rechargeable power, great all‑round starter.
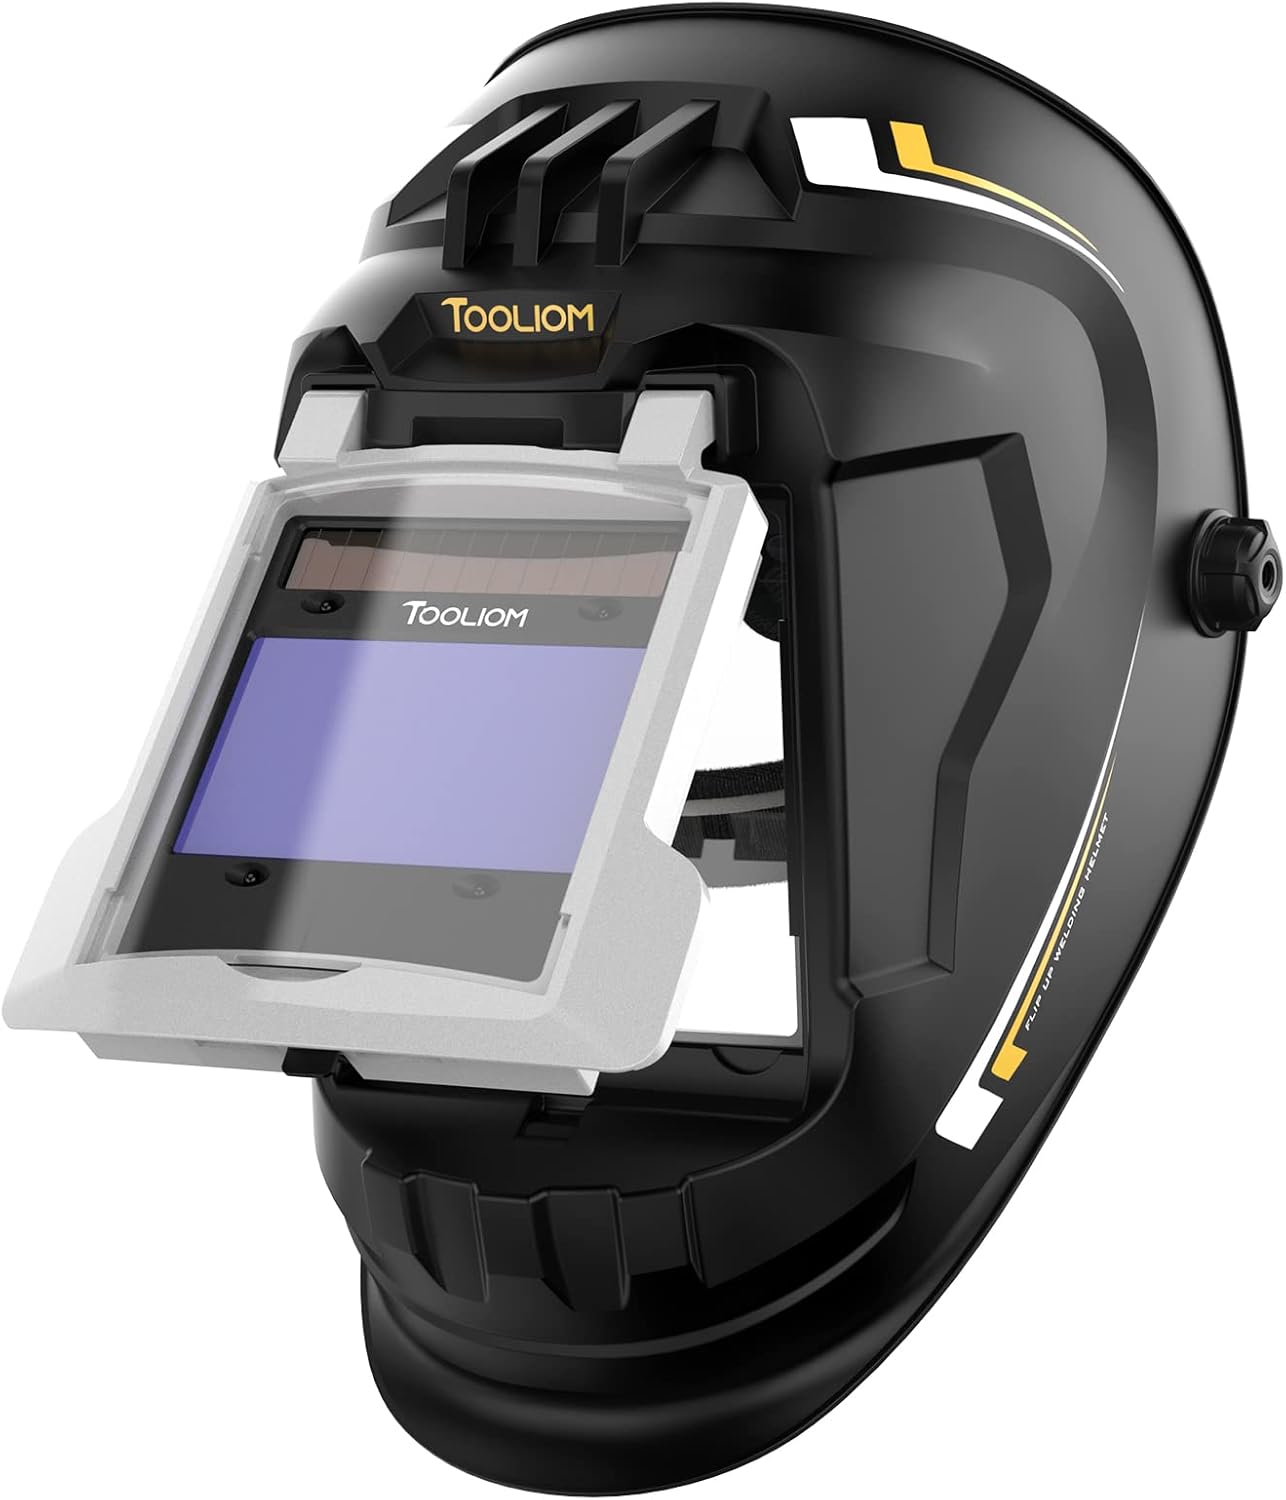
- TOOLIOM Auto Darkening Welding Helmet (Large Viewing): True‑color lens, 4 sensors, wide shade range, very good value for learning TIG/MIG/Stick.
- VORITO Auto Darkening Welding Helmet (Large Viewing): True‑color optics, 4 sensors, very fast 1/30,000 s switching, ideal if you’ll weld in more awkward positions.
If your budget is tight and you want something lighter and simpler, a compact true‑color helmet like the TOOLIOM compact 3.64″×1.67″ or VILSIN compact is also a solid first helmet.
Table of Contents
20 Best Welding Helmets for Beginners – Top Picks for Safety & Comfort 2026
1. VILSIN Welding Helmet Auto Darkening Solar Powered – Compact True‑Color Starter
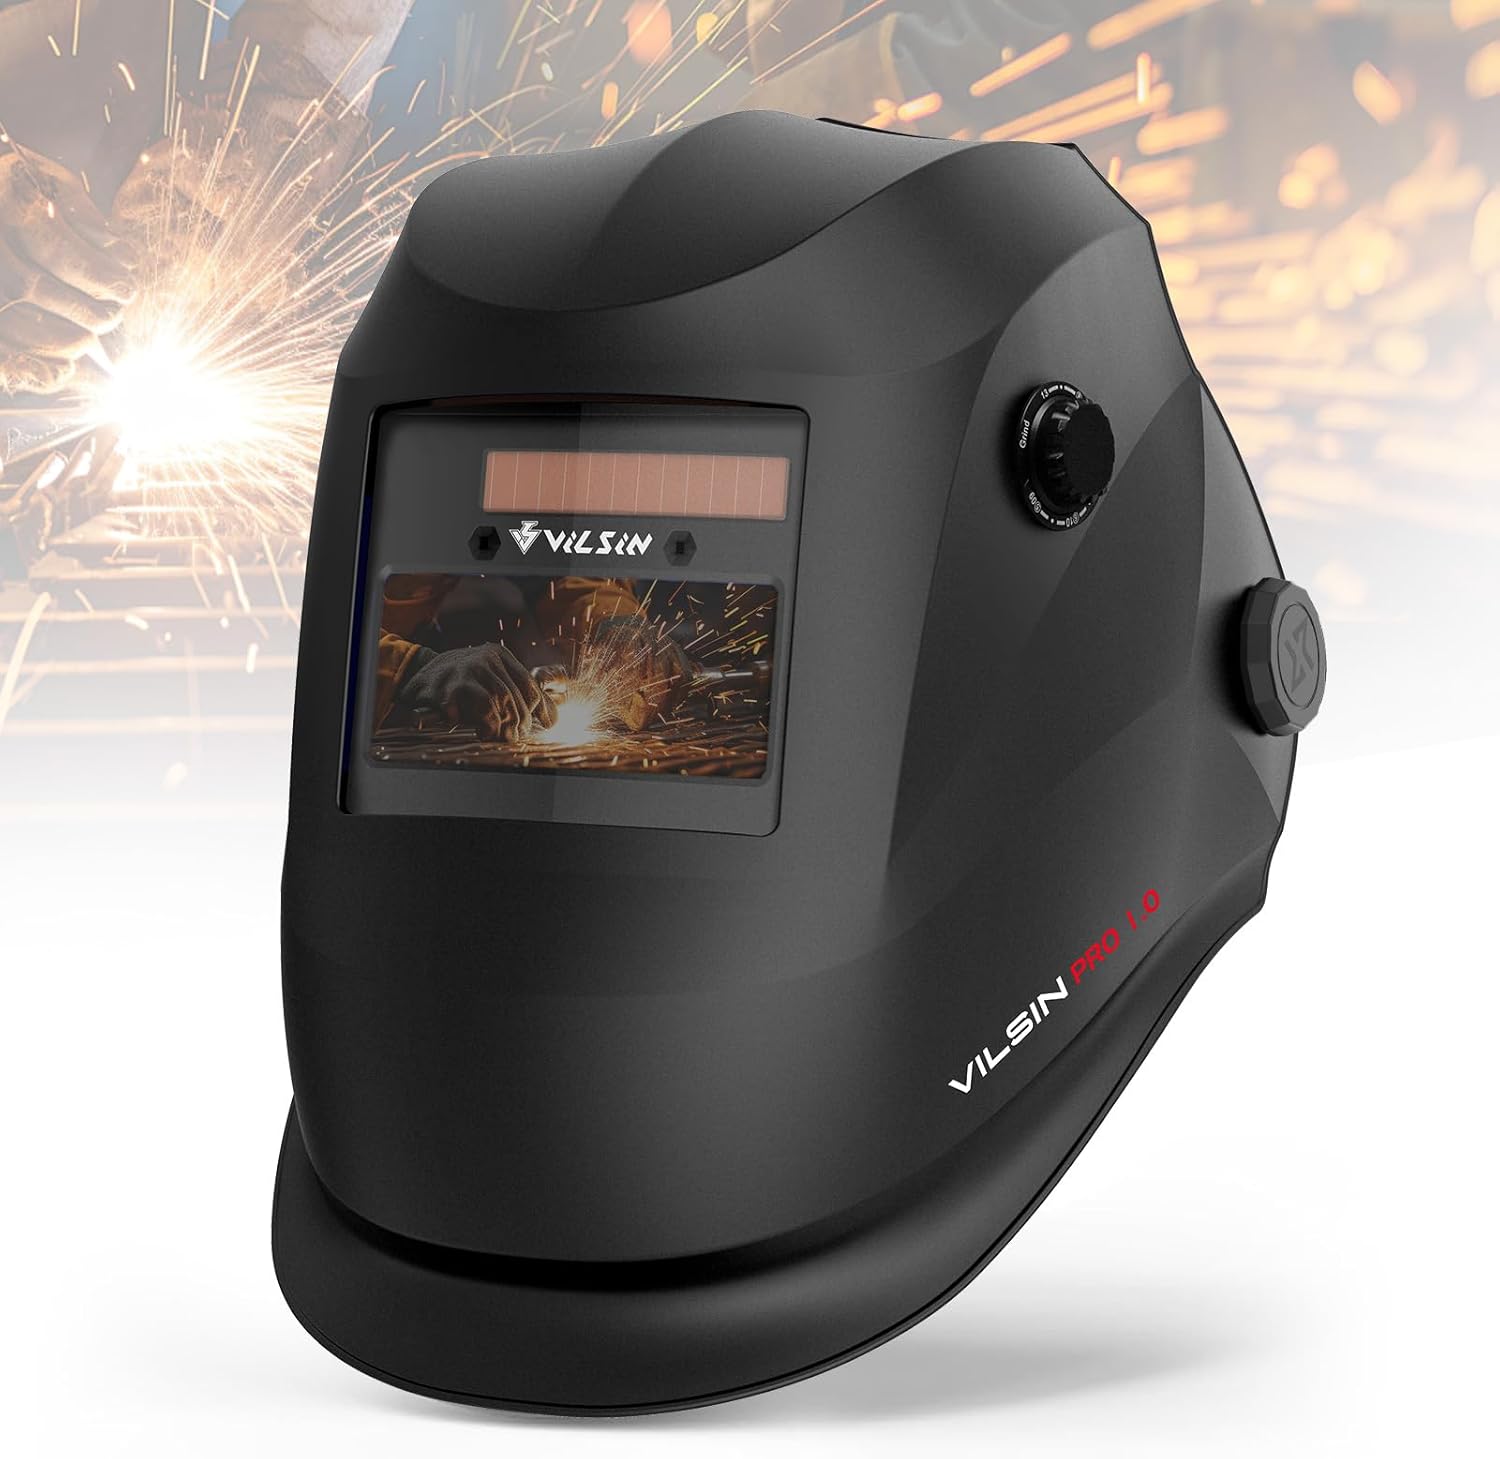
VILSIN Welding Helmet Auto Darkening Solar Powered
A lightweight, compact auto‑darkening helmet with a 3.78"×1.58" viewing area, true‑color optics, and solar plus battery power for everyday beginner use.
Check PriceWhy it stands out
This VILSIN helmet gives beginners a clear, true‑color view in a small, light shell that’s easy to handle and simple to set up.
Key points
- Viewing area: approx. 3.78″ × 1.58″
- Optical class: 1/1/1/2 with 2 arc sensors
- Shade range: light DIN 4, dark DIN 5–9 / 9–13
- Switching speed around 1/16,000 s (0.06 ms)
- Dual power: solar cell plus internal battery
- Suitable for MIG, TIG (moderate amps) and Stick
Pros
- True‑color view is much clearer than old green lenses
- Compact and lightweight, good for smaller heads and tight spaces
- Wide shade range covers grinding and most welding tasks
- Controls are straightforward for first‑time users
Cons
- Narrow window compared with large‑screen helmets
- Only two sensors, so out‑of‑position work can be less consistent
- Basic headgear may feel cheap if used all day
Best for
New welders in home garages or small shops who want a budget‑friendly first helmet that’s light, clear, and easy to live with.
2. MIGVAN Welding Helmet – Large True‑Color View with 4 Sensors
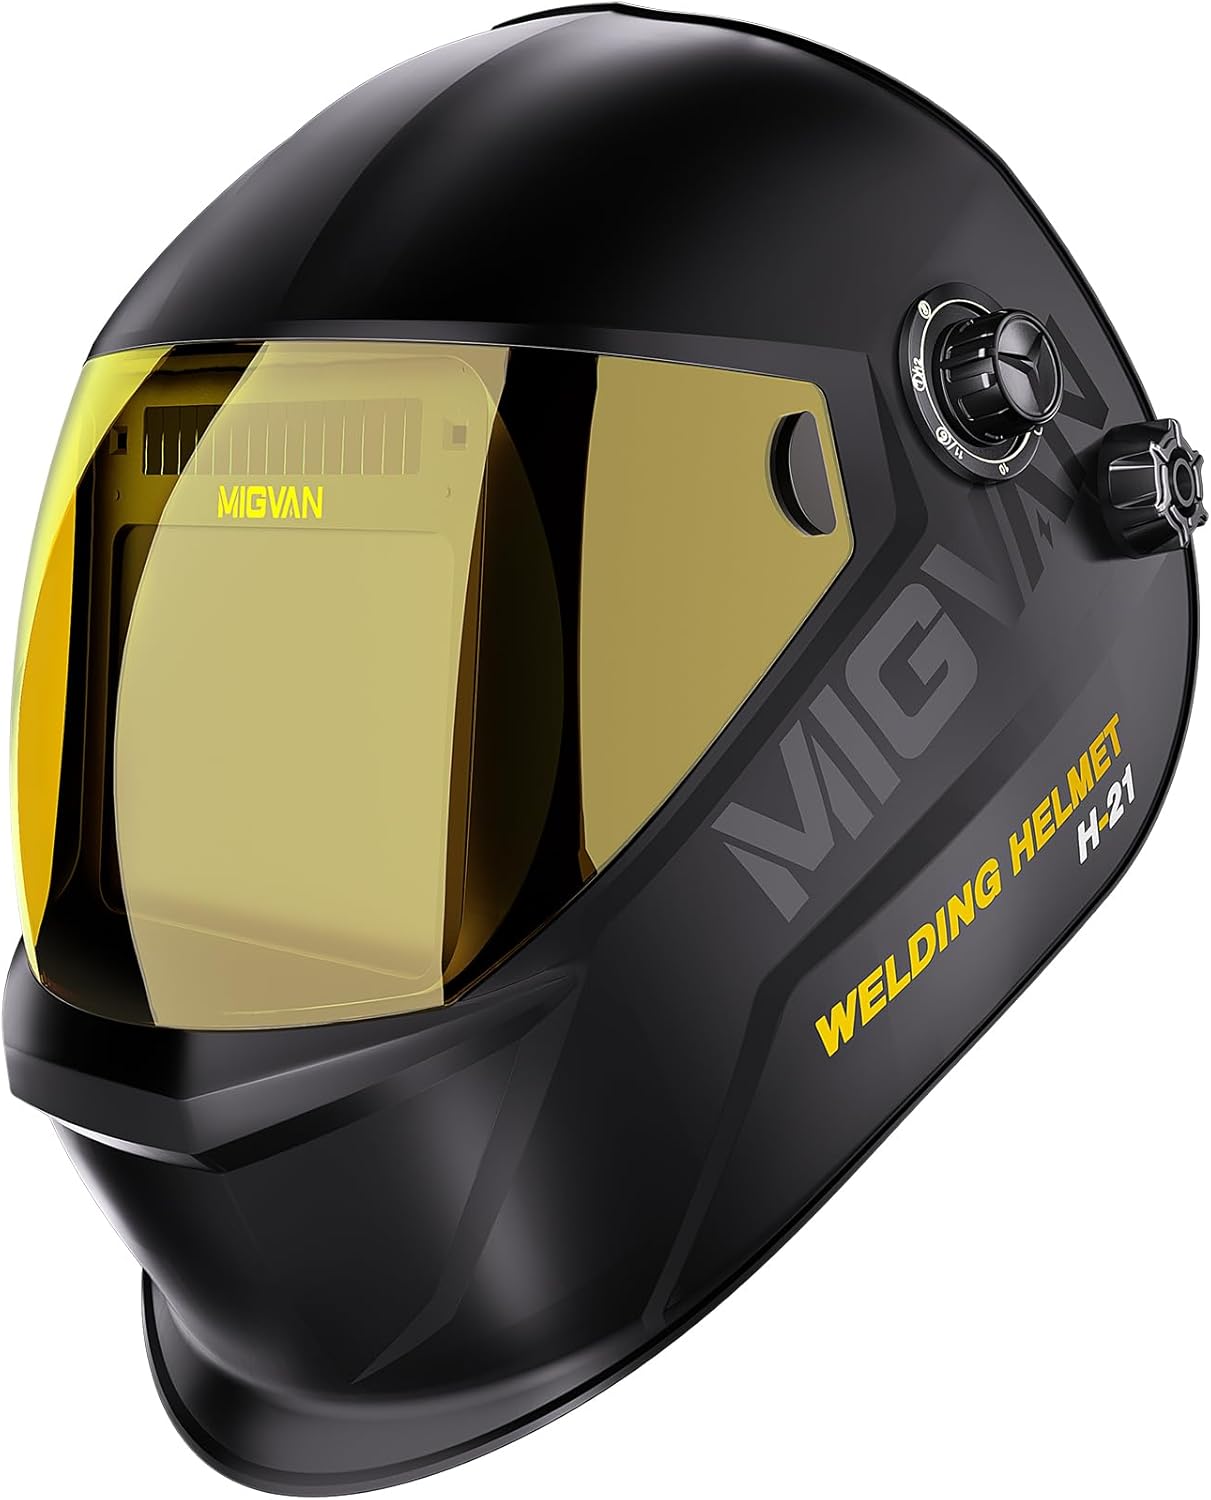
MIGVAN Welding Helmet Auto Darkening True Color Large Viewing
A large‑screen true‑color helmet with about a 3.9"×3.2–3.6" view, 4 arc sensors, and solar plus rechargeable power, ideal for learning multiple processes.
Check PriceWhy it stands out
MIGVAN combines a big, bright window with four sensors and a rechargeable power system, so beginners get a wide, stable view without worrying about sudden battery failure.
Key points
- Viewing area: around 3.9″ × 3.2–3.6″ (large)
- True‑color lens with high optical clarity
- 4 arc sensors, ~1/10,000 s switching
- Shade range roughly DIN 4/5–13 with grind mode
- Solar assist plus rechargeable lithium battery
- Designed for TIG, MIG, Stick and cutting
Pros
- Large view makes it easier to see the joint and surroundings
- Four sensors are forgiving in awkward positions and corners
- Rechargeable battery reduces long‑term running costs
- Good all‑rounder for a beginner doing mixed work
Cons
- Bigger and a bit heavier than compact helmets
- Panoramic‑style shell can be clumsy in very tight spots
- Needs occasional charging or bright light to keep topped up
Best for
Beginners who want a do‑most‑things large‑view helmet for a home shop or small fab space and don’t mind a slightly bulkier shell.
3. Accoral Large Viewing Helmet – Fast, True‑Color Budget All‑Rounder

Accoral Large Viewing Auto Darkening Welding Helmet
A 3.94"×3.27" true‑color helmet with rapid auto‑darkening, multiple modes, and a wide 4–8.5/8.5–12.5 shade range.
Check PriceWhy it stands out
Accoral focuses on fast switching and a generous shade range, so beginners can experiment with TIG, MIG, and Stick without constantly adjusting or swapping helmets.
Key points
- Viewing area: about 3.94″ × 3.27″
- True‑color optics, 1/1/1/1 class on many listings
- Shade range: 4–8.5 / 8.5–12.5 (weld, cut, grind)
- Very quick darkening (around 1/25,000 s)
- Solar powered with battery backup
- Suitable for TIG, MIG, Stick, and grinding
Pros
- Wide view helps track the puddle and work area
- Quick switching is gentle on beginner eyes
- Shade range suits thin and thick material
- Good balance of features and price
Cons
- Usually only 2 sensors (model‑dependent), less ideal for extreme out‑of‑position work
- Large shell can feel bulky at first
- May require careful adjustment to avoid being too sensitive to ambient light
Best for
New welders who want one helmet to cover most processes and thicknesses without a steep learning curve.
4. TOOLIOM Compact Helmet (3.64″×1.67″) – Lightweight Beginner Workhorse
TOOLIOM Solar Powered Auto Darkening Welding Helmet
A compact 3.64"×1.67" true‑color helmet with 1/1/1/1 optics, 2 sensors, and very low weight, popular with first‑time welders.
Check PriceWhy it stands out
This TOOLIOM model is extremely light and simple, so beginners can weld for longer without neck strain or fighting complicated controls.
Key points
- Viewing area: 3.64″ × 1.67″
- Optical class: 1/1/1/1 true‑color
- 2 arc sensors, ~1/25,000 s switching
- Shade range: typically DIN 4/9–13
- Solar assisted with CR2032 or similar battery
- Weight around 18–19 oz
Pros
- Very light and comfortable, even for smaller users
- Clear, natural‑color view improves confidence
- Easy‑to‑understand controls for shade and sensitivity
- Good for basic TIG, MIG, and Stick practice
Cons
- Small window means more head movement to follow the joint
- Only two sensors, so overhead or tight‑angle work is less ideal
- Headgear is basic; frequent welders may want to upgrade
Best for
Beginners who want something light, clear, and cheap to get started with basic welding at home.
5. Miller Classic Series with ClearLight – Entry into Pro‑Level Clarity
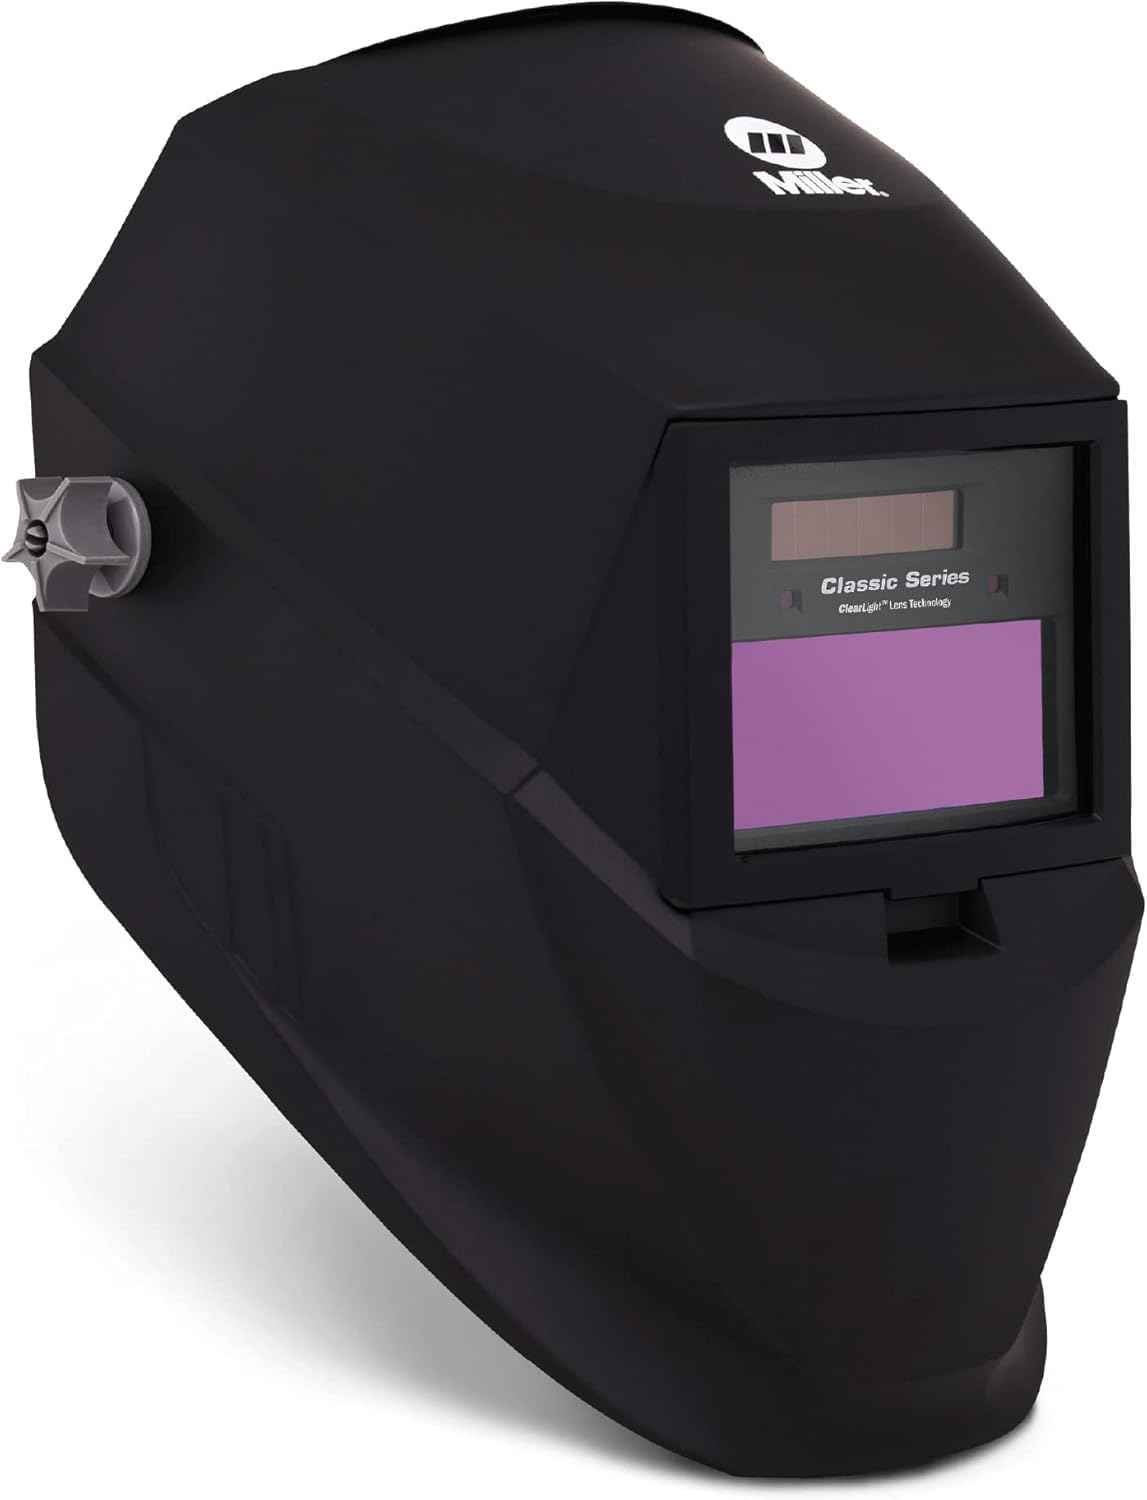
Miller Classic Series Auto Darkening Welding Helmet with ClearLight Lens
A durable helmet from a major brand with about 5.2 sq in viewing area, ClearLight optics, and 2 sensors, aimed at serious beginners.
Check PriceWhy it stands out
Miller’s ClearLight lens gives beginners a sharp, realistic view and strong build quality, making it a good first step into pro‑grade helmets.
Key points
- Viewing area: 5.2 sq in window
- ClearLight true‑color lens, high optical class
- 2 arc sensors, about 1/10,000 s switching
- Shade range: typically 3–13 with grind mode
- Rechargeable solar‑assist power system
- TIG rating down to low amps (around 20 A)
Pros
- Trusted brand with solid durability and support
- Very good clarity and color accuracy
- Comfortable headgear compared to many budget options
- Handles most everyday welding tasks easily
Cons
- Significantly more expensive than basic beginner helmets
- Only 2 sensors; for complex positions a 4‑sensor helmet is better
- Slightly heavier than some lightweight budget models
Best for
New welders who know they’ll stick with welding and want to start with a more durable, brand‑name helmet.
6. DEKORPO Auto‑Darkening Helmet – True‑Color Starter with LED Light
DEKORPO Welding Helmet Auto Darkening True Color Solar Powered
A budget‑friendly true‑color helmet with a 3.62"×1.65" window, 1/1/1/2 optics, and LED light to help in dim work areas.
Check PriceWhy it stands out
DEKORPO pairs true‑color optics with a small viewing area and an integrated work light, which is handy for beginners welding in dark garages or basements.
Key points
- Viewing area: 3.62″ × 1.65″
- Optical class: around 1/1/1/2 true‑color
- Auto‑darkening time ~1/25,000 s
- Shade range: light DIN 4, dark 9–13 or similar
- Solar power plus internal battery
- Onboard LED work light
Pros
- True‑color view gives a more realistic puddle and joint
- Small, light shell is easy to get used to
- LED light helps when layout marks are hard to see
- Very attractive price for a beginner
Cons
- Two sensors only; not ideal for out‑of‑position work
- Small viewing window vs panoramic models
- LED adds complexity and another thing that can fail
Best for
Budget‑conscious beginners working in darker spaces who still want a clear lens and a bit of extra lighting help.
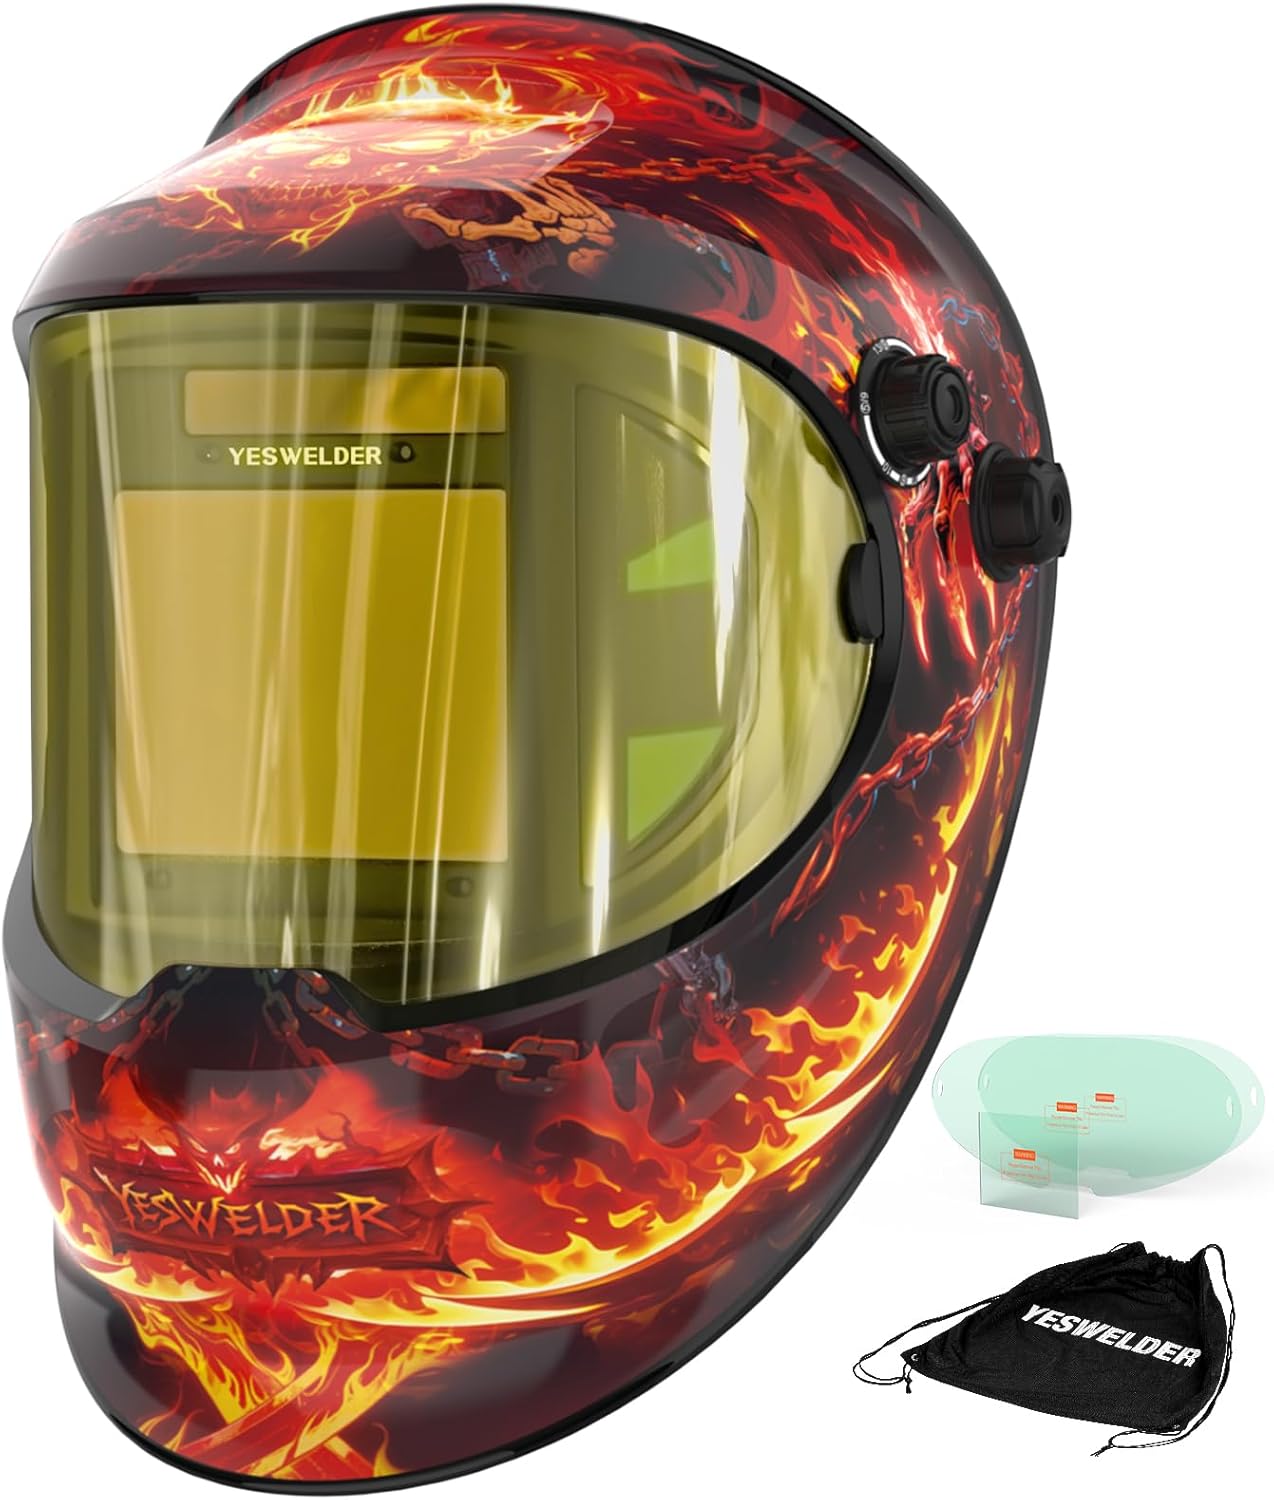
7. YESWELDER LYG‑L500A‑Q – Blue‑Light‑Blocking Compact Helmet
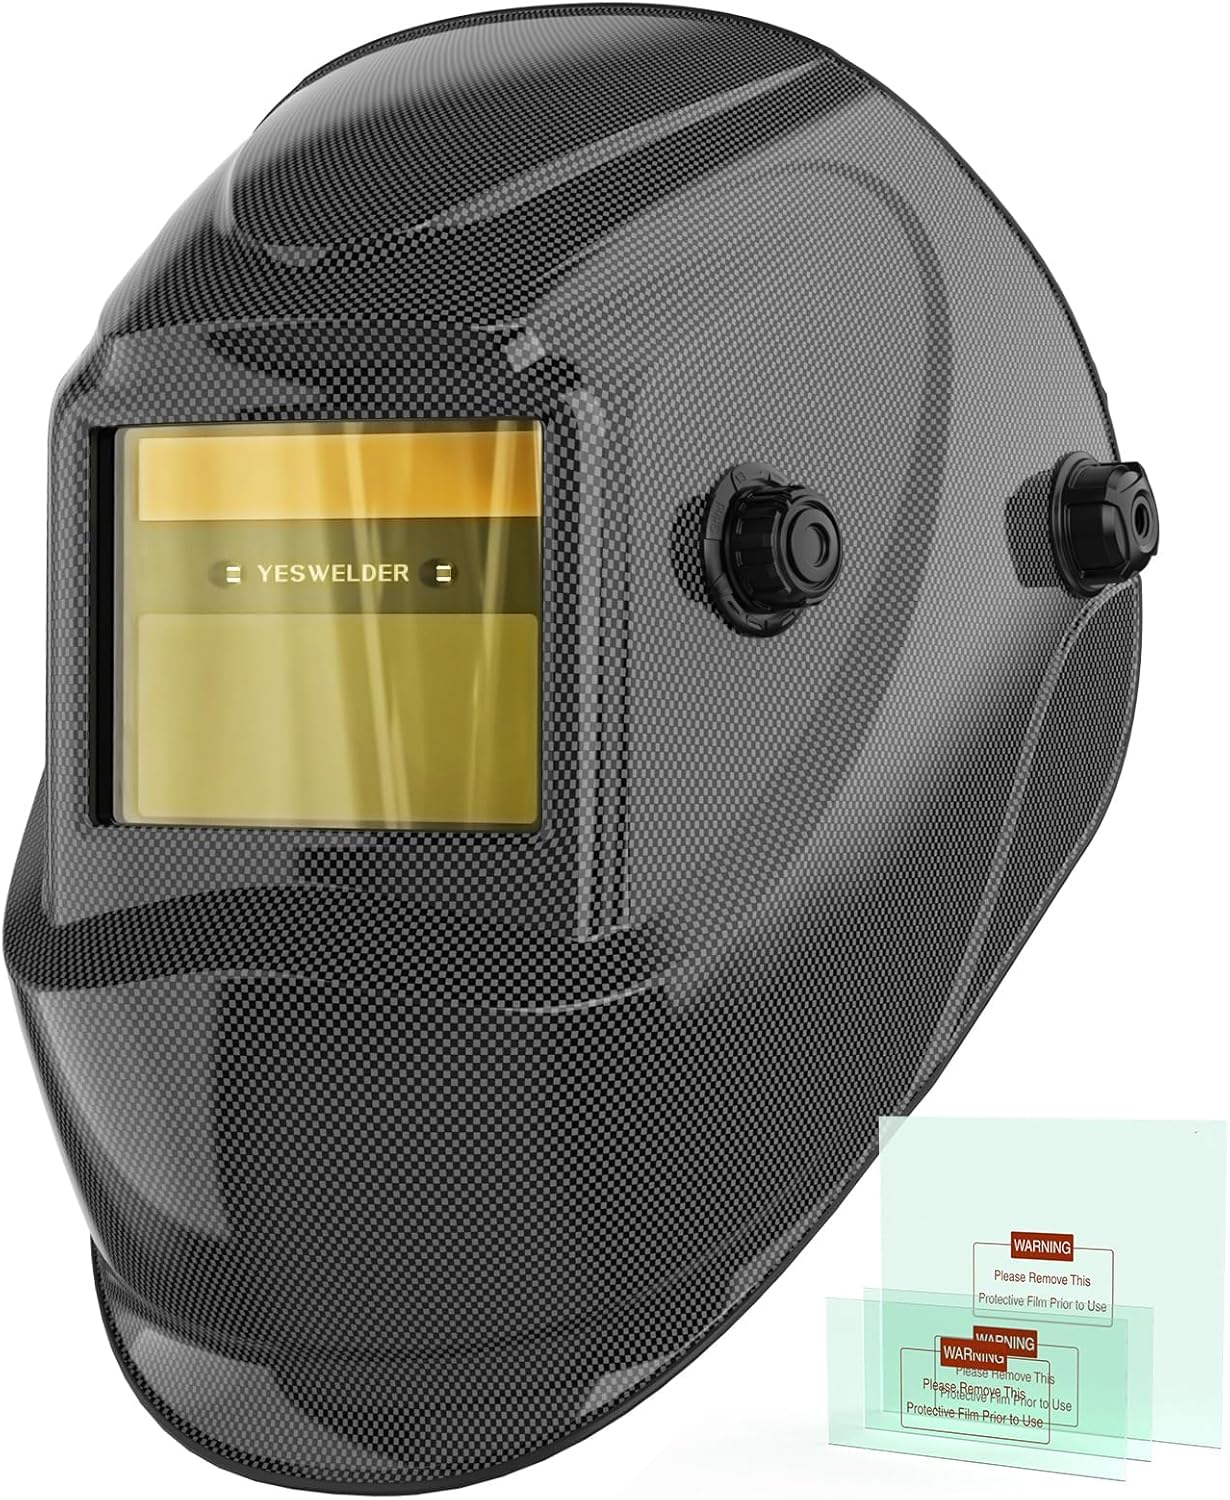
YESWELDER Auto Darkening Welding Helmet LYG‑L500A‑Q
A compact 3.64"×1.67" helmet with blue‑light‑blocking outer lens, 2 sensors, and true‑color optics aimed at eye comfort.
Check PriceWhy it stands out
This YESWELDER model filters blue light, giving beginners a softer, less harsh view that can help reduce eye fatigue during long practice sessions.
Key points
- Viewing area: 3.64″ × 1.67″
- Optical class: 1/1/1/1 or 1/1/1/2 (model‑specific) true‑color
- 2 sensors, quick auto‑darkening
- Shade range around 9–13 with blue‑light‑blocking outer lens
- Solar and internal lithium battery power
Pros
- Gentle, eye‑friendly view for extended use
- Clear optics for seeing the puddle and heat lines
- Light and compact, good for smaller faces
- Strong value for beginners on a budget
Cons
- Smaller viewing area than large‑screen helmets
- Two sensors make it less ideal for extreme positions
- Limited extra features compared with bigger YESWELDER models
Best for
New welders who want a compact, eye‑friendly helmet that’s easy to carry and comfortable to wear for frequent short projects.
8. Auto‑Darkening Helmet with Powered Sensors – Ultra‑Budget Training Option
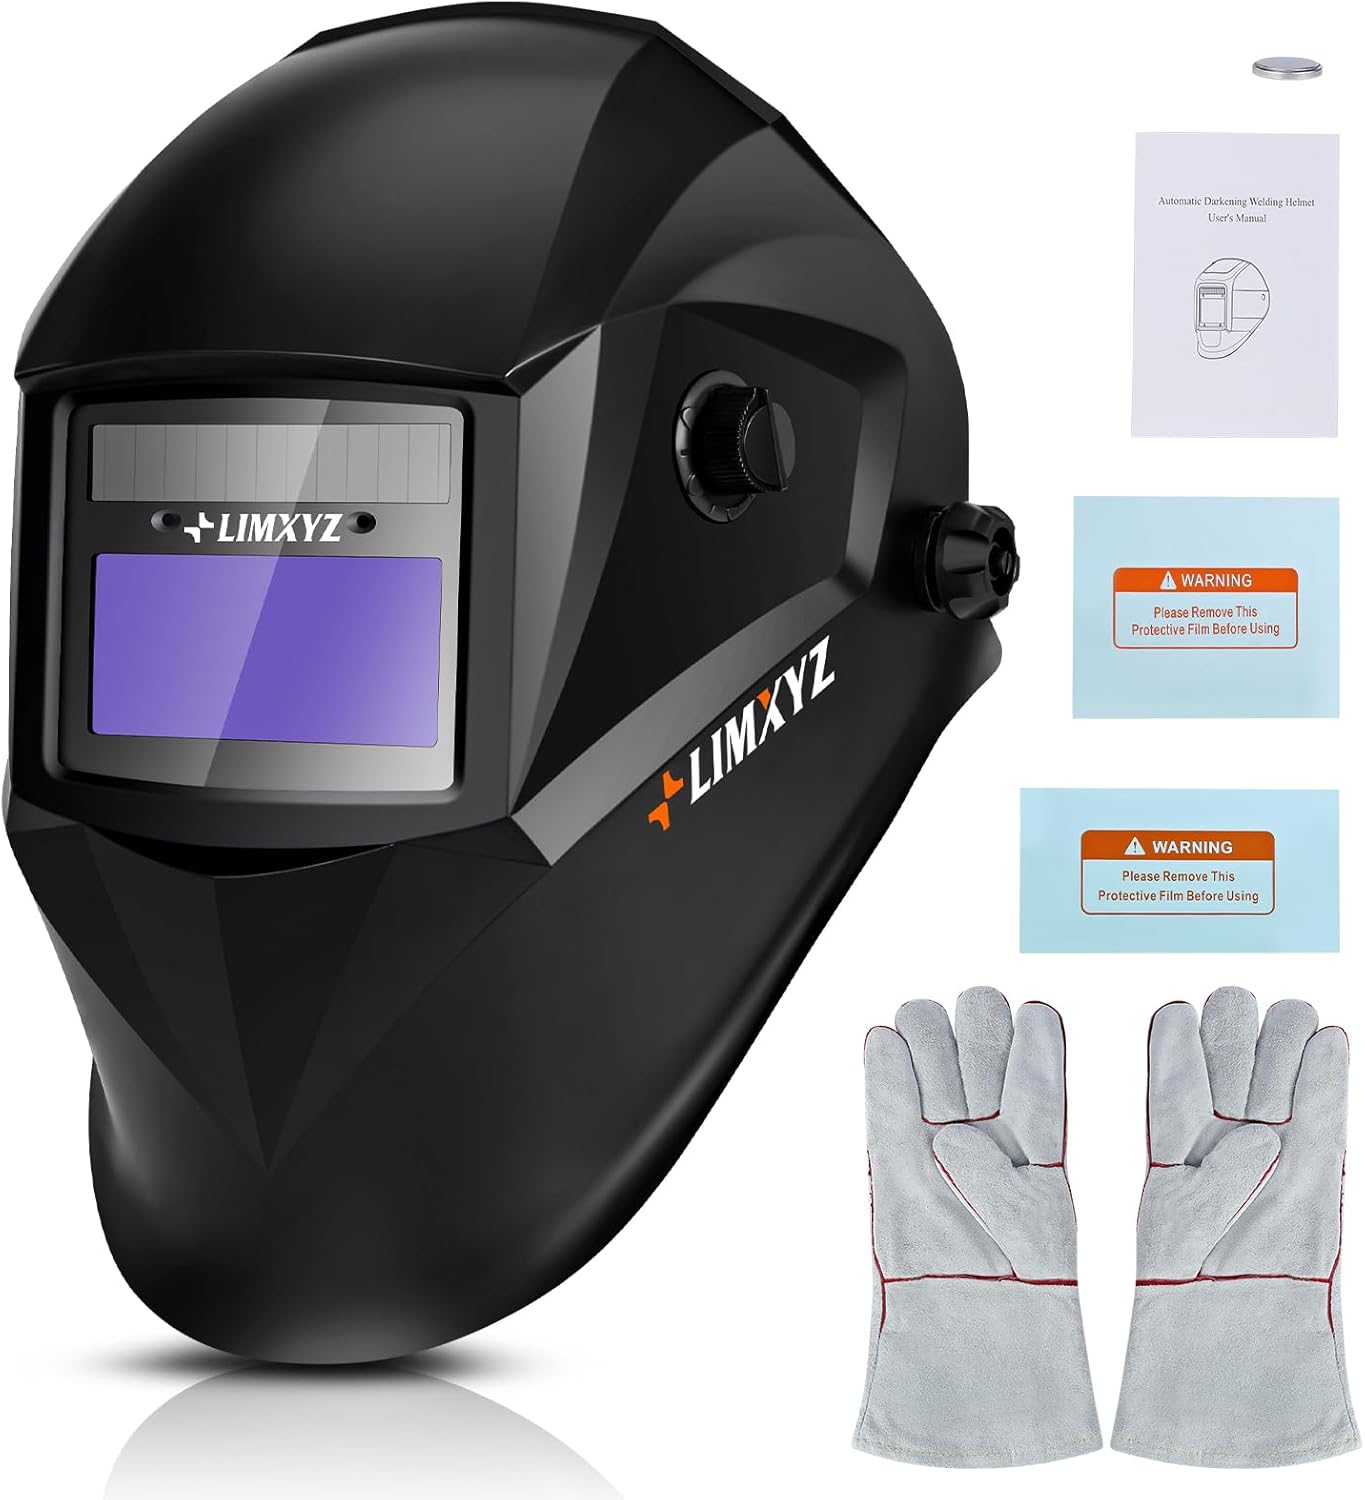
Welding Helmet Auto Darkening, Powered Sensors
A very simple auto‑darkening helmet with a compact viewing area, two sensors, and basic adjustments for new welders on a tight budget.
Check PriceWhy it stands out
This generic style of helmet focuses on the basics: automatic darkening, a small window, and low cost, making it attractive as a first test helmet.
Key points
- Compact viewing window (similar to 3.7″ × 1.6″)
- 2 sensors with auto‑darkening filter
- Typical shade range around 9–13
- Solar + internal battery design
- Suited for occasional MIG and Stick use
Pros
- Very low price, good for trying welding without big investment
- Simple setup and controls
- Light enough for most users
- Fine for flat and bench work
Cons
- Limited information and brand support
- Two sensors only; not ideal for advanced positions
- Optical quality tends to be average, not true‑color
Best for
People who want the cheapest way to start welding and don’t yet know how often they’ll use a helmet.
9. GOL‑SIV Large 4″×4″ Helmet – Huge Window for Easy Learning
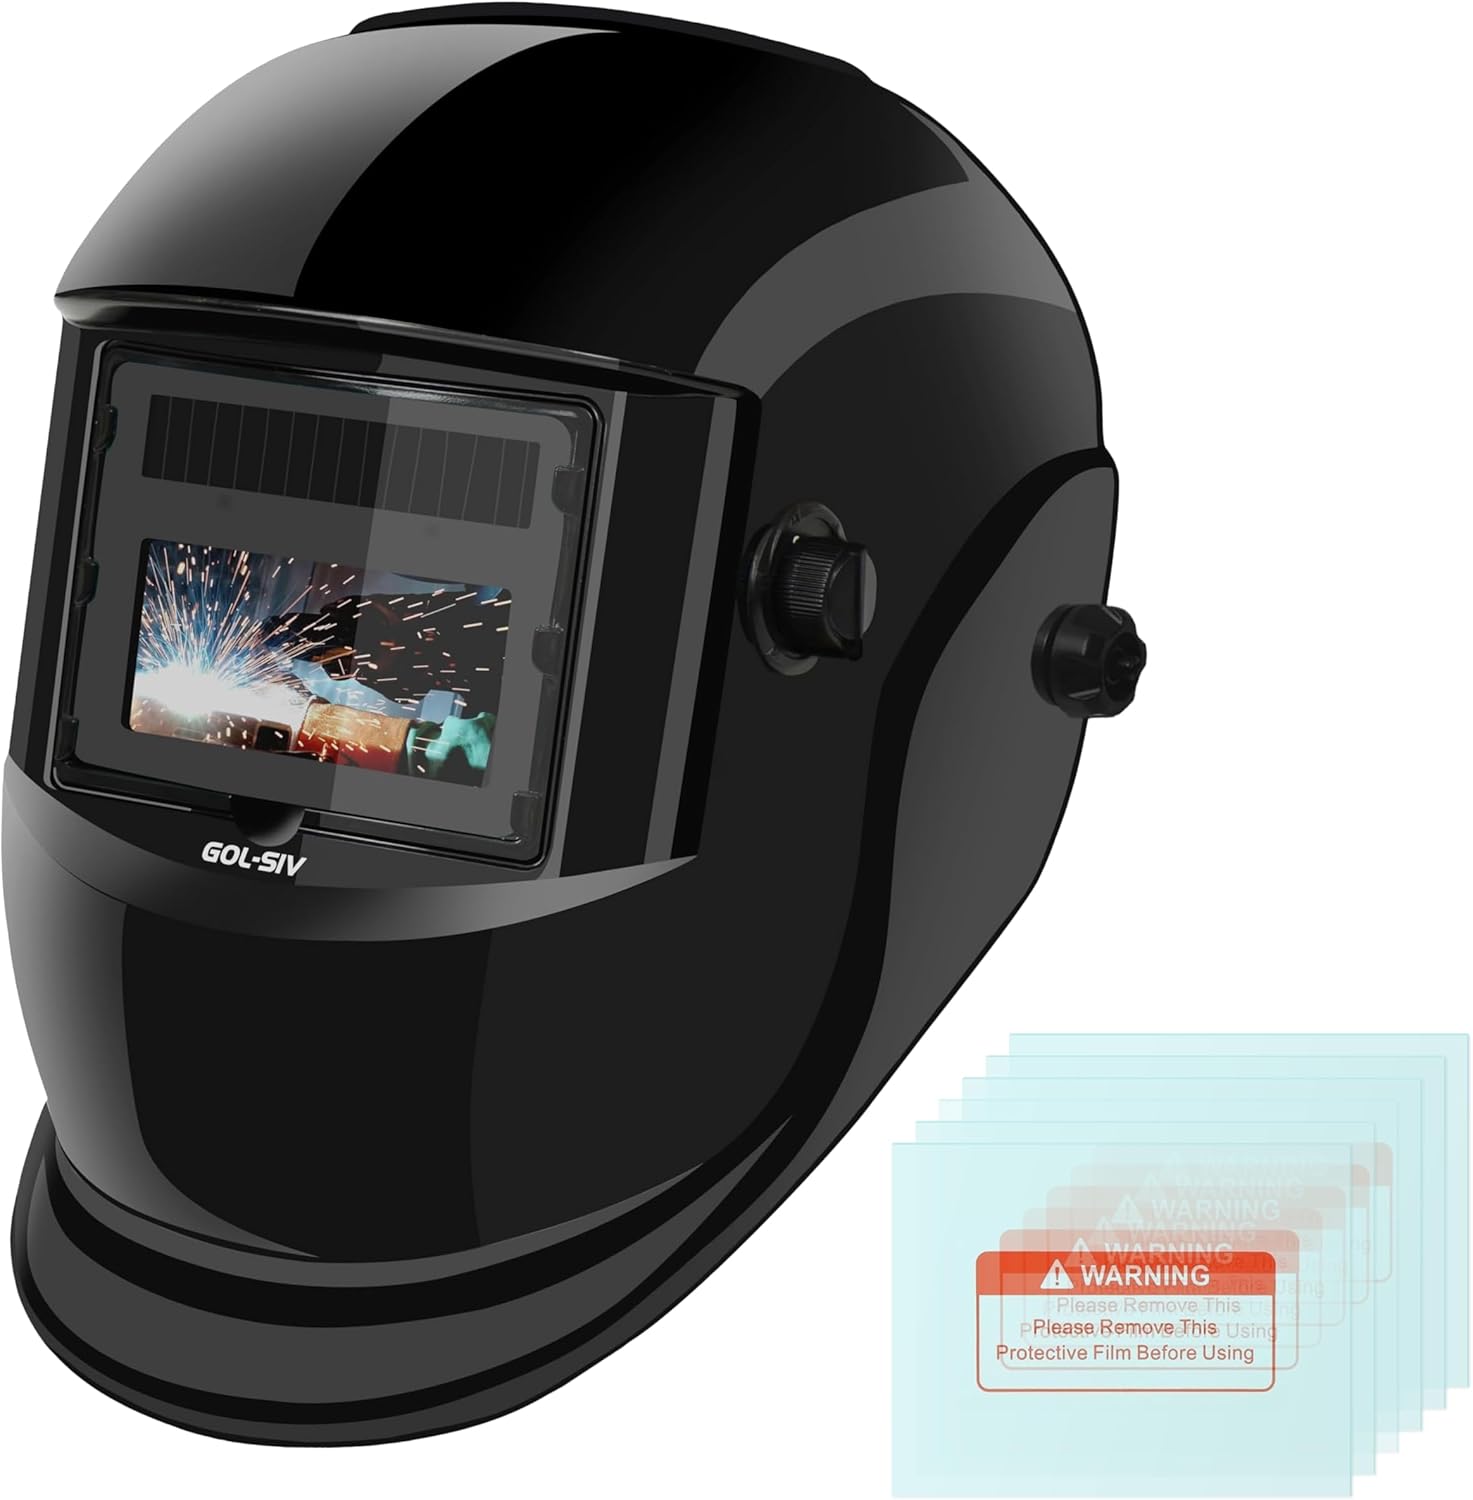
GOL‑SIV Auto Darkening Welding Helmet, Large Viewing
A 4"×4" extra‑large true‑color window with good optical grade and adjustable shade, giving beginners a panoramic feel.
Check PriceWhy it stands out
The GOL‑SIV 4×4 window makes it much easier to track your work without moving your head, which is ideal for people just learning to control the puddle.
Key points
- Viewing area: 4″ × 4″ (very large)
- Optical grade often listed as 1/1/1/2 true‑color
- Shade range around 5–13, adjustable
- Solar + battery powered
- Suited for MIG, TIG, Stick, and grinding
Pros
- Huge view reduces neck strain and head movement
- True‑color optics improve detail and puddle control
- Good for multi‑process learning in one helmet
- Solid value vs traditional big‑brand 4×4 hoods
Cons
- Physically larger; can be awkward in tight spaces
- Slightly heavier than compact helmets
- Fewer mainstream reviews than YesWelder or Miller models
Best for
Beginners who weld mostly at a bench or in open spaces and want maximum visibility while they learn.
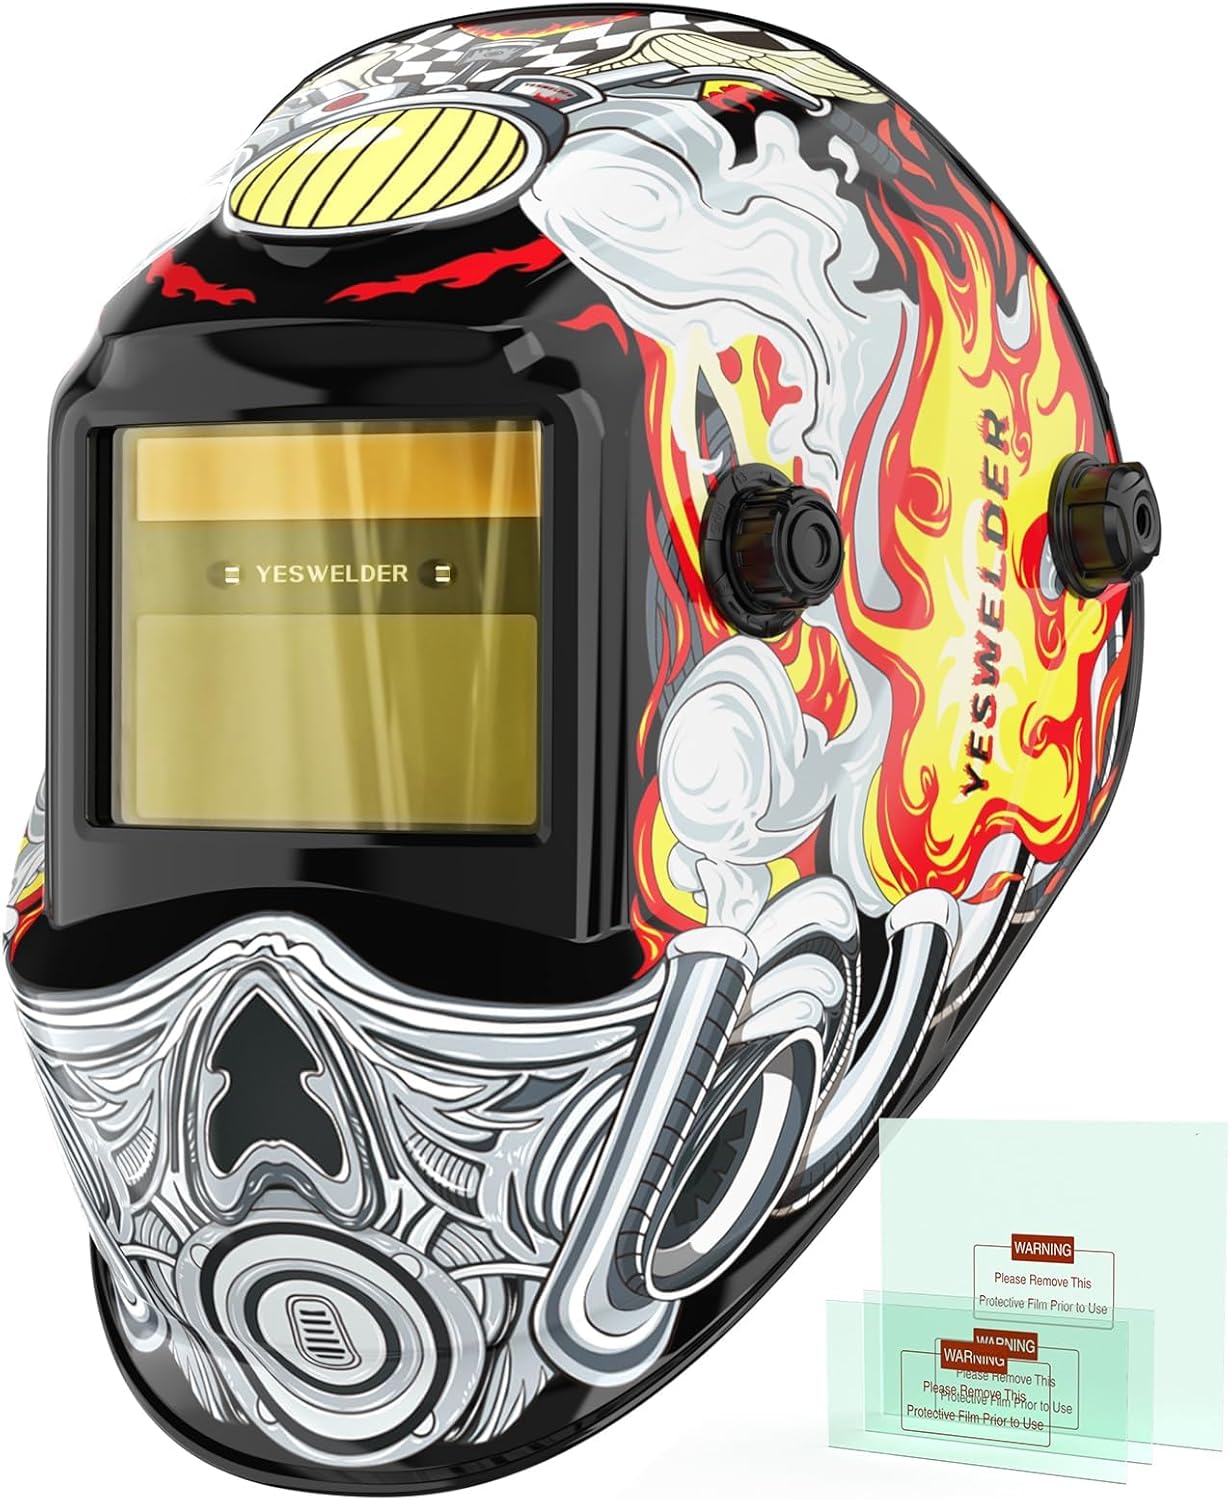
10. TOOLIOM Large‑View Helmet with Light – Big Screen, True‑Color
TOOLIOM Auto Darkening Welding Helmet, Large Viewing
A large 3.94"×3.27" true‑color window with 4 sensors and optional LED light, designed as an affordable “all‑in‑one” beginner helmet.
Check PriceWhy it stands out
Compared with small‑window beginner helmets, this TOOLIOM gives you a much broader view and better sensor coverage without a big jump in price.
Key points
- Viewing area: 3.94″ × 3.27″
- True‑color lens with high optical clarity
- 4 arc sensors for reliable detection
- Shade range: typically 4/5–13 with grind mode
- Solar + battery power, some variants include an LED light
Pros
- Big window helps see more of the joint and surroundings
- Four sensors are more forgiving for new welders
- Works across TIG, MIG, Stick, and grinding
- Still relatively affordable for the feature set
Cons
- Heavier and bulkier than compact helmets
- LED light adds another thing to maintain
- Headgear is decent but not at the level of pro helmets
Best for
Beginners who plan to weld regularly and want a true‑color, large‑view helmet that can grow with their skills.
11. Miller Digital Elite™ Black QR Helmet – Feature‑Rich Mid‑Range Option
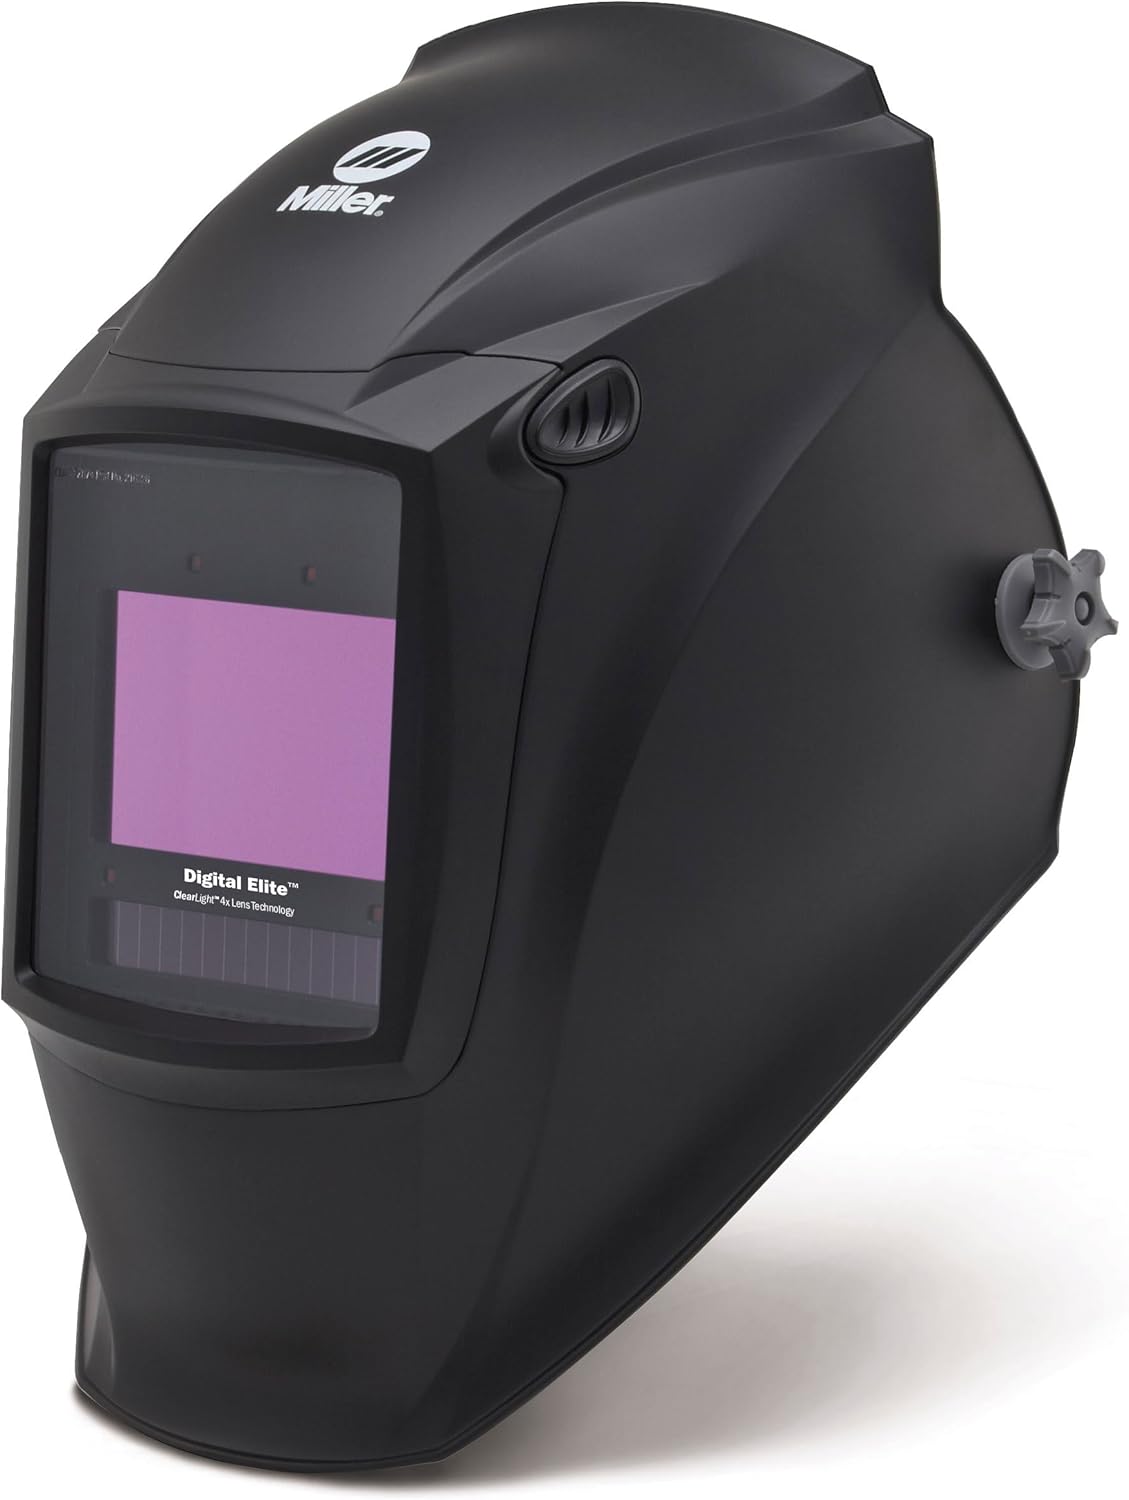
Digital Elite™ Black QR Auto Darkening Welding Helmet
A modern black helmet with a large viewing area, four sensors, and digital controls, aimed at users who want more fine‑tuning options.
Check PriceWhy it stands out
This helmet adds digital controls and high‑end optics, giving beginners a pro feel and lots of adjustment room without going to top‑tier prices.
Key points
- Large main window (around 3.9″ × 3.6″)
- High‑clarity true‑color lens
- 4 independent arc sensors
- Multiple digital modes for weld, cut, grind
- Solar plus internal battery power
Pros
- Fine control over shade, sensitivity, and delay
- Four sensors make arc detection very reliable
- Good viewing size for complex jobs
- Stylish design that feels like serious gear
Cons
- More complex menu can confuse complete beginners
- Higher price than basic beginner helmets
- Digital buttons can be awkward with gloves
Best for
Motivated beginners who are happy to learn the settings and want a helmet that can carry into intermediate or light professional use.
12. YESWELDER LYG‑30800H – Large View with Built‑In Fan and Light
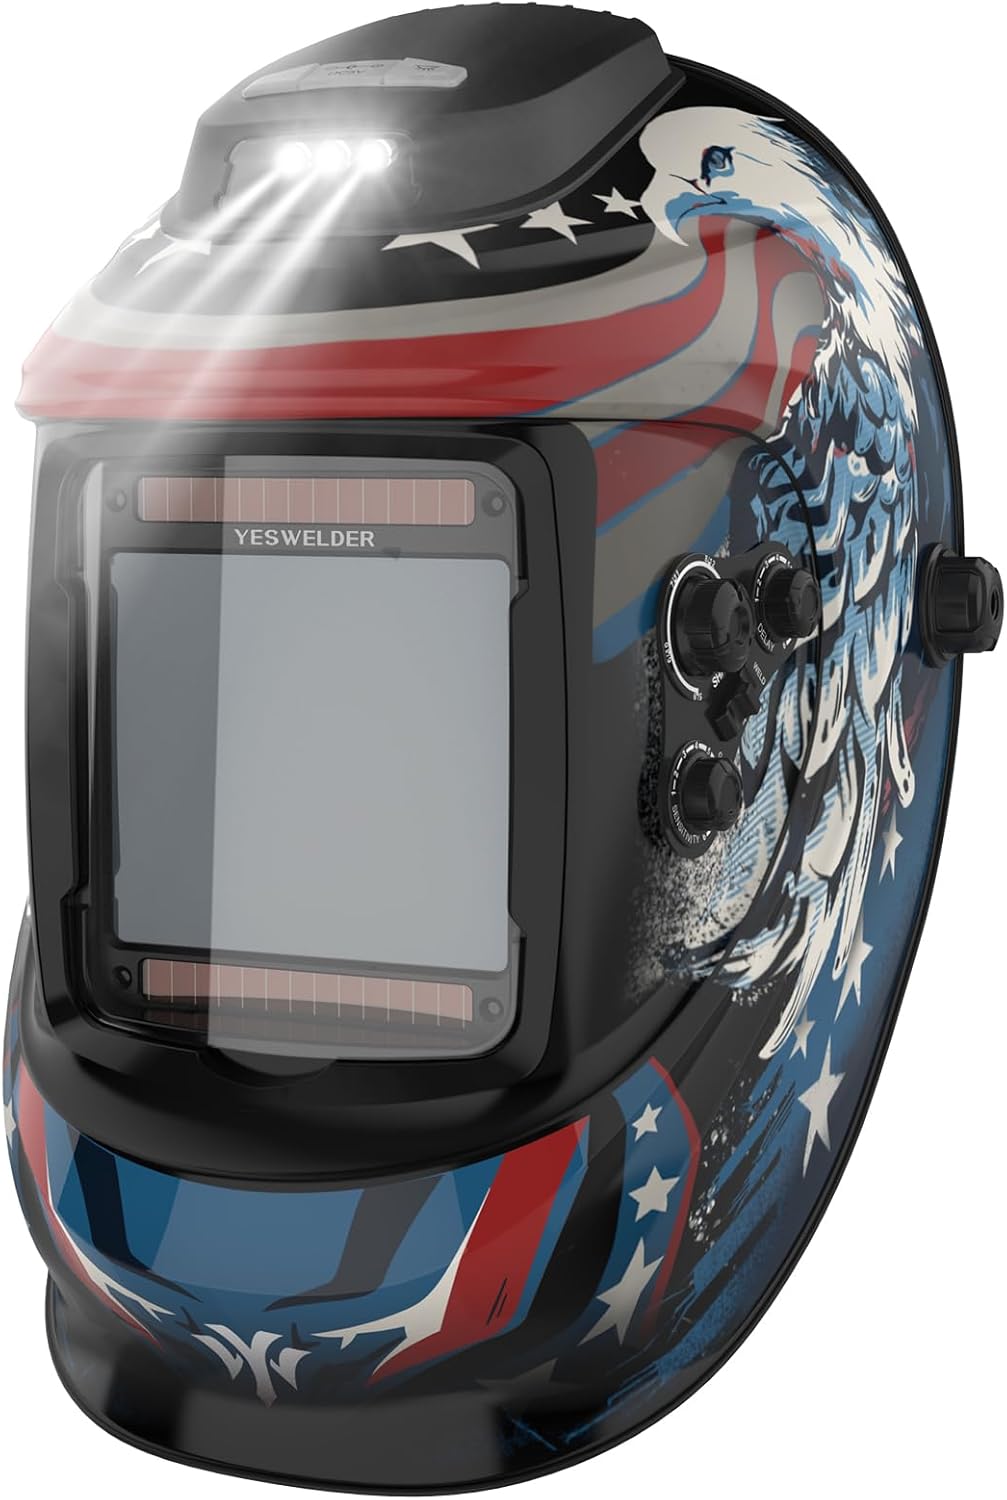
YESWELDER Auto Darkening Welding Helmet with Fan and Light (LYG‑30800H)
A feature‑packed large‑window helmet with 4 sensors, true‑color lens, an integrated cooling fan, and LED light for long, hot welding sessions.
Check PriceWhy it stands out
The built‑in fan and light make this one of the most comfortable beginner helmets for hot garages or longer practice sessions.
Key points
- Viewing area: approx. 3.93″ × 3.66″
- Optical class: 1/1/1/1 true‑color
- 4 sensors, fast switching
- Shade range: around 3/5–9/9–13 with grind mode
- Solar‑assist plus rechargeable battery for fan and ADF
- Integrated LED work light
Pros
- Fan helps reduce fogging and sweat build‑up
- Large, bright view is very beginner‑friendly
- Four sensors give good coverage in many positions
- All‑in‑one helmet for weld, cut, and grind
Cons
- Heavier due to fan, battery, and light
- More electronics = more potential long‑term maintenance
- Needs regular charging if the fan and light are used often
Best for
New welders who expect to spend long periods under the hood and value comfort and visibility as much as low price.
13. Omolith True‑Color Helmet – Compact, Very Clear Lens
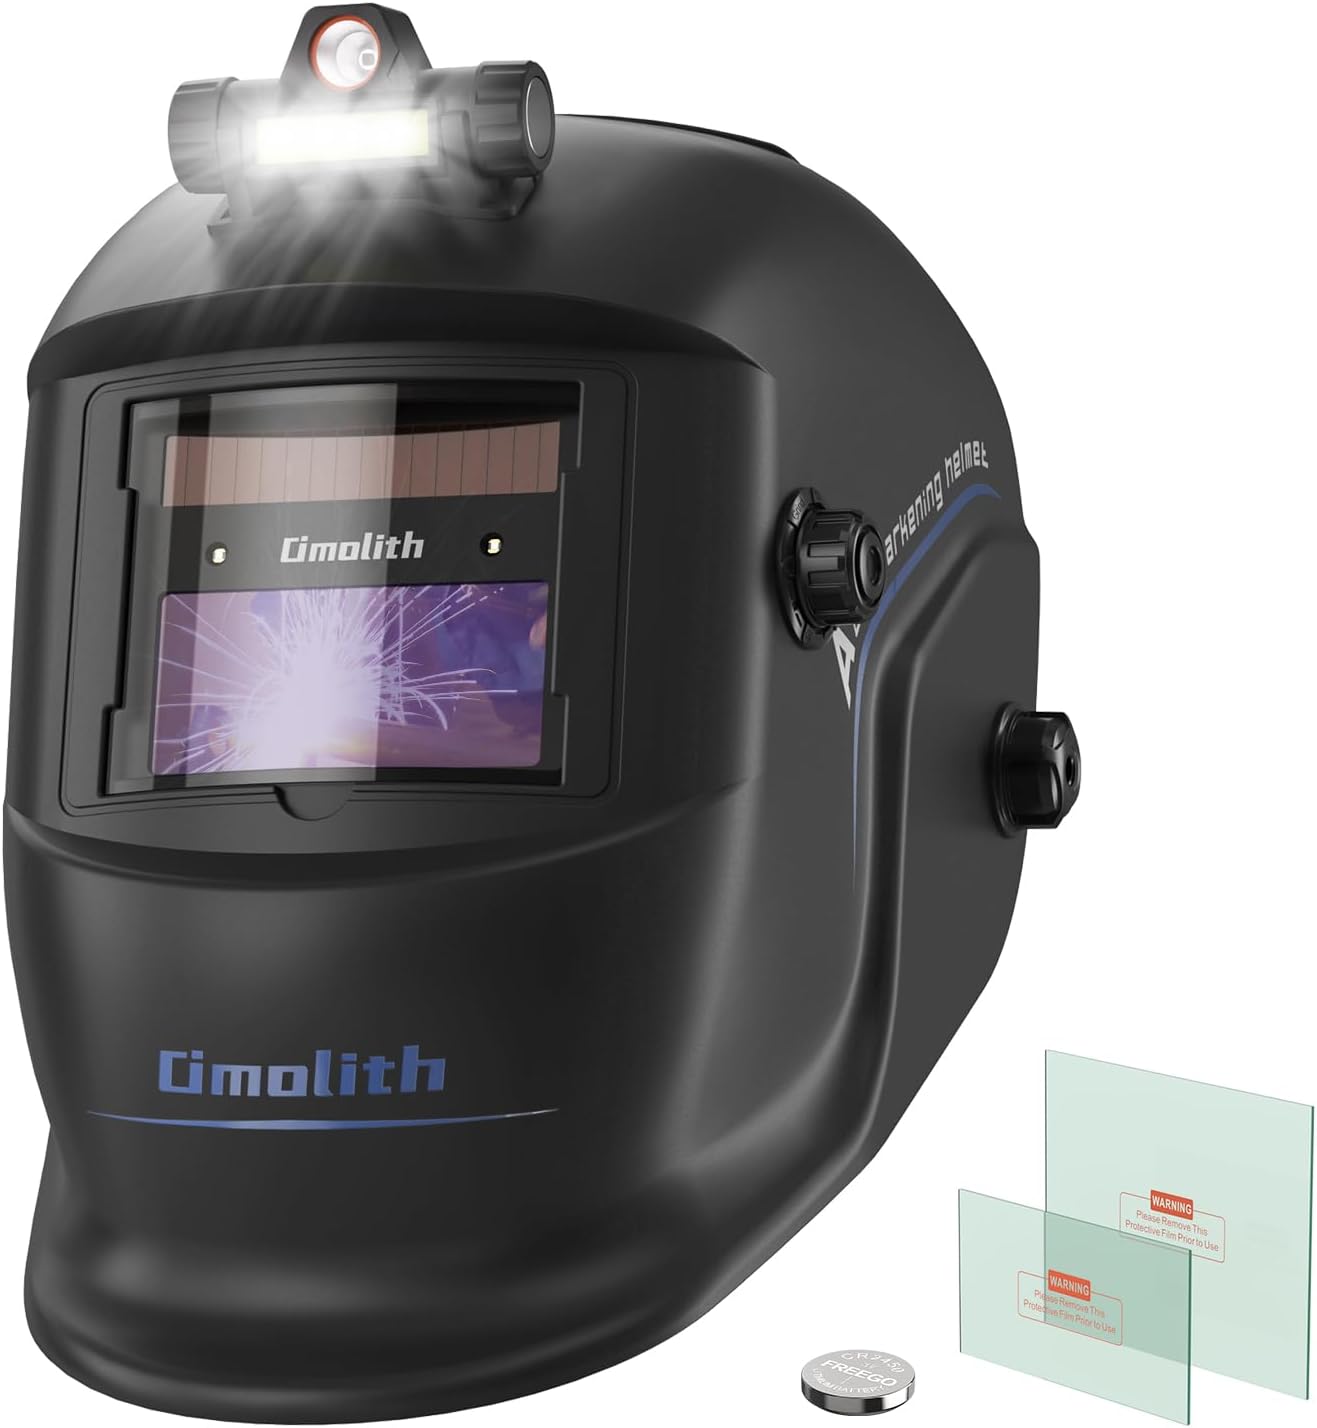
Omolith True Color Auto Darkening Welding Helmet
A compact helmet with a 3.64"×1.67" viewing area, 1/1/1/1 true‑color lens, and simple controls for TIG, MIG, and Stick beginners.
Check PriceWhy it stands out
Omolith focuses on optical quality over size, giving a very sharp view in a small, light shell at a beginner price.
Key points
- Viewing area: 3.64″ × 1.67″
- Optical class: 1/1/1/1 true‑color
- 2 sensors, fast response
- Shade range: around 4/9–13
- Solar powered with internal battery backup
Pros
- Very clear, low‑distortion lens for reading the puddle
- Light and compact, comfortable for smaller users
- Simple adjustments with minimal learning curve
- Good match for hobby TIG, MIG, and Stick
Cons
- Two sensors only; not the best for extreme positions
- Small window compared to large‑view helmets
- Headgear is basic and may need upgrading if used daily
Best for
Beginners who care more about clarity than window size and mainly weld at a bench or in simple positions.
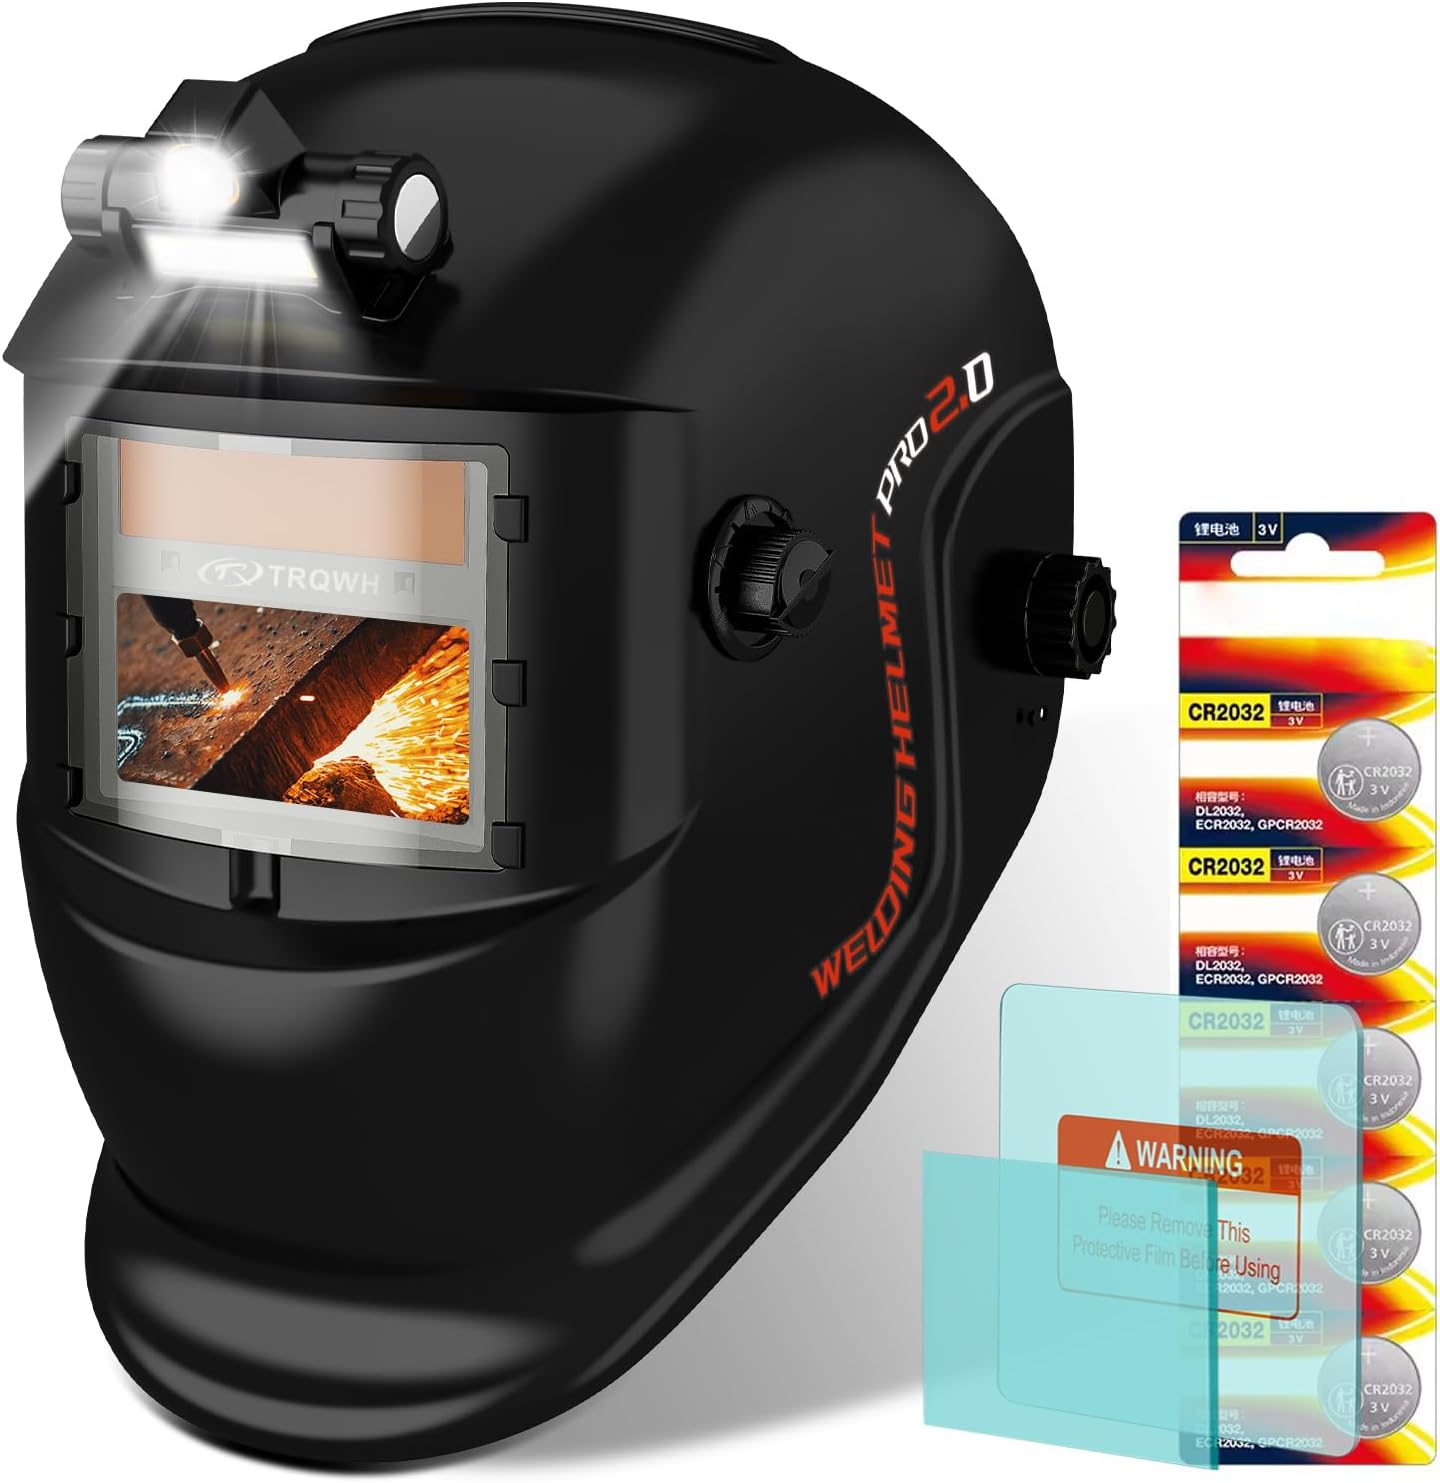
14. TRQWH Auto‑Darkening Helmet – True‑Color with Optional Light
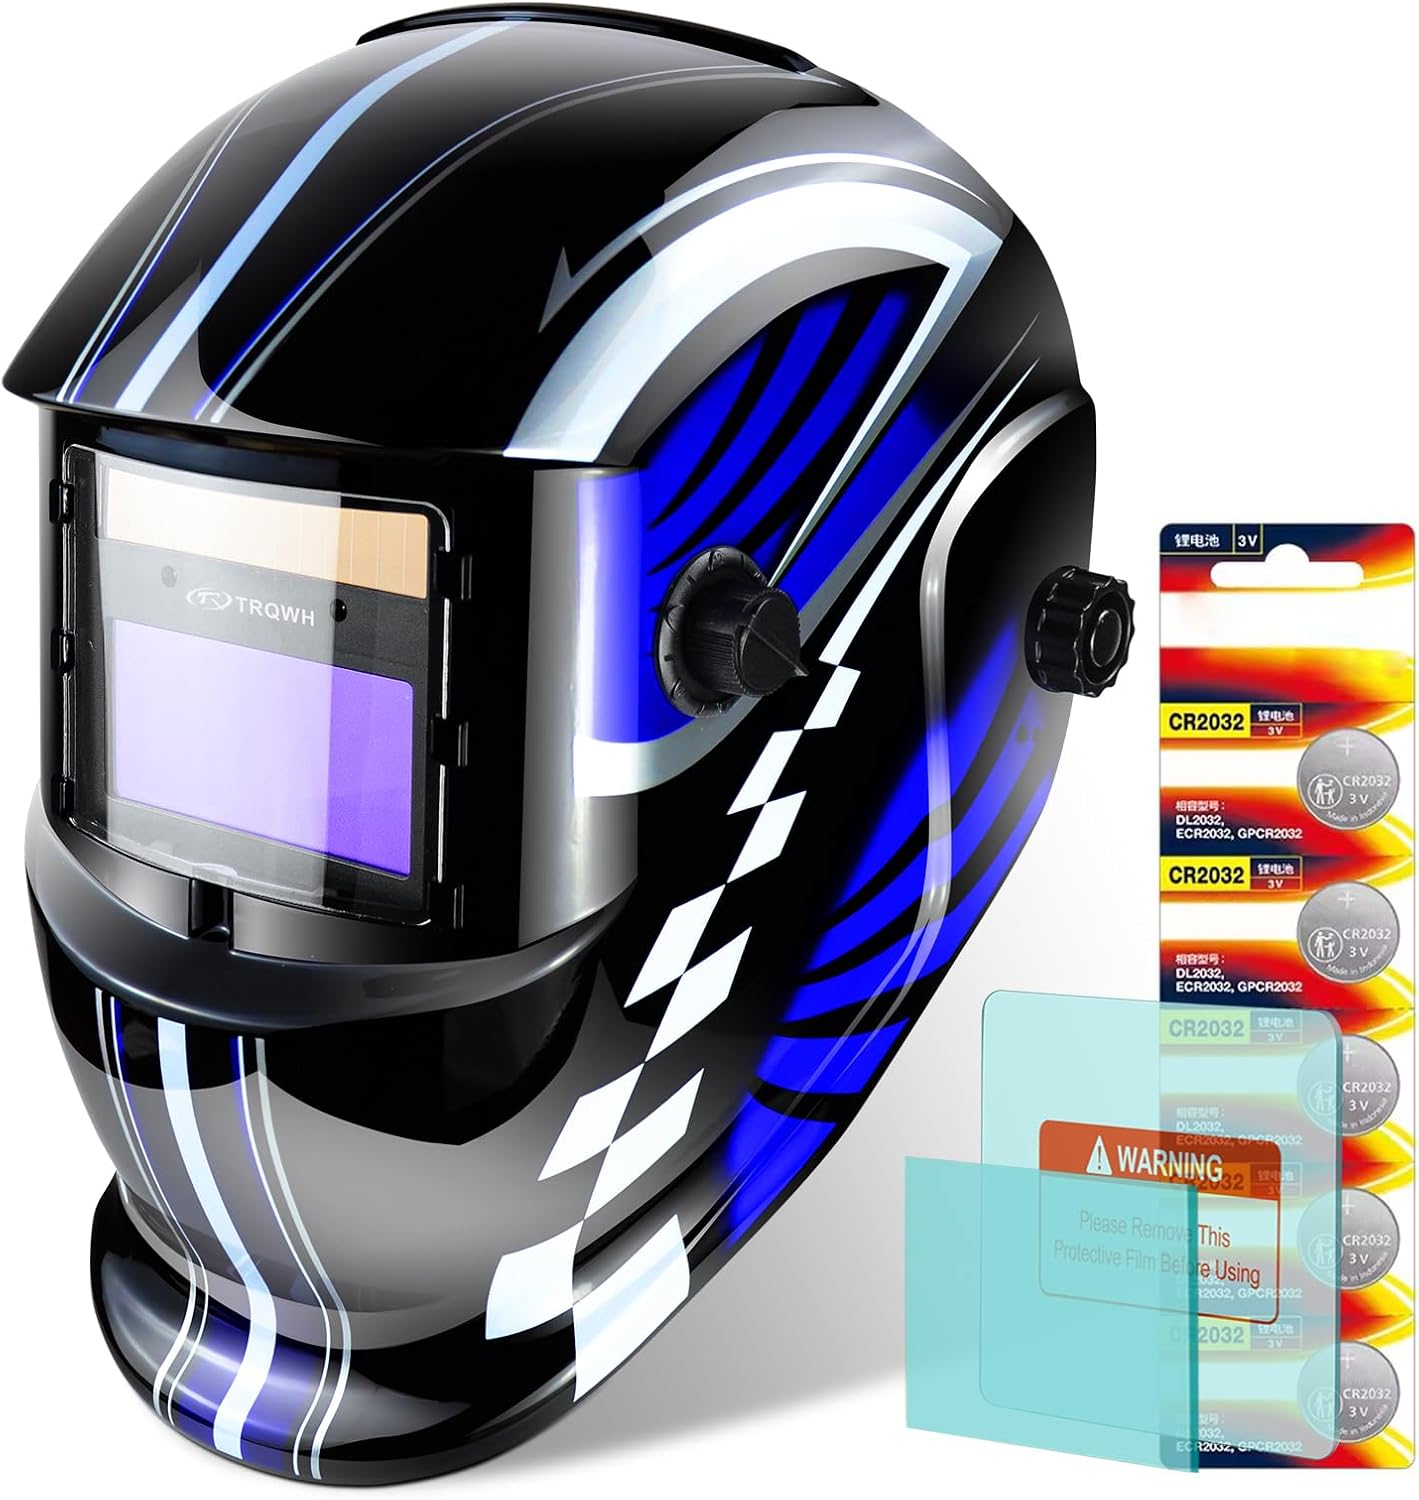
TRQWH Auto Darkening Welding Helmet with Light
A true‑color auto‑darkening helmet with a large main screen, 2 sensors, and some versions including a built‑in LED light for added visibility.
Check PriceWhy it stands out
TRQWH is often priced like basic helmets but adds true‑color optics and options like LED lighting, making it a strong upgrade for new welders.
Key points
- Large viewing area (similar to 3.9″ × 3.2″)
- True‑color lens, good optical rating
- 2 sensors, ~1/25,000 s darkening
- Shade range: roughly 4/9–13 with grind mode
- Solar cells plus replaceable lithium batteries
Pros
- Clear, natural‑color view
- Larger window than many budget options
- Simple controls suitable for beginners
- LED light (on some versions) is helpful in dim shops
Cons
- Two sensors instead of four on some competitors
- Slightly bulkier shell than compact helmets
- Brand less known than big names like Miller or Lincoln
Best for
Home welders who want more window size and clearer optics than ultra‑cheap helmets, but still need to keep cost under control.
15. YESWELDER LYG‑Q800D – Panoramic View with Side Windows
YESWELDER Auto Darkening Welding Helmet with SIDE VIEW, LYG‑Q800D
A panoramic helmet with a 3.93"×3.23" main screen, non‑darkening side windows, 4 sensors and true‑color optics for wide awareness.
Check PriceWhy it stands out
The Q800D is one of the most popular budget panoramic helmets, letting beginners see more of their surroundings while still getting a high‑quality main view.
Key points
- Main viewing area: 3.93″ × 3.23″ plus side windows
- Optical class: 1/1/1/1 true‑color
- 4 sensors, fast switching
- Shade range: 5–9 / 9–13 with grind mode
- Solar + internal battery power
Pros
- Wide field of view, especially with side windows
- Four sensors keep auto‑darkening consistent
- True‑color lens makes puddle and joint easier to read
- Good value compared with premium panoramic hoods
Cons
- Larger and heavier than compact helmets
- Side windows do not darken and can admit bright light
- Not ideal in very tight spaces around pipe or inside tanks
Best for
Beginners who mostly weld in open areas and want a helmet that feels more open and less tunnel‑like while they learn.
16. YESWELDER Blue‑Light‑Blocking Helmet – Eye‑Comfort Focused
YESWELDER Auto Darkening Welding Helmet, Blue Light Blocking
A compact, true‑color helmet with a 3.64"×1.67" view, 1/1/1/1 optics and a blue‑light‑blocking outer lens to reduce eye fatigue.
Check PriceWhy it stands out
This model is built around eye comfort, using a special outer lens to cut blue light while still giving a clear, detailed picture.
Key points
- Viewing area: 3.64″ × 1.67″
- Optical class: 1/1/1/1 true‑color
- 2 sensors, quick switching
- Shade range: about 3.5/9–13
- Solar‑assist with internal battery
Pros
- Very sharp, low‑distortion weld view
- Blue‑light‑blocking design is easier on sensitive eyes
- Light and compact shell for beginners
- Good for MIG, Stick and many TIG applications
Cons
- Smaller viewing area than large‑screen helmets
- Two sensors only; complex positions can be trickier
- No side windows or fan; feature set is simple
Best for
Beginners who feel eye strain quickly or expect to tack and weld frequently and want a softer, more comfortable view.
17. Throne Standard Helmet – Flip‑Up Sugar‑Scoop Style Shell
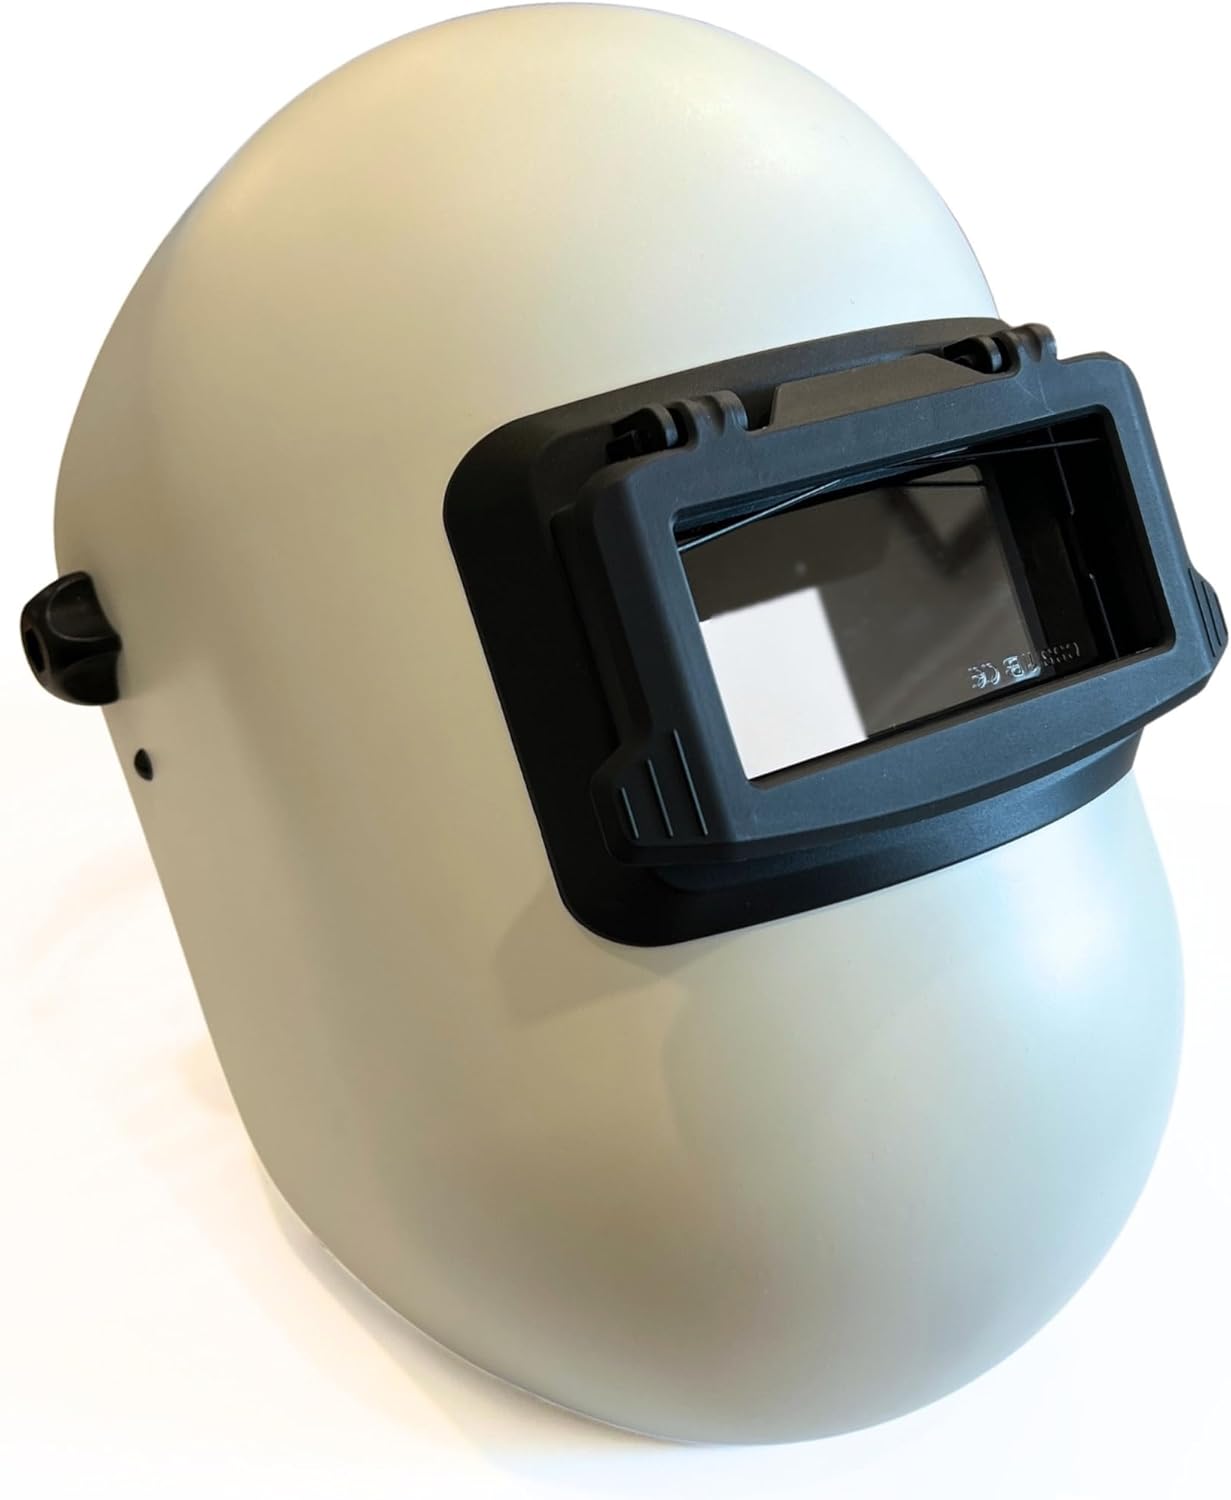
Throne Welding Standard Helmet with Retainer
A low‑profile sugar‑scoop style hood that uses standard lenses and a flip‑up front, ideal if you plan to add your own auto‑darkening 2×4 lens later.
Check PriceWhy it stands out
Unlike most helmets in this list, the Throne is mainly a shell and retainer system, giving beginners a lightweight hood that can be customised with different lenses.
Key points
- Sugar‑scoop / pipeliner‑style shell
- Uses standard 2″ × 4 1/4″ lenses (passive or auto‑darkening)
- Flip‑up front for quick inspection and grinding
- Lightweight fiberglass or composite build (model‑specific)
- Narrow, low‑profile design for tight spaces
Pros
- Very light and low‑profile, great for confined areas
- Flip‑up design lets you inspect work quickly
- You choose the exact lens (passive or ADF) you prefer
- Long‑term flexibility as your needs change
Cons
- Not auto‑darkening out of the box
- Requires extra purchase and setup of the lens
- Smaller viewing area than modern panoramic helmets
Best for
Beginners interested in pipeline or structural work who like the idea of a custom low‑profile hood they can upgrade over time.
18. Auto‑Darkening Helmet with Light – Basic Hood with Built‑In Illumination
Welding Helmet Auto Darkening with Light
A small, budget auto‑darkening helmet with a compact viewing window and an integrated LED light for dark workspaces.
Check PriceWhy it stands out
This helmet is simple but practical, offering basic auto‑darkening protection plus extra lighting to help beginners see their layout and joint.
Key points
- Compact viewing window (similar to 3.7″ × 1.6″)
- Auto‑darkening filter with adjustable shade
- Built‑in LED work light
- Solar‑assist and internal battery
- Good for MIG/Stick and light TIG practice
Pros
- Extra light is useful in dim garages or sheds
- Lightweight shell that most beginners can wear comfortably
- Very affordable, easy to justify as a first helmet
- Simple, clear controls
Cons
- Smaller view than mid‑range helmets
- LED adds another battery draw and possible failure point
- Unknown brand and long‑term durability
Best for
DIYers testing the waters with welding who mostly work in darker corners and want a cheap, functional helmet.
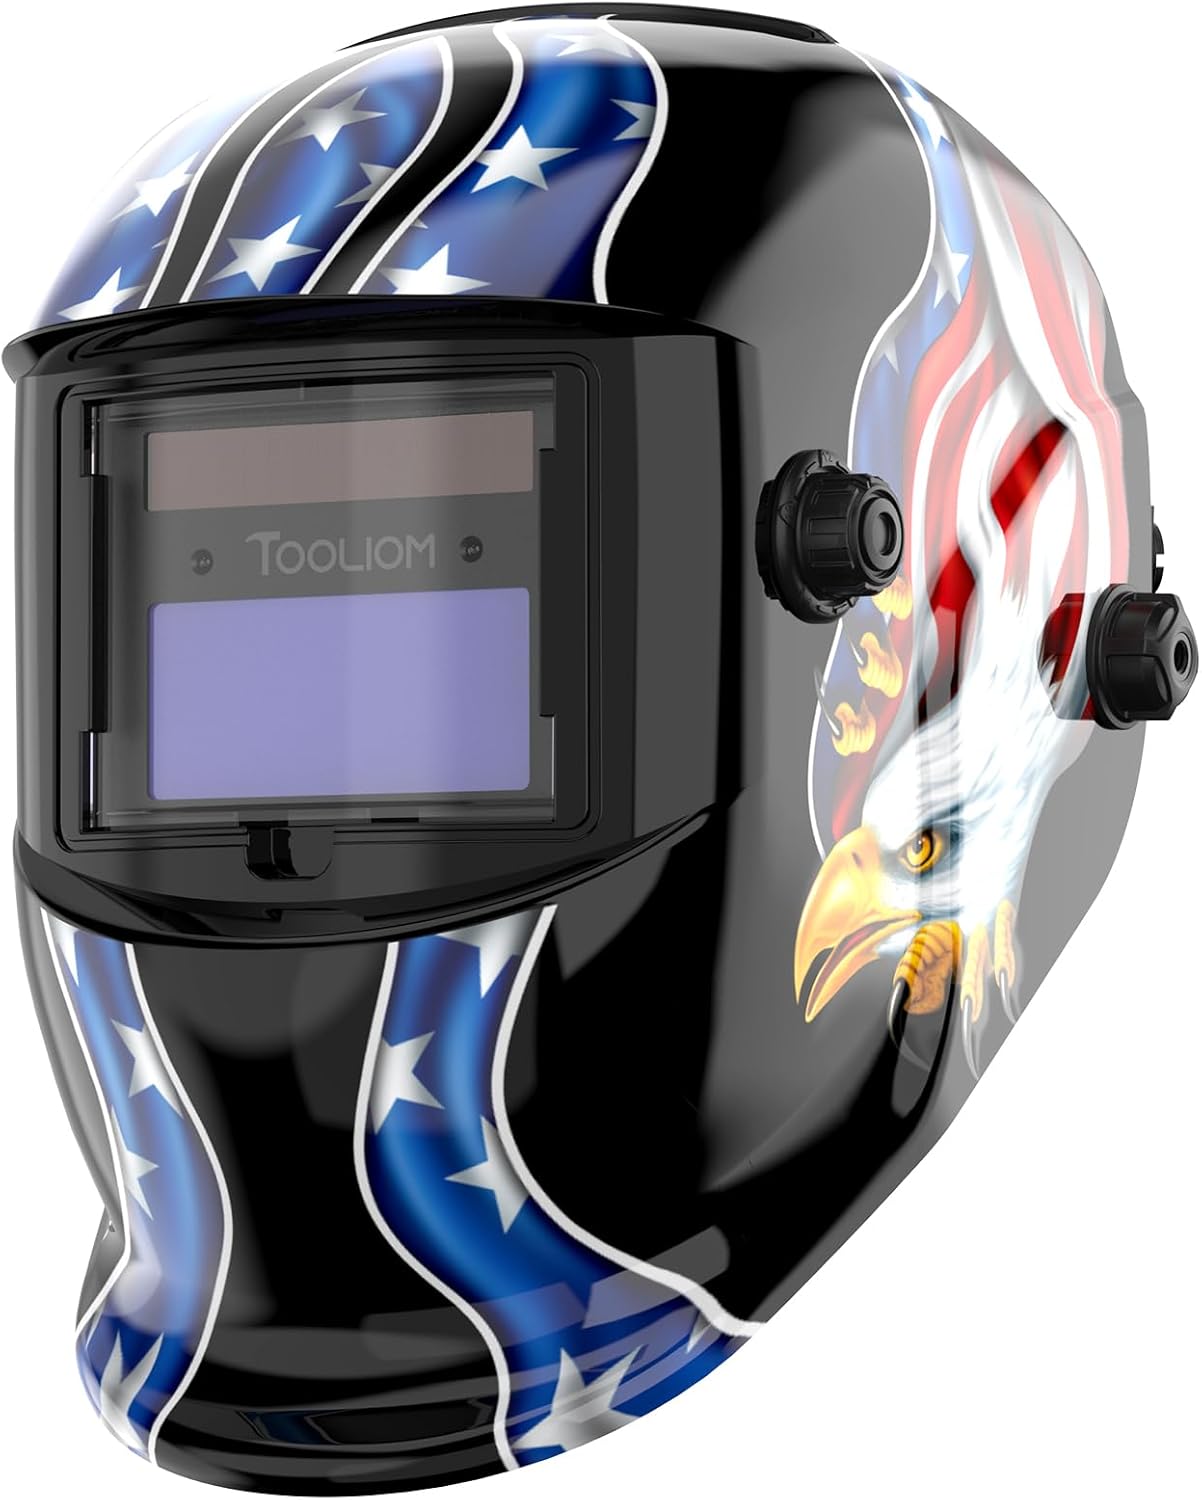
19. VORITO Large‑View Helmet – 4 Sensors with Fast 1/30,000 s Response
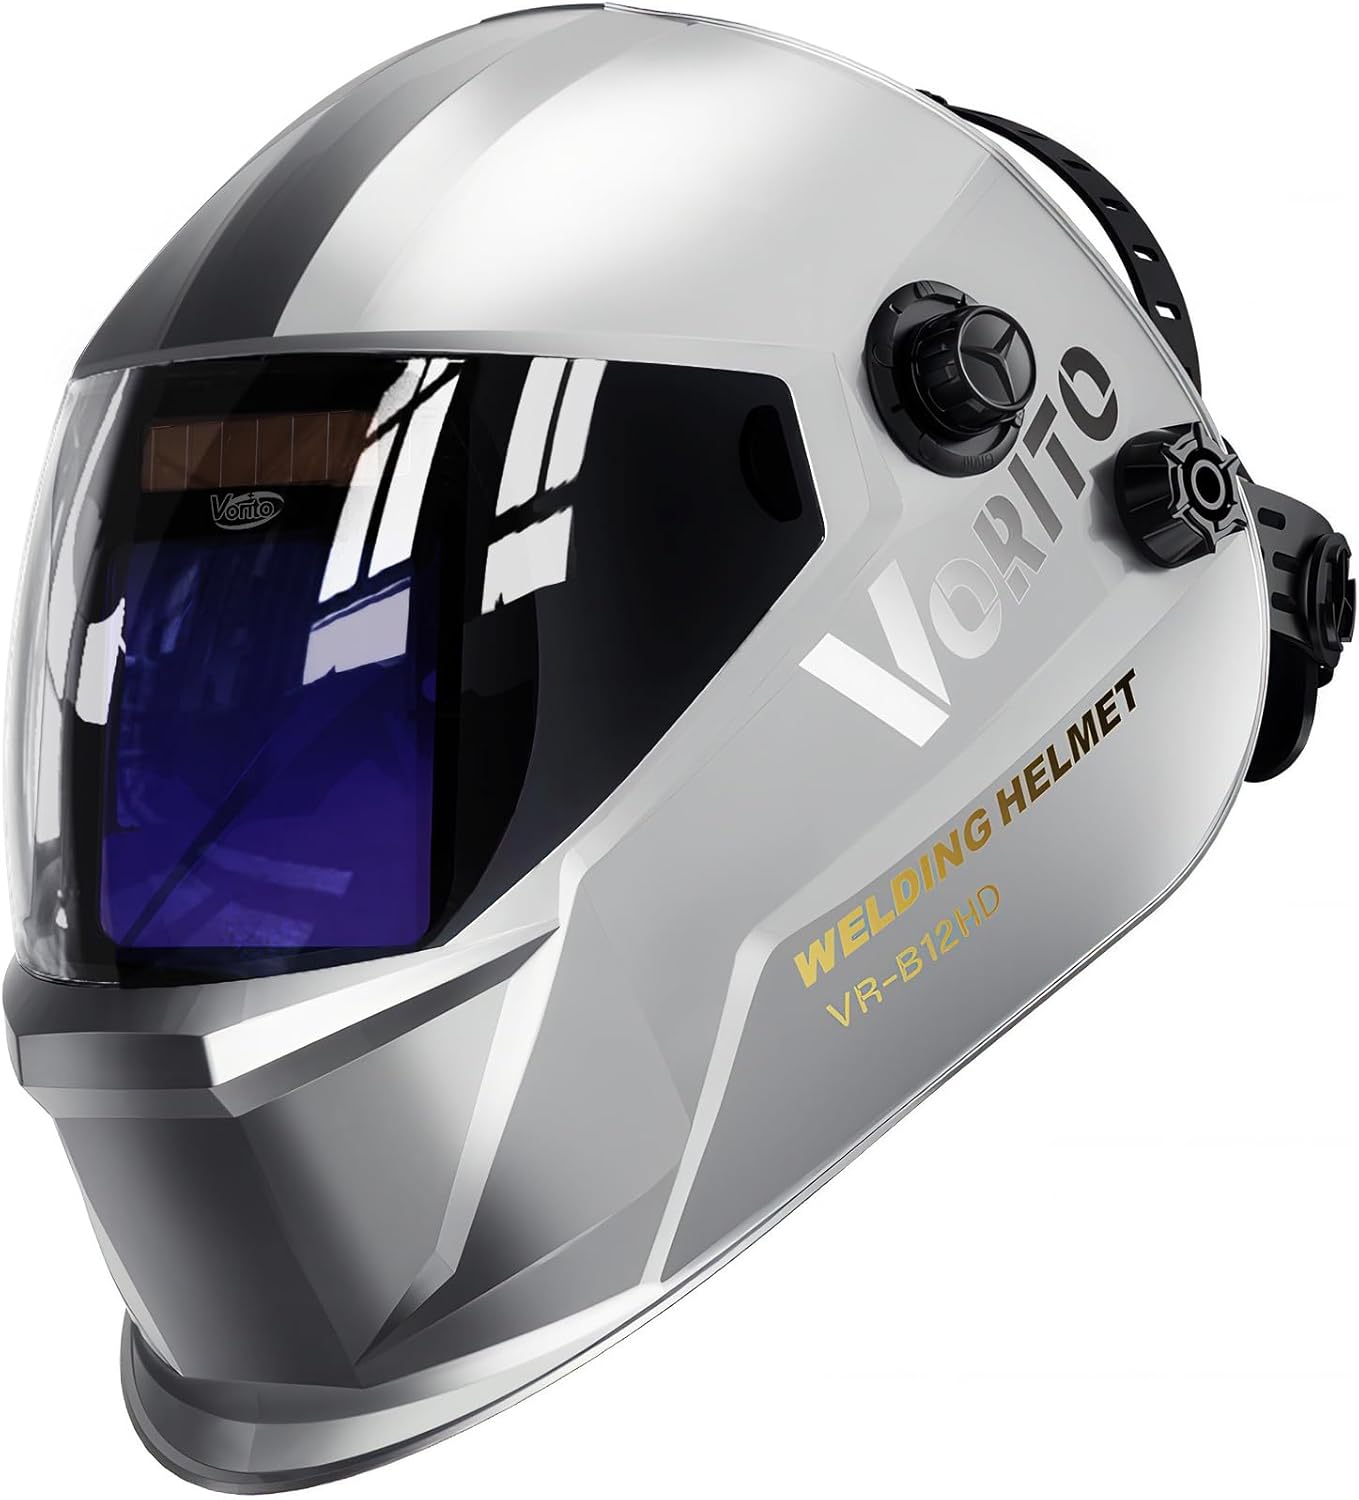
VORITO Welding Helmet Auto Darkening True Color Large Viewing
A true‑color helmet with a 3.94"×1.97" window, 4 sensors, and 1/30,000 s darkening speed for reliable protection in many positions.
Check PriceWhy it stands out
VORITO is one of the faster‑switching helmets in this price range, offering four‑sensor reliability and a wide shade range to cover most beginner tasks.
Key points
- Viewing area: 3.94″ × 1.97″
- Optical class: often listed as 1/1/1/1 true‑color
- 4 sensors, 1/30,000 s response time
- Shade range: DIN 4/5–13 with grind mode
- Solar + rechargeable or replaceable battery
Pros
- Fast switching gives a comfortable, flicker‑free experience
- Four sensors help when working around pipe or brackets
- True‑color optics improve detail and depth perception
- Good value for the feature set
Cons
- Window is wide but not as tall as some large‑view helmets
- Slightly heavier than minimal budget hoods
- Headgear is functional but may need tweaks for best comfort
Best for
Beginners who expect to try different positions and want a fast, reliable helmet with good optics and decent coverage.
20. ANDELI OPTIM‑600LB (B0FXLYJ5PJ) – 180° Panoramic Beginner Upgrade
ANDELI OPTIM‑600LB Panoramic Auto Darkening Welding Helmet
A 180°‑style panoramic helmet with about a 4.6"×3.2" main view plus side lenses, true‑color optics, and fully digital controls.
Check PriceWhy it stands out
ANDELI’s OPTIM‑600LB gives beginners a very wide, immersive view and advanced lens control usually found in more expensive helmets.
Key points
- Main viewing area: about 4.6″ × 3.2″ plus side windows
- Total panoramic area around 7.2″ × 3.2″
- True‑color, digitally controlled lens
- Shade range: 4/5–9/9–13 (multi‑mode)
- Solar + 500 mAh rechargeable battery (USB‑charged)
- Rated for TIG, MIG, Stick, and plasma cutting
Pros
- Huge panoramic view, excellent for learning body and torch position
- Digital controls make it easy to fine‑tune for any process
- Side windows improve awareness of surroundings
- Strong build quality for the price
Cons
- Larger and heavier than basic helmets, can feel front‑heavy
- Price is usually at the top end of beginner budgets
- Extra electronics mean you must remember to charge it
Best for
New welders who are serious about welding and want a feature‑rich panoramic helmet that will still make sense as their skills grow.
Which Beginner Helmet Should You Choose?
For most new welders, the best starter helmet is:
- True‑color lens (easier on the eyes, better puddle detail)
- Viewing area around 3.9″×3.2–3.6″ (good visibility without huge weight)
- Four sensors (more reliable switching in real‑world positions)
- Shade range 4/5–13 with grind mode (covers learning TIG, MIG, and Stick)
If that sounds like you, strong all‑round picks include:
- MIGVAN Large‑View – big screen, 4 sensors, rechargeable power
- TOOLIOM Large‑View – 3.94″×3.27″ window, true‑color, 4 sensors
- VORITO 4‑sensor helmet – fast 1/30,000 s switching, clear optics
If you want a lighter, cheaper first helmet and mostly weld at a bench, look at:
- VILSIN compact true‑color
- TOOLIOM compact 3.64″×1.67″
- Omolith true‑color compact
If you care most about comfort and visibility for longer sessions, consider:
- YESWELDER LYG‑30800H (fan + light)
- YESWELDER LYG‑Q800D or ANDELI OPTIM‑600LB (panoramic view)
Think about where you weld (tight vs open spaces), how long you’ll wear the helmet, and which processes you want to learn first. Then pick the helmet whose view size, sensor count, and comfort match that reality. That way your first helmet helps your learning instead of holding you back.
How to Choose a Welding Helmet for Beginners
1. Auto-Darkening vs. Passive Helmets
Auto-darkening helmets adjust the lens shade instantly when you strike an arc. Beginners benefit because it reduces eye strain and eliminates the need to flip the helmet constantly. Passive helmets are cheaper but require manual flipping.
2. Viewing Area
Larger viewing areas make it easier to see the weld pool and surrounding metal. Look for a helmet with at least 3.8 x 1.7 inches for beginners.
3. Comfort & Weight
Beginner welders often wear helmets for extended periods. Choose a lightweight helmet (around 1–1.6 lbs) with adjustable headgear.
4. Lens Reaction Time & Shade Range
Reaction time is how fast the lens darkens (1/25,000 second is ideal). Shade ranges like 9–13 cover most welding applications for beginners.
5. Power Source
Solar-powered helmets are convenient and require no battery replacement. Rechargeable or replaceable battery helmets offer consistent performance in low-light conditions.
6. Safety Certifications
Check for ANSI Z87.1 certification for impact and eye protection compliance.
Common Mistakes Beginners Make
When you’re just getting into welding, it’s easy to choose the wrong gear or build bad habits that slow down your progress. Here are the most common beginner mistakes to avoid:
- Buying the cheapest helmet possible
Many ultra‑cheap helmets have slow switching, poor clarity, and flimsy shells. They technically work, but they’re uncomfortable, strain your eyes, and may not last. - Ignoring lens clarity and viewing area
Focusing only on cool graphics or price and not on true‑color optics and a decent window size makes it harder to see the puddle, read the joint, and learn proper technique. - Not matching the helmet to the job
Using a tiny 2‑sensor helmet while welding in awkward positions or inside frames often leads to mis‑triggering and occasional flashes. Similarly, huge panoramic hoods can be a pain in tight spaces. - Using the wrong shade setting
Beginners often weld too bright (shade too low) because they want to see more, which can cause eye fatigue, or too dark, which hides the puddle and ruins control. - Poor helmet fit and balance
Loose or badly adjusted headgear makes the helmet slip every time you nod or move. This is tiring and distracts from learning basic torch and travel‑speed control. - Skipping basic prep and safety
Not cleaning metal, not checking for flammables nearby, or welding in short sleeves can lead to bad welds, fires, and burns, problems that are completely avoidable.
Tips for Beginner Welders
Good habits early on make a huge difference. These simple tips help you get more out of your first helmet and your first welds.
- Prioritize a clear, comfortable view
Choose a true‑color auto‑darkening helmet with a reasonable viewing area and, if possible, four sensors. Being able to see the puddle clearly will speed up your learning more than any other feature. - Set your shade, then fine‑tune
Start near the recommended shade for your process (for example, DIN 10–11 for most MIG/Stick). If the arc feels too bright, go up one shade; if you can’t see the joint edges, go down one. - Adjust the headgear properly every time
Tighten the ratchet so the helmet doesn’t wobble, and use the top strap to set height. A stable, balanced helmet lets you focus on hand movement, not on holding the hood in place. - Practice on clean, flat steel first
Start with clean, mild steel plate in the flat position. This removes variables so you can focus on arc length, travel speed, and bead shape before moving to out‑of‑position or dirty work. - Watch the puddle, not the arc
Keep your eyes on the weld puddle and the edges of the joint, not the bright arc itself. Your helmet will protect you, your job is to see how the metal is flowing and filling. - Use short practice beads and repeat
Run short, straight beads instead of long, wandering ones. Look at each bead, adjust your angle or speed slightly, and repeat. Small, consistent practice builds skill faster than random long welds. - Protect all exposed skin
Wear proper gloves, a welding jacket or sleeves, and long pants. UV from the arc can burn skin quickly, even through thin clothing. - Ask for feedback and film yourself
If possible, have an experienced welder look at your beads, or record short clips of yourself welding to review your torch angle, distance, and body position.
FAQs – Best Welding Helmet for Beginners
What is the best type of welding helmet for a beginner?
For most beginners, the best choice is a true‑color auto‑darkening helmet with a medium‑large viewing area, 4 arc sensors, and a shade range of about 4/5–13 with grind mode. This combination gives you clear vision, reliable darkening for MIG, TIG and Stick, and enough flexibility to grow with your skills.
How much should a beginner spend on a welding helmet?
You don’t need to spend a fortune. A solid beginner helmet usually costs $40–$100. Below $40, you often sacrifice clarity, build quality, or consistency. Between $60–$100 you can get true‑color optics, a comfortable viewing area, and better sensor performance that will last through your learning phase and early projects. You can also check our best welding helmet under $200.
Is a large viewing area always better for beginners?
A medium‑large window (around 3.8″×3.2″ to 3.9″×3.6″) is ideal. Very small windows are cheap and light but force you to move your head more. Extra‑large or panoramic views are great in open spaces but add weight and bulk. For most new welders, the mid‑range size balances comfort, visibility, and control.
Do beginners really need 4 sensors?
If you only weld flat or on a bench, 2 sensors can be enough. But beginners often change positions and experiment. 4 sensors give more reliable darkening if your torch angle changes or something briefly blocks part of the lens. It’s a small upgrade that makes welding more forgiving when you’re still learning.
Are budget welding helmets under $100 safe for beginners?
Yes, as long as they:
- Meet standards like ANSI Z87.1 / CSA / CE
- Offer consistent UV/IR protection even when not darkened
- Have a proven track record in user reviews for reliable switching
Avoid unbranded helmets with no clear safety info or very poor feedback—your eyes are not the place to cut every corner.
Should a beginner choose a compact or panoramic helmet?
- Compact helmets: lighter, cheaper, better for tight spaces and short sessions.
- Panoramic helmets: wider view and better awareness, but heavier and more expensive.
Beginners who weld mostly at a bench or in a garage are usually best served by a standard large‑view helmet, not the smallest compact or the biggest panoramic.
Can I use a cheap helmet to learn TIG?
You can, but TIG is more demanding. For basic or mid‑amp TIG, many budget true‑color helmets work fine. If you plan to do lots of low‑amp TIG, look for models specifically noted for good low‑amp performance and stable darkening, or be prepared to upgrade once you move beyond basic practice.
Conclusion – How to Pick Your First Welding Helmet with Confidence
For a beginner, the best welding helmet is the one that makes it easy to see the puddle, protects your eyes every time, and stays comfortable on your head.
In practical terms, aim for:
- True‑color auto‑darkening lens – clearer, less green, easier to learn with.
- Viewing area around 3.8″×3.2″ to 3.9″×3.6″ – wide enough to see your work without a heavy panoramic shell.
- 4 arc sensors if possible – more reliable triggering as you try different positions.
- Shade range about 4/5–13 with grind mode – covers learning MIG, Stick, and basic TIG in one helmet.
- Recognised safety standards (ANSI / CSA / CE) – non‑negotiable for eye protection.
If your budget is tight, a compact true‑color helmet with 2 sensors and a standard shade range is still a good way to start, and you can upgrade later once you weld more often.
Think about where you weld (tight vs open spaces), how often you’ll weld (occasional DIY vs weekly practice), and which process you’ll learn first (MIG/Stick vs TIG). Choose the helmet whose view size, sensor count, and comfort match that reality. Do that, and your first welding helmet will support your learning curve instead of fighting it.

James is a welding expert, accomplished author, and trusted guide with over 8 years of experience in the industry. With his in-depth knowledge and engaging writing style, James has become a true authority in the field, offering readers and clients invaluable expertise and insights to take their welding skills to new heights.