Learning how to use a welding ground clamp is one of the first skills every welder should master. The ground clamp completes the welding circuit, and it directly affects arc stability, weld quality, and your personal safety. A loose or dirty clamp creates resistance, heat, and dangerous electrical faults. This guide walks you through the entire process from setup to maintenance.
Before you start, it helps to understand why the ground clamp is not a minor accessory. Many weld defects and safety incidents trace back to a poor ground connection. If your clamp is worn out, selecting a quality ground clamp for your machine solves most grounding problems. Taking a few extra seconds to attach it correctly saves time, materials, and skin.
Always follow the welding safety requirements set by OSHA when working with electrical welding equipment. The ground clamp is part of your electrical safety system, not just a convenience. Proper use also protects your welder from internal damage.
Table of Contents
What Is a Welding Ground Clamp?
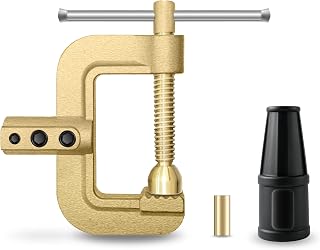
HITBOX 400A C-Style Welding Ground Clamp
Check PriceA welding ground clamp is the metal clamp that connects the work lead, often called the ground cable, to your workpiece or welding table. It carries the welding current back to the machine to complete the electrical circuit. Without this path, the arc will not start or will be extremely unstable. In welding, the term ground often means work connection, not an earth ground.
Inside the welder, current flows from the machine to the electrode, through the arc, into the base metal, and back through the ground clamp. The clamp must make solid contact with bare metal to keep resistance low. High resistance at the clamp point causes voltage drop, heat, and erratic arcs.
Common Types of Welding Ground Clamps
- Spring clamps, economical and common for light to medium work
- C-clamp style, provides high pressure and good contact
- Magnetic clamps, quick to move but less reliable on curved or hot metal
- Copper or brass jaw clamps, excellent conductivity and durability
How to Use a Welding Ground Clamp Step by Step
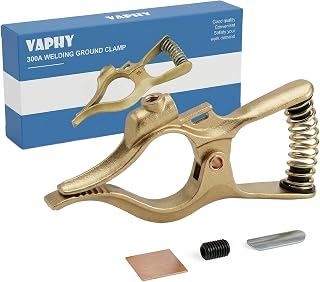
Vaphy 300-Amp T-Style Welding Ground Clamp
Check PriceFollow these steps every time you set up a weld. The routine takes less than a minute but makes a major difference in safety and weld quality.
Step 1: Turn Off the Welder
Always power down the welder before connecting or moving the ground clamp. This removes the risk of electric shock and protects the machine. Some inverters have capacitors that can hold charge, but the output side should not be live when the machine is off. Make this a habit even when swapping from one joint to another.
Step 2: Inspect the Clamp and Cable
Look at the jaw surfaces, spring tension, and cable connection. The jaws should close firmly without gaps, and the copper or brass surfaces should be clean. Cable strands must be tightly secured to the clamp lug with no fraying or corrosion. A damaged ground clamp overheats quickly and can ruin your weld.
Step 3: Clean the Workpiece
Remove paint, rust, mill scale, oil, and dirt from the area where the clamp will attach. Use a grinder, flap disc, or wire brush until you see bright bare metal. The contact area should be larger than the clamp jaws. Cleaning only the top surface is not enough, the clamp jaws must bite into clean metal, not sit on grease.
Step 4: Attach the Ground Clamp
Place the clamp as close to the weld joint as practical. Clamp directly onto the workpiece whenever possible. If you must use a welding table, make sure the table has a clean bare metal surface and the work lead is connected from the table to the machine. Do not rely on rusty chains or painted brackets to carry welding current.
For a complete overview of work lead placement, read this guide on proper grounding for welding machines. The same principles apply to your ground clamp setup.
Step 5: Verify the Connection
Give the clamp a small tug after attaching it. It should not slide or rock. The teeth or flat jaws should make full contact with the workpiece. If the clamp is warm after a short weld, stop and check the contact point. A correctly installed ground clamp stays cool or only slightly warm.
Step 6: Test with a Short Weld
Make a small tack or run a short bead on scrap before starting your main weld. Watch the arc for stability and listen for a steady sound. A stuttering arc, excessive spatter, or a hot clamp means the connection is weak. Stop, reposition, and clean the area again.
Where to Place the Ground Clamp for Best Results
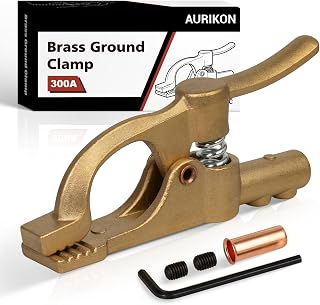
AURIKON 300 Amp Brass Welding Ground Clamp
Check PricePlacement has a direct effect on arc blow, voltage drop, and the risk of current passing through sensitive parts. Always keep the ground clamp on the same workpiece being welded. Do not attach the clamp to a part that is insulated from the weld zone by bearings, bushings, or paint.
- Keep the ground clamp as close to the weld joint as possible
- Use a clean, flat, bare metal surface
- Avoid placing the clamp on moving or precision parts
- For large fabrications, move the clamp when you move the weld area
- Never clamp to pipes carrying flammable gas or fuel
Common Mistakes When Using a Welding Ground Clamp
Most ground clamp problems come from a few repeated mistakes. These errors create electrical resistance, which turns into heat. Heat can melt insulation, burn skin, and even start a fire in the shop.
- Clamping onto painted, rusty, or oily metal
- Using a clamp rated for less current than the welder can output
- Letting the cable hang by the copper lug instead of supporting it
- Placing the ground far from the weld joint on the same long piece
- Using a magnetic clamp on hot metal or rough surfaces
- Ignoring a clamp that feels warm during welding
Maintaining Your Welding Ground Clamp
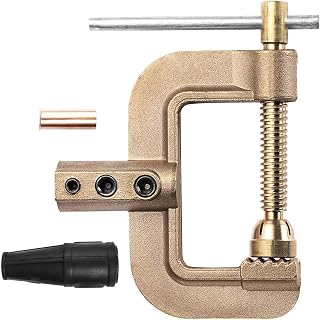
HZXVOGEN 400A C-Style Welding Ground Clamp
Check PriceA ground clamp is a wear item, but simple maintenance extends its life. Check the spring tension before each job. If the jaws do not close tightly, replace the spring or the whole clamp. Clean the jaw faces with a wire brush and remove any oxidation.
The cable connection at the clamp lug also needs attention. Tighten the screw or crimp if it feels loose. Use heat shrink or tape to protect the connection from moisture and spatter. A ground clamp that shows deep arc marks, cracks, or melted insulation should be retired.
Store the clamp and cable off the floor and away from oil and water. Dragging the clamp across the floor damages the jaws and cable. Wipe the clamp down after heavy use and inspect the jaw alignment before your next project.
Frequently Asked Questions About Welding Ground Clamps
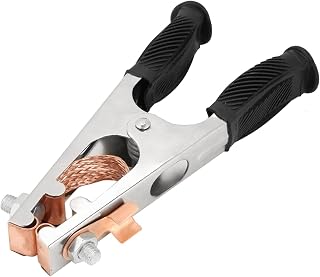
Haosie 500A Electroplated Ground Clamp
Check PriceCan you weld without a ground clamp?
No, you cannot safely weld without a ground clamp or work lead. The welding circuit must be closed for the arc to form. Attempting to bypass the ground path can force current through you, tools, or machine parts and cause electric shock or fire.
Why does my welding ground clamp get hot?
A hot ground clamp means high electrical resistance at the contact point. Loose clamping, dirty metal, undersized cable, or a weak spring can cause this. Stop welding, clean the metal, tighten the connection, and inspect the clamp. If it remains hot, replace the clamp.
Should I attach the ground clamp to the workpiece or the table?
Whenever possible, attach the ground clamp directly to the workpiece. The table can work, but only if the table is clean, bare metal and the work lead connects from the table back to the welder. A direct workpiece connection removes extra contact points and lowers resistance.
What size ground clamp do I need for my welder?
Match the clamp to the maximum amperage output of your welder. For a 200 amp machine, use a clamp rated for at least 200 amps. For high duty cycles, choose a heavier clamp with a stronger spring. A clamp that is too small overheats and limits your weld output.
Conclusion
Using a welding ground clamp correctly is not complicated, but it is often skipped. A clean metal surface, a strong clamp, and a direct connection close to the weld keep the arc smooth and the operator safe. Build the habit of inspecting the clamp and cable every time you set up.
Start with a quality clamp, follow the steps above, and replace worn parts without hesitation. These small habits improve every bead you lay. The few seconds you spend on a proper ground connection will show in your weld quality and your safety record.