Many DIYers, welders, and artists wonder: do paint markers work on metal? The short answer is yes, but the results depend heavily on the type of marker you choose and how you prepare the surface. Paint markers can leave crisp, opaque lines on everything from aluminum sheets to rusty steel, making them a go-to tool for everything from crafty home decor to industrial part marking.
Unlike standard permanent markers, true paint markers contain liquid paint that bonds to non-porous surfaces. When you get the process right, they deliver vibrant, scrape-resistant results that hold up to heat, moisture, and daily handling. In this guide, you will learn exactly how paint markers behave on metal, which ones are worth your money, and the step-by-step techniques professionals use to get a flawless finish.
Table of Contents
What Are Paint Markers?
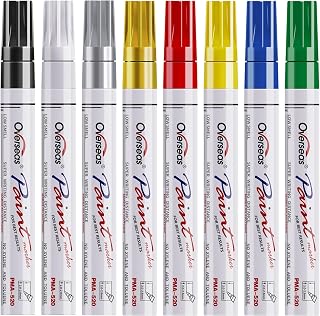
Overseas 8 Colors Paint Pens, Oil Based Permanent Paint Markers Medium Tip
Check PriceA paint marker is a writing tool that dispenses opaque, oil-based or water-based paint instead of dye-based ink. The tip is typically felt, metal ball, or nylon nib that releases paint through a valve system. Shake the marker, press the nib a few times, and the paint flows down to the tip, giving you control similar to a pen but with the coverage of a small brush.
These markers come in a range of finishes, from glossy to matte, and in permanent or semi-permanent formulas. Many professional welders and metal fabricators use them for layout lines, labeling, and color-coding parts. Artists use them to create intricate designs on steel tumblers, metal signs, and jewelry blanks.
How Do Paint Markers Work on Metal?
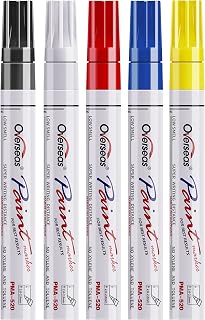
Overseas 5 Colors Paint Pens, Oil Based Permanent Paint Markers Medium Tip
Check PriceMetal is a non-porous surface, which means ink from a regular Sharpie just sits on top and can be wiped away with a little solvent. Paint markers solve this problem by delivering a thin film of paint that bonds mechanically to microscopic scratches on the metal, and sometimes chemically, depending on the formula. When the paint cures, it forms a durable skin that resists chipping and fading.
The Role of Surface Adhesion
Adhesion is the single most important factor when using paint markers on metal. Clean, slightly abraded metal gives the paint tiny grooves to lock into. Most failures happen because of oily residues, mill scale, or glossy coatings that prevent the paint film from gripping. Even a high-end paint marker will perform poorly on a surface that has not been wiped down with a degreaser and lightly scuffed.
Drying Time and Curing
Oil-based paint markers can feel dry to the touch in minutes, but they need hours, sometimes 24 to 48, to fully cure on metal. Water-based acrylic markers dry faster, often within a few minutes, but they remain more susceptible to water damage unless sealed. Some industrial paint pens require baking or heat-curing to reach maximum durability, which is something to keep in mind if you are working on parts that will face high heat or abrasion.
Types of Paint Markers That Work Best on Metal
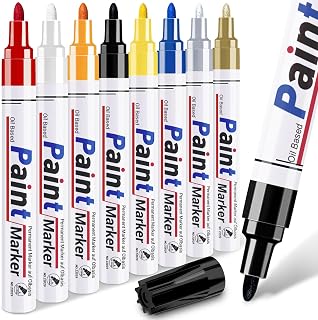
DAPAWIN Oil Based Paint Markers for Metal: 8 Colors Oil Based Permanent Paint Pens
Check PriceNot every paint marker is created equal. The best option for you depends on whether you need a fine line for detailing, a broad tip for covering large areas, or high-temperature resistance for the shop. Here are the main categories that pros and hobbyists rely on.
Oil-Based Paint Markers
Oil-based markers are the crowd favorite for metal surfaces. They produce a glossy, opaque line that stays flexible when dry and resists moisture, UV light, and mild chemicals. These markers work beautifully on raw steel, aluminum, brass, and even dusty surfaces once you wipe them down. Because the paint is oil-based, clean-up requires mineral spirits or acetone, but that also means the mark stays put once cured.
Popular examples include the Sharpie oil-based paint pen and the Sakura Pen-Touch series. Many metalworkers keep a handful of these in their toolbox for temporary layout marks as well as permanent identification labels. If you are looking for the top-rated paint markers for metal projects, consider oil-based formulas first.
Water-Based Acrylic Paint Markers
Acrylic paint markers are water-based, highly opaque, and available in a huge color range that includes vivid neons and pastels. They are popular with artists who paint on metal cups, automotive parts, and custom signs. On clean metal, they can deliver a smooth, even coat that dries matte or satin. The downside is they are not inherently weatherproof, so you will need to apply a clear sealant over the finished design if the item lives outdoors or gets handled often.
These markers perform especially well on painted metal and primed surfaces. If you are decorating a metal surface that already has a base coat of spray paint, acrylic paint markers will grab that layer with ease and give you fine control for lettering and details.
Industrial Paint Markers and Pens
Industrial-grade paint markers are built for harsh environments. They often feature metal barrels, replaceable nibs, and special ink formulas that withstand extreme heat, oils, and grinding fluids. Brands like Markal and Dykem offer paint pens specifically designed for steel mills, fabrication shops, and welding applications. These markers can write on hot metal, oily steel, and rough cast iron without skipping.
Welders in particular need a marker that will not disappear after the first pass of a torch. That is why many turn to metal marking pens that welders trust, which often use a solid paint stick or a specialized liquid paint formula that survives preheat cycles and welding heat.
Step-by-Step Guide to Using Paint Markers on Metal
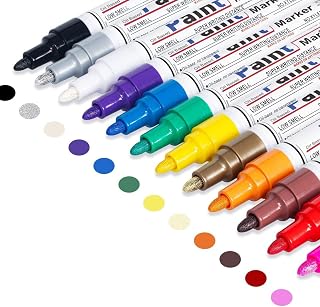
Oil Based Paint Pen, Permanent Paint Marker: Quick-Dry, Waterproof Marker Set of 12
Check PriceGetting a permanent, professional-looking mark on metal is not difficult, but skipping preparation steps will almost always lead to peeling and smudging. Follow this sequence for the best results.
Surface Preparation
Start by degreasing the metal with isopropyl alcohol, acetone, or a dedicated surface cleaner. Even new metal sheets have a thin layer of oil or mill coating that repels paint. Wipe the area thoroughly with a lint-free cloth and let it evaporate completely. For smooth or glossy metals, scuff the surface lightly with a fine-grit sandpaper, around 400 to 600 grit, or a green kitchen scrub pad. This creates a micro-profile the paint can grab.
After sanding, wipe away all dust with a clean rag and give the surface one more alcohol wipe. Any leftover dust will become trapped in the paint and cause roughness. If you are working on stainless steel or aluminum that will be exposed to weather, consider applying a thin coat of self-etching primer before you paint. This step dramatically improves long-term durability.
Application Techniques
Shake the marker vigorously for at least one minute, especially with oil-based pens. The mixing ball inside needs to break up the settled pigment. Pump the tip on a scrap piece of paper until the paint flows evenly. When you move to the metal, use light, steady strokes, and avoid going over the same line repeatedly while it is wet. Overworking the paint can pull the partially dried skin and create lumps.
If you need to correct a mistake, use a cotton swab dipped in the appropriate solvent, mineral spirits for oil-based paint, or water for acrylics, to wipe it away while the paint is still fresh. Once cured, clean removal becomes much harder and usually requires mechanical abrasion. For fine details, let each layer dry for at least 15 minutes before adding an adjacent color or second coat.
Sealing the Finish
To protect your design from scratches, fading, and moisture, apply a clear coat over the painted area after the paint has fully cured. A spray-on acrylic sealer, polyurethane, or a two-part epoxy clear coat all work well depending on the item’s final use. For outdoor metal projects, a UV-resistant sealant is a must, otherwise sunlight will degrade the paint within a few months.
Test the sealant on a scrap piece first. Some clear coats contain solvents that can reactivate and smear oil-based paint markers. Water-based clear coats are generally the safest bet over both oil and acrylic paints. Once sealed, your paint marker artwork or labels can last for years without significant wear.
Common Problems and How to Avoid Them
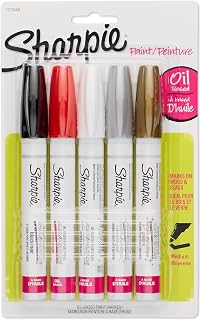
Sharpie Oil-Based Paint Markers, Medium Point, Assorted & Metallic Colors, 5 Count
Check PriceWhen paint markers fail on metal, the culprit is usually one of three things: poor surface prep, incompatible paint chemistry, or impatience with curing times. Paint peeling off in sheets is a classic sign of an oily surface. If you see this, strip the paint, degrease more aggressively, and scuff the metal before redoing the work.
Another issue is the paint beading up and refusing to wet the surface. This happens on highly polished or silicone-treated metals. A light sanding and solvent wipe nearly always solve the problem. In some cases, you may need to switch to an oil-based industrial marker that has a more aggressive binder system. Welders often keep both oil and industrial markers on hand to cover different metals with various coatings.
Comparing Paint Markers to Other Metal Marking Methods
Paint markers are just one tool in the metal marking toolbox. Understanding how they stack up against alternatives will help you pick the right method for your specific job.
Paint Markers vs. Permanent Markers
Standard permanent markers use dye-based ink that soaks into porous materials like paper or wood. On metal, the ink dries on the surface but does not form a film. It can be rubbed off with a dry finger over time, and it fades quickly under UV light. Paint markers leave a thicker, pigmented film that bonds much more tightly. If you need a mark to survive handling or outdoor exposure, paint markers are the clear winner.
Paint Markers vs. Engraving and Etching
Engraving and chemical etching create permanent marks by physically removing or altering the metal surface. These methods are extremely durable but require specialized equipment and skills. Paint markers cannot compete with engraving for true permanence, but they offer a fast, inexpensive way to add detail, legibility, and color that engraving alone cannot provide. Many professionals combine the two by engraving an outline and then filling the recess with a paint marker for high-contrast visual effect.
Expert Tips for Long-Lasting Results
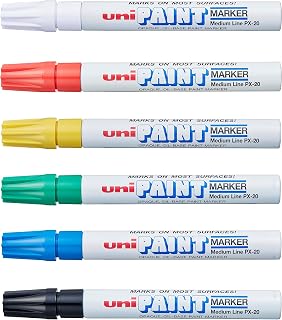
uni Paint PX-20 Paint Markers, Medium Line, Assorted, 6 Pack
Check Price- Always test your marker on a hidden section or a sample piece of the same metal. Different alloys and finishes can react differently.
- Store paint markers horizontally and in a cool place. This keeps the paint evenly distributed and prevents the tip from drying out.
- If you need to mark metal that will be welded, look for a paint pen rated for up to 800 degrees Fahrenheit. Many standard paint markers will burn off and lose their mark entirely.
- For extremely smooth metals like polished chrome, a quick pass with a fiberglass scratch brush gives the paint a perfect foothold without leaving visible scratches.
If you decide to seal your project, do not rush the cure time. Oil-based paints can feel dry but still be soft underneath. Give the piece a full two days before applying clear coat, and then allow that top coat to cure according to the manufacturer’s recommendations.
Frequently Asked Questions
Can you use regular Sharpies on metal?
Regular Sharpies will write on metal but their marks are not durable. The dye ink wipes off easily and fades quickly with exposure to light and moisture. For any lasting application, you are far better off with an oil-based paint marker.
Do paint markers wash off metal?
Once fully cured and, if needed, sealed, quality paint markers are highly resistant to washing and light scrubbing. Water-based acrylic marks can soften with prolonged soaking unless sealed. Oil-based and industrial markers are generally waterproof and can handle regular cleaning with mild detergents.
How do I remove paint marker from metal if I make a mistake?
Before the paint cures, you can wipe it away with a rag dampened with acetone, mineral spirits, or rubbing alcohol. For fully cured paint, you will need to use a solvent-soaked pad and let it dwell on the mark for a few minutes, then scrub gently with a nylon brush. In manufacturing shops, a quick pass with a scotch-brite wheel also removes the marks effectively.
Are paint markers safe for food-contact metal surfaces?
Most standard paint markers are not certified for direct food contact. If you are decorating a reusable metal tumbler or a flask, keep the design on the outside and seal it well. For surfaces that will touch food directly, look for food-safe enamel or markers that explicitly meet FDA regulations.
Can paint markers withstand heat?
Some can. Standard oil-based or acrylic paint markers typically hold up to around 200 to 300 degrees Fahrenheit before softening or discoloring. For hot metal parts, such as exhaust pipes or weldments, you need a high-temperature industrial marker designed to withstand 800 to 1,000 degrees Fahrenheit without burning off. Always check the manufacturer’s temperature rating before marking parts that will be heated.
Conclusion
So, do paint markers work on metal? Absolutely, and they can produce stunning, long-lasting results when you choose the right type and follow a few simple preparation steps. Whether you are labeling tools, personalizing a tumbler, or laying out a fabrication project, paint markers give you portable, low-odor, and precise control that a spray can simply cannot match.
Remember to start with a clean, de-glossed surface, match the marker chemistry to your metal and environment, and give the paint ample time to cure. A quick shot of clear sealer will lock in your work for years to come. For more specific product recommendations, you can explore our guide to the best paint markers specifically made for metal surfaces. If you are in a shop environment, you may also want to check out metal marking pens that welders trust for high-heat and industrial applications. Between proper technique and the right tool, you will never have to wonder if your marks will survive the next shift.
For a more visual walkthrough of the process, take a look at these detailed instructions on using paint markers on metal from a reliable crafting resource.