Starting out with MIG welding can feel overwhelming, but a few solid mig welding tips for beginners will quickly flatten the learning curve. MIG, short for Metal Inert Gas, is the most beginner-friendly welding process because the wire feeds automatically, letting you focus on technique. Whether you are repairing a trailer, building furniture, or just learning a new trade, dialing in the fundamentals early prevents frustration and wasted material.
Many first-time welders think pulling the trigger is all it takes, but small adjustments to your setup and body position make a massive difference. By the end of this guide, you will understand machine settings, gun manipulation, material prep, and how to read the bead to self-correct mistakes. We have packed every tip into digestible advice you can take straight to the garage.
Table of Contents
Understand Your MIG Welder Setup Before Striking an Arc
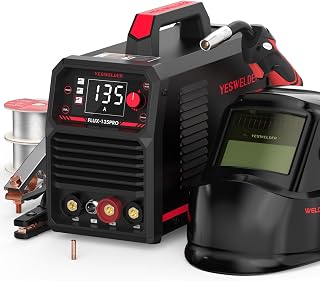
YESWELDER 135A Flux Core MIG Welder FLUX-135PRO with LYG-L600A Helmet
Check PriceBefore melting any wire, spend ten minutes checking the machine’s configuration. A poorly set up welder works against you even if your technique is textbook. Pay attention to polarity, gas flow, and wire tension because these three factors often separate a smooth bead from a sputtering mess.
Check the Polarity and Ground Connection
Most home MIG welders use solid wire with shielding gas, which requires DC electrode positive polarity. Inside the drive compartment you will find polarity terminals, make sure the torch lead connects to the positive terminal and the ground clamp to the negative terminal. If you are running flux-core wire without gas, the polarity flips to electrode negative, so always verify before you start.
Attach the ground clamp to clean, bare metal as close to the weld joint as practical. A poor ground causes erratic arc starts and wire burnback. You do not need a massive clamp investment, but a tight connection on shiny metal saves hours of troubleshooting.
Dial In Gas Flow and Wire Feed Tension
For short circuit MIG on mild steel, set your shielding gas regulator between 15 and 25 cubic feet per hour. Too little gas allows porosity, while excessive flow wastes gas and can draw in atmospheric contamination. Listen for a soft hiss at the nozzle, not a violent blast.
Wire feed tension matters just as much. Adjust the drive roll pressure so the wire feeds smoothly without slipping, yet the roll stops if you pinch the wire between your fingers. Overtightening flattens the wire and leads to erratic feeding through the liner.
12 MIG Welding Tips for Beginners That Build Confidence Fast
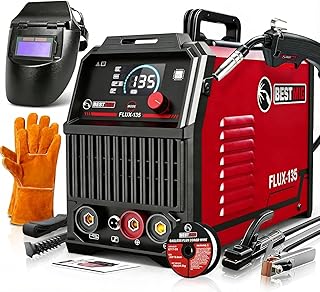
BESTMIG 135A MIG Welder – 3-in-1 Flux Core Welder, MIG/Lift TIG/Stick Welding Machine
Check PriceOnce the hardware is ready, shift focus to the physical techniques that transform a crooked, spattered line into a uniform weld. These twelve pointers cover gun angle, stick-out, travel speed, and more. Practice them individually on scrap plate before combining everything into one fluid motion.
- Maintain a 5 to 15 degree gun angle. Point the nozzle in the direction of travel with a slight push angle for clean flat beads. Dragging the gun gives deeper penetration but more spatter, while pushing flattens the bead and lets you see the puddle better.
- Keep stick-out between 3/8 and 1/2 inch. The wire stick-out, the distance from contact tip to workpiece, directly affects amperage. Too long a stick-out drops heat and causes a tall, ropey bead. Too short builds excessive heat and can fuse the tip.
- Match wire feed speed to voltage first. Start with the door chart settings, then fine-tune. If the arc sounds like a rapid bacon sizzle, you are close. A loud, sputtering arc means voltage too low or wire speed too high.
- Clean metal is non-negotiable. Remove mill scale, rust, paint, and oil with a flap disc or wire brush. MIG is less forgiving of contaminants than stick welding, and skipping this step results in porosity and weak fusion.
- Watch the puddle, not the arc. Beginners stare at the bright white arc. Train your eyes to look just behind the arc at the molten weld puddle, that is the seam you are controlling. A clear auto-darkening hood makes this dramatically easier.
- Travel speed controls bead shape. Moving too fast creates a narrow, pointed bead with poor tie-in. Moving too slow piles metal high and can burn through thin stock. Aim for a consistent speed where the puddle fills the joint edges without overflowing.
- Rest the nozzle on the workpiece for support. Use the gas nozzle as a guide when running a straight bead on flat plate. Light contact steadies your hand and keeps stick-out constant, giving you one less variable to manage.
- Start with a simple stringer bead. Resist the urge to weave like a pro. Straight stringer beads with no side motion build muscle memory for travel speed and arc length. Once those are solid, you can play with weaves.
- Tack your parts before full welding. Place small tacks at each corner and midpoint to hold alignment. Tacking reduces distortion and gives you a chance to double-check fit-up without wrestling full-length welds.
- Listen to the sound. A healthy MIG arc hums with a steady frying rhythm. Any popping, crackling, or abrupt noise change signals a problem. Use your ears as a diagnostic tool just as much as your eyes.
- Trim the wire before every start. At the end of a bead the wire melts back forming a small ball. Snip it with pliers to expose sharp wire, which guarantees a crisp start. Trying to restart on a balled tip leads to violent arc surges.
- Inspect each bead immediately. Look for consistent width, flat profile, and clean toes. If the bead is undercut, increase travel speed or lower voltage slightly. If it is humped, slow down or add wire feed speed. Immediate feedback accelerates learning.
Choose the Right Shielding Gas and Wire for Your Project
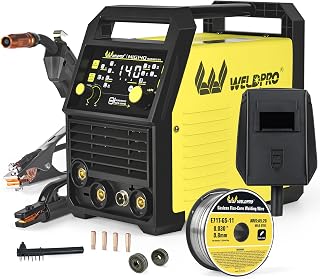
WELDPRO 140A MIG Welder 110/220V, 2026 Newest 5-in-1 Flux Core Welder
Check PriceSolid wire and shielding gas produce the cleanest beginner results. A 75% argon / 25% CO2 mix, commonly called C25, works beautifully on mild steel, delivering low spatter and a stable arc. Straight CO2 is cheaper but creates a harsher arc and more spatter, making it tougher for new hands to control.
Wire diameter matters too. For thin sheet metal between 18 gauge and 1/8 inch, 0.023-inch or 0.030-inch wire prevents burn-through. Thicker material up to 1/4 inch runs well with 0.030-inch or 0.035-inch solid wire. Match the contact tip and drive roll size exactly to your chosen wire diameter.
Master Gun Technique to Eliminate Spatter and Porosity
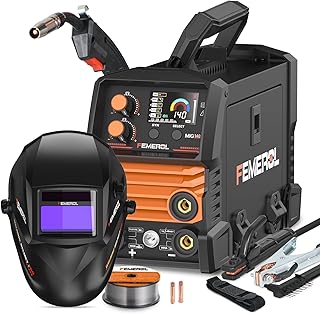
FEMEROL 140A 3 in 1 MIG Welder,Flux Core, MIG/Lift TIG/Stick Welding Machine 110V
Check PricePush vs. Pull: Which Technique Gives Better Results
The push technique, where you tilt the gun forward and move away from the puddle, places less material on the weld and offers a wider, flatter bead with excellent visibility. It is the preferred method for most thin-gauge work and cosmetic welds. Pulling the gun, or dragging, directs the arc back into the puddle and generates deeper penetration but creates a crowned, narrower bead with more spatter. When you practice on clean mild steel, start with a 10-degree push angle and watch how the toe wets out.
Consistent Travel Speed and Stick-Out Are Everything
Inconsistent stick-out and varying travel speed cause uneven bead width and undercut. Brace your forearm on the table or use your free hand to steady the torch. Count in your head, one-thousand-one, one-thousand-two, as you weld a small joint, and try to replicate that rhythm. The bead will tell you if the count needs to be faster or slower, look for a slightly crowned profile that wets smoothly into the base metal.
Practice Weld Bead Patterns After Mastering Straight Lines

ANDELI 110V/220V MIG Welder 135A, PULSE Flux Core/Lift TIG/Stick 4-in-1
Check PriceOnce comfortable running stringers, introduce simple patterns to widen the bead or fill gaps. A tiny cursive e motion or a tight C-shape weave works well for vertical-up or thicker sections. Do not overcomplicate the motion, slight oscillations just twice the wire diameter are enough. More elaborate weaves come later, after you learn to read the puddle. If you want a deeper dive into weaving techniques, explore our guide on effective weld bead patterns.
Recognize and Fix Common MIG Welding Problems
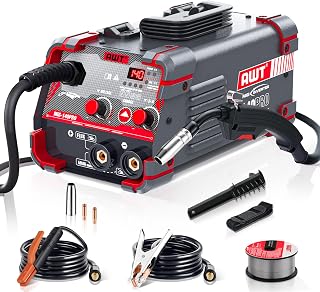
AWT 140A Flux Core MIG Welder/Stick/Lift TIG 3 in 1 Welding Machine 110V
Check PricePorosity and How to Eliminate It
Porosity looks like tiny wormholes scattered through the bead and almost always stems from inadequate shielding gas coverage. Check for a blocked nozzle from spatter, a gas leak, or wind blowing the shielding cloud away. If you weld outdoors, set up wind screens or increase the flow rate slightly. Also confirm the cylinder is not empty, a surprisingly common oversight.
Excessive Spatter and Erratic Arc
Random spatter often signals a voltage/wire feed imbalance. Increase voltage in small increments until the crackle smooths out. Loose ground connections and rusty metal also contribute. Keep the contact tip clean and replace it if the bore is ovaled, a worn tip feeds wire erratically and can even bridge the arc. Anti-spatter spray on the nozzle and workpiece makes cleanup faster but does not fix the root cause.
Select the Right Equipment from the Start
While you can learn on almost any machine, a beginner-friendly welder with infinite voltage control makes dialing in settings far less frustrating. Look for a unit that runs on 115-volt or 230-volt input and includes a setup chart right on the door. If you are still comparing models, take a look at our recommendations for a beginner-friendly MIG welder that balances price, portability, and ease of use.
Do not overlook personal protective gear. A quality auto-darkening helmet with an appropriate shade range lets you see the puddle clearly during setup and instantly darkens when the arc strikes. For MIG welding, a shade 10 to 12 works for most hobby amperages. Thick leather gloves, a cotton welding jacket, and safety glasses worn under the hood complete your basic kit.
Frequently Asked Questions About MIG Welding
What is the proper MIG gun angle for a flat weld?
Hold the gun at a 5 to 15 degree angle from vertical, pointing in the direction of travel. This slight push angle provides a clear view of the puddle, minimizes spatter, and creates a flatter bead profile that ties in nicely at the toes.
Why does my MIG weld look like it has holes?
Small holes, called porosity, appear when gas coverage fails. Common causes include a clogged nozzle, breeze that displaces the shielding cloud, insufficient gas flow, or welding on contaminated metal. Clean the nozzle, block wind, and remove all rust and paint to fix it.
Do I push or pull when MIG welding steel?
For most thin to medium steel, pushing is preferred because it yields a cleaner, wider bead with less spatter. Pulling increases penetration and works well when you need deeper fusion on thicker sections, but it creates more crown and spatter. Choose based on joint thickness and desired bead profile.
How do I prevent burn-through on thin metal?
Use the smallest wire diameter suitable, 0.023-inch or 0.030-inch, lower the voltage and wire feed speed, and increase travel speed. Pulse the trigger on very thin gauges to limit heat input, or place a copper backing bar behind the joint to absorb excess heat and support the puddle.
Conclusion: Get Comfortable, Then Get Consistent
No single mig welding tip for beginners works in isolation, but stacking small improvements creates clean, strong welds faster than you would expect. Start with a correctly polarized machine, clean metal, and a steady gun hand. Listen to the arc, watch the puddle, and adjust one variable at a time. When a bead goes wrong, treat it as free information, every defect tells you exactly what to tweak. Bookmark this guide, review the twelve tips before each session, and soon your welds will look as good as the tutorials.
Take the time to learn setup habits before chasing speed. Weld scrap coupons in different positions, experiment with slight angle changes, and practice restarts until they become muscle memory. And remember, the best way to support your growing skill set is with reliable gear. For further reading on technique, visit MIG welding fundamentals from Miller Electric, an excellent external resource that covers material preparation and advanced settings.