Learning how to use a mini spot welder opens up a world of precision fabrication. This pocket-sized tool is the secret weapon for building battery packs, repairing electronics, and joining thin sheet metal without warping. Unlike a massive industrial machine, a mini spot welder relies on stored electrical energy released in a controlled burst. You might feel intimidated by the sparks at first, but once you grasp the basics of current flow and electrode pressure, the process becomes second nature.
This guide strips away the confusion surrounding these handy devices. We will walk through the initial setup, dive deep into energy modulation, and highlight critical safety mistakes to avoid. You do not need an engineering degree, you just need the right technique. Whether you are tackling a DIY lithium battery project or fixing a delicate piece of jewelry, mastering this tool ensures strong, repeatable welds that last.
Table of Contents
What Is a Mini Spot Welder and How Does It Work?
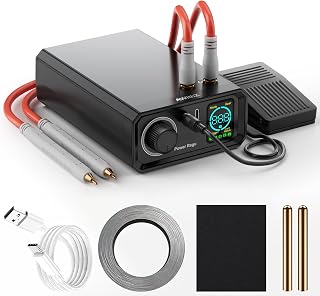
AWithZ 11500W Rotary Knob Spot Welder
Check PriceA mini spot welder is a compact capacitive discharge device. It stores energy in capacitors and releases it rapidly through copper electrodes. The intense heat generated at the tip melts the parent metals together under pressure. This differs greatly from continuous arc welding like MIG or TIG. There is no filler rod or shielding gas needed for the basic function.
The resistance at the interface of the two metal sheets creates the heat. Because the energy is discharged in milliseconds, the surrounding area stays cool. This prevents burn-through on thin materials like 0.15mm pure nickel strips. If you have ever tried to solder directly onto lithium battery terminals, you know the danger of overheating sensitive cells. A mini spot welder eliminates that thermal risk entirely.
Capacitor vs. Transformer-Based Models
You will generally encounter two designs. Capacitive discharge welders use supercapacitors and are highly portable. They work well on household outlets without tripping breakers. Transformer-based models rely on a momentary high-current draw directly from the wall. While powerful, they can be finicky with residential wiring and often require a dedicated line.
For hobbyists building battery packs, the capacitor-based portable unit is the clear winner. It offers precise digital energy control. You can weld inductively without a direct power cord tethered to the wall during the pulse. This makes positioning in tight spaces much easier.
How to Use a Mini Spot Welder: Step-by-Step Setup

SEESII Battery Spot Welder
Check PriceSuccess hinges on dental-level cleanliness and exact placement. A loose ground connection or dirty copper tip will produce a weak, glittery failure instead of a solid nugget. Follow this calibrated sequence to set yourself up for perfect welds every single time.
1. Prerequisite Safety Gear
- Eye Protection: Even a fleeting flash from a resistance weld produces molten spatter. Use clear safety glasses or a shade 3 polycarbonate face shield. Do not look directly at the arc without a filter.
- Ventilation: Welding nickel strips releases microscopic metal fumes. Place a small fan nearby to push airborne particulates away from your breathing zone.
- Dry Environment: Capacitors hold lethal charges. Never operate on a damp metal table or with wet gloves.
2. Preparing the Metal Surface
Oxidation is the silent enemy of resistance welding. Even a fingerprint can create enough resistance to scatter the energy. Wipe the nickel strip and the battery terminal with 99% isopropyl alcohol and a lint-free wipe. For corroded or older terminals, a gentle scratch with a glass fiber pen removes the oxide barrier without grinding away the plating.
You cannot weld through plastic film or heavy rust. The contact point must be bare shiny metal. If the material is visibly dirty, the weld will spit and leave a black soot mark instead of a clean silver dimple.
3. Sharpening and Aligning Electrodes
Dull electrodes spread current over too large an area. This requires more energy and burns the surrounding metal. Use a fine file or rotary disc to maintain a sharp, symmetrical tip on both sides. The points must align perfectly when they close. If one electrode touches before the other, you get a one-sided burn mark and a weak bond.
To align them, press the foot pedal lightly without power and watch the tip contact. Adjust the arms until they strike the workpiece simultaneously. A difference in pressure creates catastrophic resistance imbalance. This is often why beginners notice one side of the strip glows red while the other does nothing.
Dialing in the Right Pulse Energy
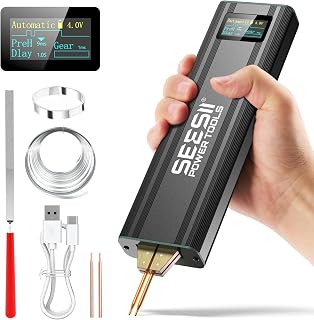
SEESII Durable Aluminum Spot Welder
Check PriceFinding the sweet spot between a cold joint and a blown hole is the core skill. Energy is measured in watt-seconds or Joules. Some units use arbitrary display numbers, but the physical logic is universal. You must match the pulse length and current to the thickness of your conductive strip.
The Pull Test
Do not trust a visual spark alone. A shiny weld does not guarantee penetration. Use pliers to rip the welded strip away. You are looking for a torn hole in the nickel itself. If the strip peels off cleanly leaving a perfect nickel base intact, you had a cold bond. Increase the energy in small increments and test again. A proper destructive pull leaves cratered material on both sides.
Pure nickel typically requires between 35 and 50 Joules for a 0.15mm thickness on steel-cased cells. Nickel-plated steel strips are easier to weld but less conductive. Start low and optionally use a dual-pulse feature if your machine supports it. A soft first pulse cleans the surface, while the second hard pulse fuses the metals.
Avoiding Blowouts
A blowout happens when you punch through the battery casing. This is dangerous, releasing toxic electrolytes and potentially starting a fire. If the welds leave a tiny hole or the probe sinks, cut the energy by 30% immediately. Lithium cells, particularly the negative terminal edge, are thinner than you think. Stay away from the center negative pole, always weld on the raised rim.
Mastering Hand Pressure and Probe Technique
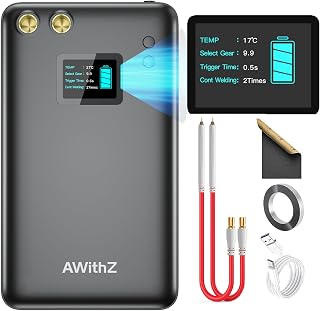
AWithZ 11000mAh LCD Spot Welder
Check PriceHow you hold the pen dictates electrical resistance. The mini spot welder does not have a servo clamp, your hands are the clamping force. You must apply steady, firm pressure before triggering the pulse. Wavering during the millisecond discharge causes massive current fluctuation.
Press the probes down with about 2 to 3 pounds of force. The tips should slightly indent the nickel strip. If you hold the pen lightly, an air gap creates micro-arcing. This blackens the strip and spits molten balls sideways. Consistent downward vector pressure ensures the current flows through the strip into the battery, not across a resistive gap.
The Two-Hand Stability Method
Support your welding hand with your opposite hand. Rest the heel of your palm on the workpiece or table edge. This prevents natural hand tremors. Lean the electrode tips slightly forward, roughly 10 degrees off perpendicular. This gives you a visual line of sight on the exact contact patch while maintaining flat tip engagement.
Trigger the weld only after you have completely stopped exhaling. A small breath-based body sway moves the electrode laterally. That movement stretches the molten pool, creating a brittle needle-like weld instead of a round nugget.
Practical Applications and Material Compatibility
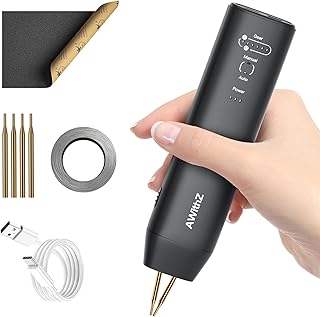
AWithZ Handheld 11-Gear Spot Welder
Check PriceA capable mini spot welder is versatile beyond lithium cells. You can repair thermocouple wires, fuse thin stainless foils, or build custom mesh screens. Understanding the material limits prevents frustration. Resistance welding needs both electrical conductivity and mechanical deformability under heat.
Welding Different Metals
- Nickel to Steel: The gold standard for battery packs. Nickel offers high corrosion resistance and matched resistivity. Use the moderate energy profile we discussed.
- Copper to Steel: Very difficult on small devices. Copper siphons heat away rapidly. You often need a parallel tungsten electrode setup or a specialized capacitive unit capable of 150+ Joules. A standard mini welder may fail without a copper-sandwich strategy.
- Stainless Steel: Works beautifully. The inherent resistance of stainless steel makes it perfect for low-energy pulses. Great for surgical tool repair and sensor housings.
- Aluminum: Nearly impossible for a basic mini spot welder. The oxide layer melts at a much higher temperature than the base metal. You need a high-frequency inverter machine with a much larger transformer.
Troubleshooting Bad Welds

Hosyond Handheld Spot Welder
Check PriceEven after reading a manual, reality often produces gray spatter and weak joints. Bad welds fall into three diagnostic categories. You must diagnose based on the physical evidence, not the digital display. The mark left behind tells the exact story of the current path.
Symptom: Sparkly Burnt Surface with No Fusion
This indicates a surface flashover. The copper tips might be too sharp, acting like tiny lightning rods jumping an arc. Blunt the very tip slightly. Also, you probably did not have enough pressure. The current jumped the air gap instead of driving through the metal. Re-train the hand pressure reflex.
Symptom: One Side Stuck, Other Side Loose
One electrode is hitting harder than the other. Adjust the set screws on the electrode arms to balance the spring tension. Or, you placed one tip on a dirty zone and the other on a clean zone. Always clean symmetrically. If the battery cap geometry is uneven, shift the angle slightly to compensate for the slope.
Symptom: Holes in Thin Strip
Turn down the output. If your unit lacks fine control, consider adding a restriction to the circuit, or use a double-layer strip as a heat shield. Pulse time is your only friend here. A machine with “pulse width modulation” (PWM) lets you shorten the time drastically to keep the heat shallow.
Maintaining Your Mini Spot Welder for Longevity
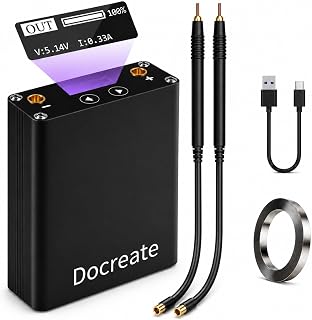
5500W Handheld Spot Welder
Check PriceCapacitor welders are robust but sensitive to neglect. You must keep the electrode tips mirror-like and the internal charging board free of metallic dust. Over time, copper work-hardens and flakes. A periodic light sanding with 800-grit sandpaper followed by a wipe-down with dielectric cleaner restores conductivity.
Store the unit with the capacitors discharged. Discharging is typically done by shorting the electrodes with a thick resistor, or if the firmware allows, a back-bleed function. Leaving caps charged for months degrades the electrolyte and causes voltage drift. The calibration of your energy settings will shift, leading to sudden blowouts later on.
Frequently Asked Questions
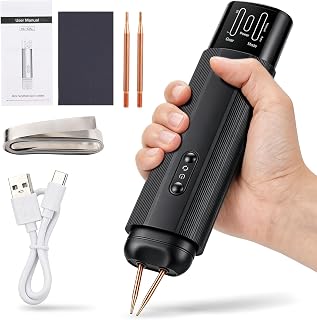
Rechargeable Mini Spot Welder
Check PriceCan a mini spot welder replace soldering?
Yes, for connecting flat tabs to batteries. Soldering requires prolonged high heat input which damages internal cell separators. Spot welding finishes the bond in under 5 milliseconds. However, for wire-to-pad PCB work, soldering is usually the better method because of geometric constraints.
Why does my mini welder trigger the breaker?
Transformer-based units pulling 1000VA+ instantaneously cause this. Ensure your unit is a true capacitor discharge welder that charges slowly and dumps internally from the bank. Charge it slowly at a lower current rate if it has a CC/CV board. Plugging directly into a power strip with other high-draw devices is another common culprit.
What thickness of nickel strip can I weld?
A standard 12V capacitive unit handles 0.12mm to 0.2mm pure nickel with ease. For 0.3mm strips, you usually need a high-performance unit with a MOSFET array and a large capacitor bank. Try to slit thick strips to make them more manageable, or use two parallel runs of thinner material.
Is it possible to weld without a foot pedal?
Auto-pulse pens with built-in detection switches exist. They trigger when the resistance drops across the tips. While convenient, a dedicated foot pedal gives better control. By separating triggering from hand position, your grip remains firm during the pulse. Combined motion often leads to probe slip.
Conclusion
Learning how to use a mini spot welder comes down to respecting the physics of resistance. You are not melting metal with a continuous flame. You are focusing a lightning strike into a microscopic point under your thumb. Master the holy trinity of clean surfaces, balanced pressure, and precise pulse timing. Start with sacrificial samples; rip them apart violently to prove the bond. Once you calibrate feeling to results, building high-current battery arrays or delicate metal art becomes safe, repeatable, and deeply satisfying. The power of industrial joining sits on your bench, treat it with careful respect and it will perform flawlessly for thousands of cycles.
If you are serious about battery construction, pairing your new spot welding skill with the right protective gear is non-negotiable. Explore our detailed breakdown of the best spot welders optimized for batteries to compare duty cycles. Additionally, understanding broader joining methods helps you choose the right process for the metal, review our comparison of tack welding and spot welding techniques to avoid mix-ups. For a deeper dive into the physics of resistance bonding, visit the authoritative resource at ScienceDirect’s engineering overview.