You flipped the switch on your Cut 50 plasma cutter, expecting a clean, fast cut, but instead you got a weak spark, a wandering arc, or worse, nothing at all. You are not alone. The Cut 50, a popular 50-amp inverter plasma cutter, is loved for its affordability and portability. But like any budget-friendly tool, it comes with a particular set of quirks and common failure points.
The good news is that 90 percent of Cut 50 plasma cutter problems are not catastrophic failures. They usually boil down to air supply issues, consumable wear, or simple user error. Before you box it up and ship it back, take a deep breath. This guide walks you through the troubleshooting process step by step, using plain, no-nonsense language.
We will cover the seven most frequent headaches, from a machine that refuses to arc to cut edges that look like a jagged mess. You will also learn how to maintain your torch to prevent these issues in the first place. If you are new to plasma cutting, you might also want to check out our beginner guide on using a plasma cutter for the first time.
ARCCAPTAIN iControl CUT55 Pro
Check PriceTable of Contents
Common Cut 50 Plasma Cutter Problems and How to Fix Them
Cheap plasma cutters often sacrifice duty cycle and component quality to hit a low price point. Still, a properly tuned Cut 50 can handle up to 1/2 inch steel with decent results. The moment it starts acting up, check the basics first. Air, power, and consumables are the holy trinity of plasma troubleshooting.
1. The Arc Won’t Start (No Spark)
You pull the trigger and hear the air solenoid click, but there is no pilot arc. This is the number one issue with the Cut 50 series. The machine thinks it is safe, so it refuses to fire. Usually, the culprit is a missing ground or a safety interlock.
First, confirm your work clamp is making solid metal-to-metal contact. Grind off paint, rust, or mill scale right at the clamping point. A poor ground circuit will prevent the high-frequency start from initiating the arc. Next, inspect the torch cap and consumables. If the retaining cap is loose, a safety switch inside the torch head will disable the trigger. Screw it down finger-tight, not gorilla-tight.
Still no spark? With the machine unplugged, pull the electrode and swirl ring. Look for a gray or white burn mark on the electrode tip. If the electrode is fully mushroomed or the tip is missing, the air gap is gone. Replace the electrode and nozzle as a set. For deeper electrical diagnosis, you can cross-reference your symptoms with plasma cutting troubleshooting guide.
2. Weak or Intermittent Arc
PRIMEWELD CUT50DP 50A Non-Touch Pilot Arc
Check PriceThe arc fires but sputters, dances, or cuts out mid-line. A flickering arc is almost always a sign of unstable air pressure or moisture in the lines. Plasma cutters demand clean, dry air at a steady flow rate. The internal air regulator on a Cut 50 is notorious for drifting under load.
Set your compressor output to 90 to 120 PSI and do not trust the built-in gauge alone. Attach a second inline gauge right at the machine inlet, then pull the trigger. The pressure while air is flowing should stay between 55 and 70 PSI. If it dips below 50 PSI, the arc will struggle to transfer. Drain your compressor tank daily. Any water vapor hitting the hot electrode will instantly vaporize and blow out the arc.
Also check for kinked torch leads or a clogged air filter element inside the machine. The Cut 50’s tiny filter bowl can clog fast in a dusty shop. If the air is good but the arc still wavers, your swirl ring is likely dirty. A blocked swirl ring creates turbulent airflow around the electrode, making the arc flutter. Soak it in a mild degreaser and blow it dry.
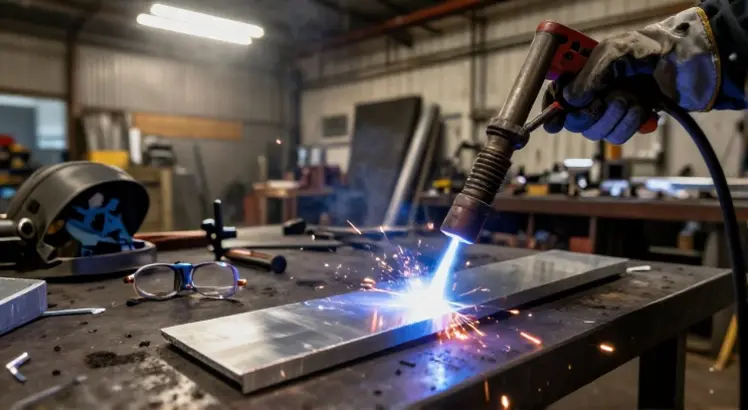
3. Excessive Dross and Angled Cut Edges
After cutting, you find a heavy, stubborn layer of resolidified metal clinging to the bottom of the plate. Low-speed dross is thick and bubbly, while high-speed dross is thin and hard to chip off. Either way, it means your travel speed and amperage are out of sync.
On 1/8 inch mild steel, run the machine at 35 to 40 amps and move at a steady, brisk pace. If you crawl too slowly, the arc spreads heat too wide and makes a mess. If you sprint, the arc leans backward and creates a beveled edge with a hard top burr. Listen for a consistent, bacon-frying sound. That crisp sizzle is the sweet spot.
A bevel that is severe on one side of the cut points to a damaged nozzle orifice. Even a tiny nick in the copper nozzle will steer the arc sideways. Replace the nozzle and electrode together. Do not try to clean the orifice with a wire tip cleaner, it will enlarge the hole and ruin the cut geometry for good.
4. Consumables Wear Out Too Quickly
You are burning through electrodes and nozzles after only a few inches of cutting. On a properly functioning Cut 50, a set of consumables should last through at least 20 to 30 pierces and several feet of line cutting. Premature failure means the machine is eating itself due to one of two things, pierce height or moisture.
Piercing too close to the plate splashes molten metal directly back into the torch tip. Hold a standoff of about 1/8 inch during pierces, moving to a cutting height of 1/16 inch once the arc breaks through. If you start from the edge of the material, you avoid the blowback entirely. Also, never hammer the torch body against the work to knock off slag, you will crack the ceramic swirl ring.
Moisture is an electrode killer. If your electrode consistently shows a deep, cratered pit in the center of the hafnium insert, moisture is exploding the tip from the inside out. Install a simple desiccant dryer or a motorguard filter on the back of the machine. This is a tiny investment that doubles the life of your torch parts.
5. Air Stops Flowing or Solenoid Sticks
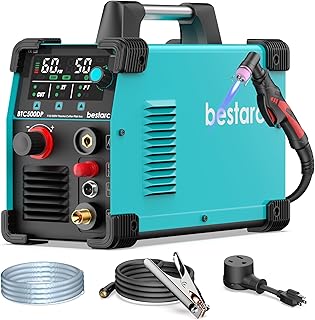
Bestarc BTC500DP 50A Pilot Arc Cutter
Check PriceYou pull the trigger, and you hear silence or a weak sputter from the torch. The air solenoid valve inside the Cut 50 is a common fail point, especially if your air supply contains oil. Oil from a lubed compressor will gum up the solenoid plunger, causing it to stick closed or partly open.
If you are sure the compressor is on and hoses are intact, tap lightly on the solenoid valve body while holding the trigger. Sometimes this frees a stuck piston. However, a sticky solenoid often needs to be replaced with a higher-quality valve. Running an in-line coalescing filter upstream can prevent the oil residue issue from happening again.
Also, test the post-flow. A Cut 50 should blow air for about 10 to 20 seconds after you release the trigger to cool the torch. If post-flow stops instantly, the control board may be sending a bad signal, or the torch switch is broken. A wonky torch switch will also cause the air to pulse wildly.
6. Unit Overheats or Trips the Breaker
The Cut 50 is rated for a 60 percent duty cycle at 50 amps, but that assumes perfect ventilation. If the thermal overload light comes on after only a minute of cutting, the machine is choking. Check the cooling fan first. Many Cut 50 clones use a cheap fan that fails early. Without airflow, the IGBT transistors overheat fast.
Make sure the intake vents on the front and back are dust-free. A blast of compressed air through the grilles every few weeks prevents the insulating blanket of dust that cooks circuit boards. Also, never run the machine lying on its side, the airflow path is designed for a flat, horizontal position.
Tripping a 20-amp household breaker is normal when you run at the max 50-amp output. You really need a dedicated 30-amp circuit on 230 volts for heavy sections. If you are on 110 volts using a dual-voltage model, cap your cutting at 3/16 inch steel to stay under 20 amps. Ignoring input current limits will cause the voltage to sag and damage the power board.
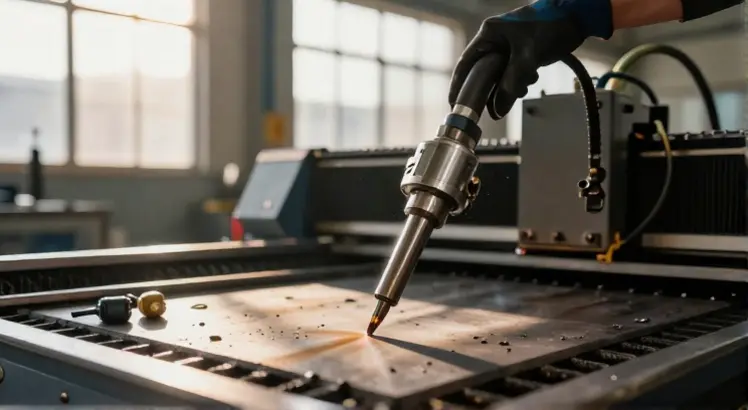
7. Torch Head Drags and Damages the Cut
The Cut 50’s standard PT-31 style torch is not a drag tip. You cannot drag the nozzle on the metal like a consumable designed for shield cup cutting. Scraping the copper nozzle along rusty plate will short the nozzle to the work, blow out the tip, and leave a scarred, jagged kerf.
Use a standoff guide or a simple roller guide attachment. If you freehand, rest your pinky finger on the work to stabilize your hand but keep the nozzle raised. Any contact between the electrified nozzle and the plate while the arc is on creates a secondary arc path that destroys the orifice instantly.
If you need to make long, straight cuts, clamp a piece of angle iron as a guide. Running the torch alongside a guide removes the human shake and keeps the cut face perfectly square. This simple trick also saves consumables because the torch stays at a consistent height.
Preventive Maintenance That Keeps Your Cut 50 Running
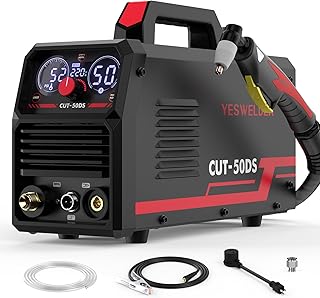
YESWELDER CUT-50DS 50Amp Digital Cutter
Check PriceMost Cut 50 plasma cutter problems creep in slowly because of neglect. A 10-minute weekly checkup stops frustrating breakdowns. Start with the air system. Drain the compressor tank completely, and unscrew the moisture trap on the back of the machine to dump any collected water. If you see rusty sludge in the trap, your air line is corroding from the inside. Add a particulate filter before the plasma cutter inlet.
Inspect the torch body for cracks and the ground clamp for frayed copper cable. A high-resistance ground causes the machine to work harder to maintain the arc, which stresses the inverter board. Every 20 hours of cutting, disassemble the torch head and clean the internal O-ring seats with a cotton swab and electrical contact cleaner. A leaky O-ring lets air bypass the electrode, reducing cooling and cutting power.
Finally, keep an extra set of consumables on hand at all times. If you are ever unsure about proper setup, our step-by-step article on how to set up a plasma cutter walks you through the entire process, from unboxing to making the first arc.
Frequently Asked Questions
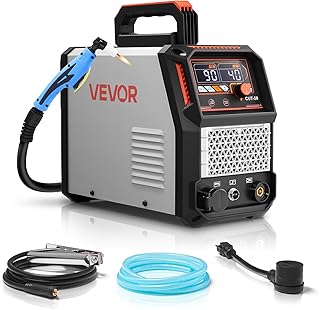
VEVOR 50A Digital Display IGBT Cutter
Check PriceWhy does my Cut 50 plasma cutter sputter and pop when I first pull the trigger?
Sputtering right at the start usually means the air inside the torch hose hasn’t purged yet. Hold the trigger until the airflow stabilizes before touching the material. If it still pops, your electrode is likely wet from moisture. Replace the electrode and let the air run for 30 seconds to dry out the torch head before installing new parts.
Can a Cut 50 plasma cutter run on a generator?
Yes, but with caution. The Cut 50 is sensitive to voltage spikes from non-inverter generators. Use a generator with a minimum of 8,000 running watts and clean power output, often labeled less than 5 percent total harmonic distortion. A surge from a cheap contractor-grade generator can fry the control board instantly. Always connect a surge protector inline.
How do I know if my PCB board is fried?
If the machine is completely dead, no fan, no light, and no click, check the power switch and fuse first. If the fan runs but the trigger does nothing, the main control board may have failed. A telltale sign of a blown board is a burnt electrical smell from the vents or a physically bulging capacitor. Board-level repair is often not cost-effective for the Cut 50, so it may be time to consider a replacement.
Is it normal for the electrode to stick to the material?
No. A sticking electrode means the pilot arc did not transfer properly. You are likely holding the torch too close or the work clamp is not making good contact. Also, verify that you are using the correct standoff. A dragging torch on a Cut 50 will short the circuit and can instantly weld the electrode to the plate.
Final Thoughts

Bestarc 50A Pilot Arc Cutter, Yellow
Check PriceYour Cut 50 plasma cutter can deliver impressive cuts for the money, but only if you treat it like a precision tool, not a disposable jigsaw. When you hit a snag, work the problem logically, air first, then power and consumables. Nine times out of ten, the fix is free, a clean filter, a tight ground clamp, or a fresh set of nozzle and electrode.
Resist the urge to open the case and poke around unless you are confident with high-voltage electronics. Many DIY repairs end up turning a minor nuisance into a fried motherboard. Stick to the external serviceable parts, keep the air dry, and you will get years of service from that little yellow box. A methodical troubleshooting approach will have you back to making clean, smooth cuts in less time than it takes to drive to the welding supply store.