If you want to learn how to use a spot welder, you have come to the right place. Spot welding is one of the fastest and most efficient ways to join thin sheet metal. It relies on electrical resistance to fuse metal together without filler rods or shielding gas. Whether you are repairing auto body panels, fabricating ductwork, or building battery packs, understanding the correct technique makes all the difference. This guide walks you through everything from safety to spot weld testing in a straightforward way.
Table of Contents
What Is a Spot Welder and How Does It Work?
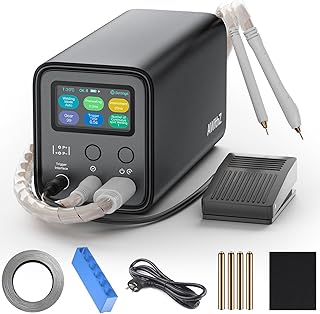
AWithZ UF20B 10.5KW Spot Welder, 3-in-1 Auto & Manual & Foot Pedal
Check PriceA spot welder uses the principle of resistance welding. Two copper alloy electrodes press the metal sheets together. Then a high electric current passes through the contact point. The metal heats up at the point of highest resistance, creates a molten nugget, and fuses under pressure. It is a clean process that produces a small, round weld spot without filler metal.
The entire cycle takes only a fraction of a second. Because heat is localized, distortion stays minimal. Spot welders come in different forms, from large stationary pedestal machines to portable handheld units. You will often see them in automotive assembly lines, sheet metal workshops, and hobby garages. Once you understand the basics, the operation becomes highly repeatable and productive.
Essential Safety Precautions Before You Start
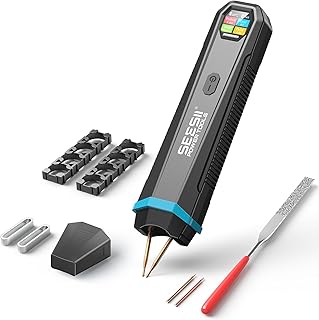
SEESII Battery Spot Welder, Custom Welding Settings, Max 0.15mm Pure Nickel
Check PriceSafety always comes first when working with high current and hot metal. Spot welding generates intense heat, sparks, and strong magnetic fields. Skipping precautions can lead to burns, eye damage, or fire. Always prepare your workspace and wear the right gear before plugging in the machine.
Personal Protective Equipment
- Wear clear safety glasses or a face shield to protect against small sparks.
- Use heat-resistant gloves to handle hot workpieces.
- Choose cotton or leather clothing to avoid melting synthetic fabrics.
- Close-toed leather boots offer better protection than sneakers.
Workspace Setup
Set up the spot welder on a stable, non-flammable surface. Keep a fire extinguisher within easy reach. Remove oily rags, solvents, and any other combustibles from the area. The electrodes get extremely hot, so arrange the power cord away from traffic paths to prevent tripping or accidental tugging. Good ventilation helps dissipate fume and ozone, even if spot welding produces less smoke than arc welding.
Step-by-Step Guide on How to Use a Spot Welder
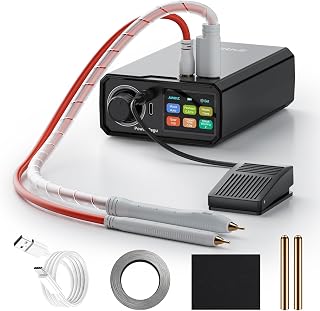
AWithZ 10000mAh Battery Spot Welder, Rotary Knob Operation 100 Gears Adjustable
Check PriceFollow these steps and you will produce strong, consistent welds. The process is simple, but small adjustments in setup lead to much better results. Take your time to learn the feel of the machine before moving on to important projects.
Step 1: Inspect the Machine and Workpieces
Start every session with a visual check. Look at the electrode tips for wear, pitting, or mushrooming. Clean or dress the tips with a proper file if they are deformed. Dirty tips increase resistance and reduce weld quality. Next, make sure the metal surfaces are free of rust, paint, oil, and mill scale. A quick wipe with acetone or a light sanding goes a long way.
Step 2: Adjust the Pressure and Current Settings
Your spot welder controls usually include pressure, weld time, and amperage. Thin sheet metal needs less current and shorter time. A good starting point for 0.8 mm mild steel might be around 5 to 7 kiloamps with a weld time of 5 to 8 cycles. Refer to the machine’s setting chart or perform test welds on scrap pieces. Too little pressure causes sparking and weak bonds. Too much pressure squishes the nugget and reduces resistance.
Step 3: Position the Metal Sheets and Electrodes
Slide the two metal pieces between the copper electrodes. Align them so the overlap distance fits the electrode tip diameter. Close the electrodes until they press firmly on the metal stack. Make sure the tips contact squarely. A tilted electrode creates uneven heating and a weak off-center nugget. For tight corners, use offset or longer reach electrodes.
Step 4: Activate the Weld
Squeeze the trigger or press the foot pedal to start the cycle. The machine will deliver current while maintaining pressure. You may notice a brief hum and a small flash of light. Keep your hands steady until the cycle completes. Do not release pressure early. Premature release can result in a cracked or missing nugget.
Step 5: Check the Weld Nugget
Release the electrodes and let the metal cool for a moment. A good spot weld leaves a small, clean indentation that is slightly discolored. The nugget should be round and uniform. Perform a peel test on a sample coupon. The weld should pull a button of material from one sheet. If it pops apart cleanly, increase the current, time, or pressure and test again. When you are confident, move on to your actual workpiece. For guidance on choosing reliable equipment, check out our guide on the top-rated spot welding machines.
Spot Welder Settings for Different Materials
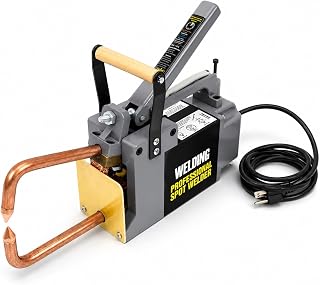
Stark USA Portable Spot Welder 1/8″ Electric Single Phase Handheld
Check PriceMaterial type and thickness directly determine the ideal settings. Mild steel works easily with standard copper electrodes. Galvanized steel requires slightly higher current and more frequent tip cleaning because the zinc coating adheres to the copper. Stainless steel needs higher current and shorter weld time due to its higher resistivity. Aluminum spot welding is much more demanding and often requires a three-phase machine with special tips.
Quick Reference for Mild Steel
- 0.6 mm (24 ga): Approximately 4 kA, 3 to 4 cycles.
- 0.8 mm (22 ga): Approximately 6 kA, 5 to 8 cycles.
- 1.0 mm (20 ga): Approximately 8 kA, 8 to 12 cycles.
- 1.2 mm (18 ga): Approximately 10 kA, 10 to 15 cycles.
These numbers are starting points. Always test on scrap and adjust accordingly. Keep a logbook with your best settings, it saves time on future projects.
Common Mistakes and How to Avoid Them
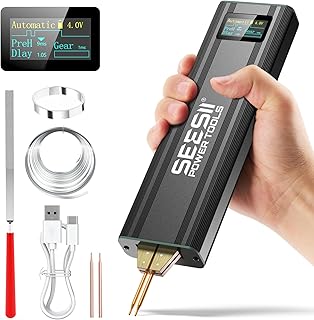
SEESII Battery Spot Welder, Durable Aluminum Casing, Max 0.15mm Pure Nickel
Check PriceEven experienced operators run into trouble when they rush. Recognizing these pitfalls early keeps your work quality high. Pay close attention to the electrode condition and setup consistency.
- Dirty or worn tips: Dress the electrodes frequently. Bad tips cause excessive spatter and weak welds.
- Too little squeezing pressure: Low pressure allows arcing at the contact surface. This burns the metal and ruins the weld.
- Overheating the workpiece: Excessive weld time creates a molten pool that blows out instead of fusing. Reduce time or current.
- Misaligned electrodes: Misalignment causes the current to spread unevenly. Always check that tips meet squarely.
- Ignoring sheet fit-up: Gaps between the sheets prevent proper nugget formation. Clamp the parts tight or use a helper to apply pressure.
Spot Welding vs. Other Joining Methods
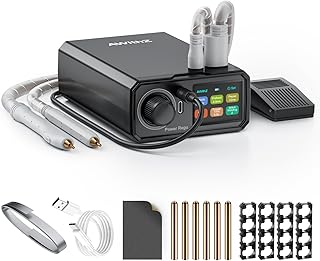
10000mAh Battery Spot Welder, AWithZ 1650A Output Current Max 100 Gears Adjustable
Check PriceIt helps to know when spot welding is the right choice compared to other techniques. For thin sheet metal, it beats MIG and TIG in speed and simplicity. You do not need filler metal, gas, or complex joint preparation. However, spot welders are limited to lap joints and material combinations that suit resistance welding. If your parts require strong structural welds on thicker sections, traditional arc welding may be better. For a closer look at another quick joining method, read our article on the differences between tack welding and spot welding.
Resistance spot welding also does not work on non-conductive materials. For plastics or composites you need a completely different process. Keep your metal clean, your tips dressed, and you will find spot welding to be one of the most productive tools in the shop. For deeper resistance welding principles, the professionals at Miller Electric have a detailed resource on spot welding fundamentals.
Frequently Asked Questions About Using a Spot Welder
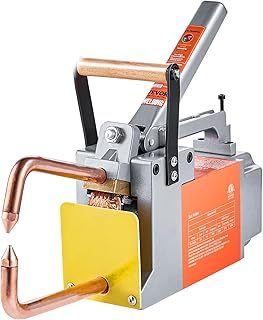
VEVOR Portable Spot Welder, 1/8-inch Spot Welder Machine with 1.5KVA Input Capacity
Check PriceCan I use a spot welder on battery tabs?
Yes, portable mini spot welders are popular for building battery packs with nickel strips. Use pure nickel strip and clean the cell terminals thoroughly. Shorten the pulse time and use a lower energy setting to avoid overheating the cells. Battery spot welding requires precise control, so a dedicated battery tab welder often gives better results than a large automotive unit.
How do I know if my spot weld is strong enough?
The peel test is the most reliable shop floor check. Weld two test coupons, clamp one side in a vise, and peel the top sheet with pliers. A good weld will tear a button from the lower sheet. A weld that peels apart without leaving material behind is too cold, increase the heat or time.
Do I need water cooling for my spot welder?
Small handheld units and hobby machines usually rely on air cooling. Larger production machines and bench models often use internal water circulation to keep the transformer and electrodes from overheating during continuous operation. If you run many welds back to back, monitor the electrode temperature and let the machine rest if it becomes too hot.
Why do my electrodes stick to the metal?
Sticking happens when the weld time is too long or the current is too high. It can also occur with dirty or misaligned tips. Reduce the heat slightly and make sure you are not pressing too lightly. Properly dressed copper electrodes with a slight dome shape help release cleanly from the workpiece.
Conclusion
Learning how to use a spot welder opens up a world of fast, clean, and efficient metal joining. Start with safety, keep your electrodes in top condition, and run test coupons before touching your actual parts. The ability to dial in pressure, time, and current takes practice, but the feedback from each weld is immediate. Compare your nugget shape, try a peel test, and adjust one parameter at a time.
Whether you are restoring a car panel or assembling battery modules, the same principles apply. Clean metal, steady pressure, and correct heat make a reliable joint. Bookmark a settings chart for your favorite materials and refer to it often. With a little patience you will produce factory-quality spot welds right in your own garage.