[et_pb_section fb_built=”1″ _builder_version=”4.16″ _module_preset=”default” background_enable_color=”off” custom_padding=”11px||5px|0px||” global_colors_info=”{}”][et_pb_row _builder_version=”4.16″ _module_preset=”default” width=”98.2%” custom_margin=”0px||||false|false” custom_padding=”0px||7px|0px|false|false” global_colors_info=”{}”][et_pb_column type=”4_4″ _builder_version=”4.16″ _module_preset=”default” global_colors_info=”{}”][et_pb_text content_tablet=”
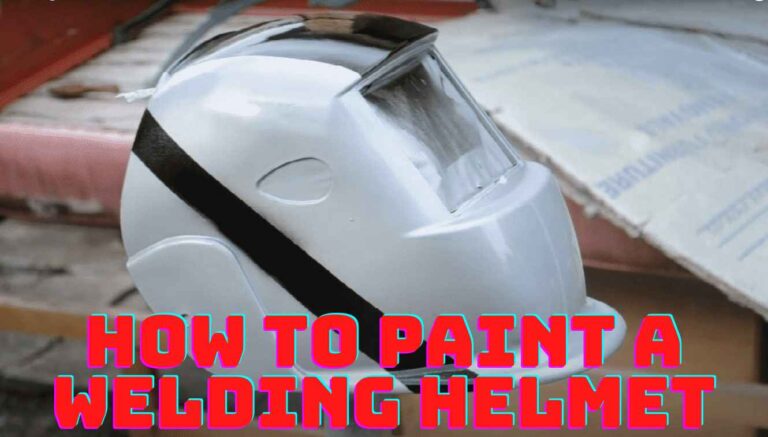
Some welders especially welding students, wants to see their welding helmets in different colors rather than the standard black. Because they want to show off their welding helmets and also want to buy best welding helmets. If you have some creativity and proper guidance on how to paint a welding helmet, then it’s not a big task. Here is the guide on how to paint an old welding helmet with a glossy finish.
The average lifespan of a welding helmet is around five years. After that, the paint begins to disintegrate. Therefore, it is good to repaint your welding helmet every few years to keep it new and good-looking. Painting any object is fun and satisfying, but it becomes exciting and important when it’s something as important as protecting your eyes and face from sparks.
Table of Contents
Things Needed to Paint a Welding Helmet
Products required before start paint a welding helmet
- Welding Helmet
- Painter’s Tape
- Paint Brush
- Spray can of the desired color
- Clean cloth for dust removal
- A primer that is fire resistant
Don’t worry if you’re not a pro painter – we’ve got everything covered in our step-by-step guide!
Remove Lens and Headgear
Prepare the work area by covering it with newspaper or plastic wrap to save. When your work area is ready, it’s time to start masking off the areas of the welding helmet you don’t want to paint. So, remove the lens and headgear from the welding helmet and set them aside. The welding lens is sensitive and can be damaged by paint. Some people tape the lens and headgear, but it is good to remove them to ensure the helmet has a flat surface and avoid worry while painting a welding helmet.
Clean Welding Helmet and Lens
People who don’t give importance to cleaning before painting a welding helmet never get excellent results. By painting an unclear surface, you can’t get the desired results. Therefore before painting a welding helmet, you must know how to clean a welding helmet lens. If the lens is clean, you will get a clear view of the working object. Before painting, you should have all cleaning materials like sandpaper or steel wool to clean the welding helmet.
No one can deny the value of cleaning before painting any object. It is an essential step if you want to get an excellent painting result. A clean surface helps the paint to stick to the object and gives a glossy finish. You can also use water and a degreaser to get outstanding results. Because it helps the paint to adhere to the surface.
Apply Primer to Welding Helmet
Now your welding helmet is clean and ready for painting. The next step is to apply a coat of primer to the helmet. It will help the paint adhere better and give it a nice and even surface. People who don’t give much importance to this step never get the expected result.
Primer helps the undercoat adhere to the surface, and it also fills any tiny scratches or imperfections on the helmet. Therefore, it is essential for a painter to apply primer before start painting a welding hood. Always choose a primer that is fire resistant; otherwise, there are chances of catching fire to the welding helmet.
Apply the Filler Paint
The use of filler paint is essential for an even finish. Filler paints are made from a mixture of pigments and resin. It is spread over the surface of the primer on the helmet. When it dries up, it leaves behind tiny pores that act as another layer of protection against heat, fire and rust. If you are looking for excellent long-term paint, give due importance to filler paint. Sugar scoop hoods and pancake welding hoods are good choices for painting welding helmets.
Choose Paint Color
Once the primer has dried, it’s time to paint the welding helmet. There are two options available for welders, whether to paint through a brush or use spray. We recommend spraying the welding helmet to get outstanding results. As it is the final step of the painting job and it is vital to use good-quality paint.
Choose a color that you love and start painting in even strokes. The more coats of paint you apply, a helmet will be glossy. However, make sure to allow each coat of paint to dry completely before applying the next one. So, you will get a good finish.
Let it Desiccate
After spraying or painting a welding hood with a brush, it is crucial to let the welding helmet dry for some hours. It will ensure that the paint cures properly and the helmet is ready for use. Do not use the helmet until the paint has fully dried. A welding helmet is an essential safety gear for welders, so it should be treated with care.
Don’t forget the lens and headgear; these should also be dry. So reattach them and your newly painted welding helmet is ready to safeguard your eyes from dangerous sparks and other debris while working.
Conclusion of How to Paint a Welding Helmet
After reading this complete guide, now you very well know how to paint a welding helmet. It is the best way to paint a welding helmet and is also very useful for beginners. You will get great results and the welding helmet will offer a new look. So, follow this guide and give a new look to your old welding helmet.
FAQs
Do you have to sand a helmet before painting?
Yes, it is recommended to sand a helmet before painting to create a smooth surface for the paint to adhere to. Sanding also helps to remove any dirt, rust, or old paint that may be present on the surface of the helmet.
Is it safe to spray a welding helmet?
Yes, it is safe to spray a welding helmet as long as proper precautions are taken. If you have removed the lens and headgear from the welding helmet then it is fine. But if there is only tape on the lens and headgear then, we don’t recommend spray paint because it can leak and cause harm to the lens.
Can you paint a plastic helmet?
Yes, you can paint a plastic welding helmet. However, you need to make sure to choose the right type of paint that is compatible with plastic. Acrylic-based paints are a good option as they are designed to adhere to plastic surfaces. Additionally, you should clean and prime the helmet properly before painting to ensure the paint adheres well and provides a smooth, even finish.
” content_phone=”
Some welders especially welding students, wants to see their welding helmets in different colors rather than the standard black. Because they want to show off their welding helmets and like to buy the best welding helmets. If you have some creativity and proper guidance on how to paint a welding helmet, then it’s not a big task. This blog post will show you how to paint your old welding helmet with a glossy finish. It’s quick and easy; follow some of these simple steps.
The average lifespan of a welding helmet is around five years. After that time, the paint begins to disintegrate. Therefore, it is good to repaint your welding helmet every few years to keep it new and good-looking. Painting any object is fun and satisfying, but it becomes exciting when it’s something as important as protecting your eyes from sparks. So go ahead and get started by reading through these instructions to get an excellent result.
Things Needed to Paint a Welding Helmet
Products required before start paint a welding helmet
- Welding helmet
- Painter’s tape
- Spray can of the desired color
- Clean cloth for dust removal
- A primer that is fire resistant
- Brush for paint
Don’t worry if you’re not a pro painter – we’ve got everything covered in our step-by-step guide!
Remove Lens and Headgear
Prepare the work area by covering it with newspaper or plastic wrap to save. When your work area is ready, it’s time to start masking off the areas of the welding helmet you don’t want to paint. So, remove the lens and headgear from the welding helmet and set them aside. The lens is sensitive and can be damaged by paint. Some people tape the lens and headgear, but it is good to remove them to ensure the helmet has a flat surface and avoid worry while painting a welding helmet.
Clean Welding Helmet and Lens
People who don’t give importance to cleaning before painting a welding helmet never get the expected result. Because by painting an unclear surface, you can’t get the desired results. Before painting a welding helmet, you must know how to clean a welding helmet lens. If the lens is clean, you will get a clear view of the working object. Before painting, you should have all washing material like sandpaper or steel wool to clean the welding helmet before starting the job.
No one can deny the value of cleaning. It is an essential step if anyone wants to get an excellent painting result. Cleaning helps the paint stick to the surface and give a glossy finish. You can also use water and a degreaser to get outstanding results. It will help the paint adhere to the surface.
Apply Primer to Welding Helmet
Now your welding helmet is clean and ready for painting. The next step is to apply a coat of primer to the helmet. It will help the paint adhere better and give it a nice, even surface. People who don’t give much importance to this step never get the expected result.
Primer helps the undercoat adhere to the surface, and it also fills any tiny scratches or imperfections on the helmet. Therefore, it is essential for a painter to apply primer before start painting a welding helmet. Always choose a primer that is fire resistant; otherwise, there are chances of catching fire to the welding helmet.
Apply the Filler Paint
The use of filler paint is essential for an even finish. Filler paints are made from a mixture of pigments and resin. It is spread over the surface of the primer on the helmet. When it dries up, it leaves behind tiny pores that act as another layer of protection against heat, fire and rust. If you are looking for excellent long-term painting results, give importance to this step.
Choose Color of the Paint
Once the primer has dried, it’s time to paint the welding helmet. There are two options available for painters, whether using a paintbrush or spray. But we recommend spraying the welding helmet to get outstanding results. As you know that it is the final step of the painting job, it is vital to use good quality paint.
Choose a color that you love and start painting in even strokes. The more coats of paint you apply, the glossier the helmet will be. However, make sure to allow each coat of paint to dry completely before applying the next one. So, the result will be a good finish.
Let it Desiccate
After spraying or brush painting, it is crucial to let the welding helmet dry for some hours. It will ensure that the paint cures properly and the helmet is ready for use. Do not use the helmet until it has fully dried. A welding helmet is an essential safety gear for welders, so it should be treated with care.
Don’t forget the lens and headgear; they should also be dry. When all parts have dried, reattach them and your newly painted welding helmet is ready to shield your eyes from dangerous sparks and other debris while working.
Conclusion of How to Paint a Welding Helmet
After reading this complete guide, you should be well aware of how to paint a welding helmet. This is the best way to paint a welding helmet and is also very useful for beginners. You will get great result and your welding helmet will give a new look. So, follow this guide and give a new color to your old welding helmet.
FAQs
Do you have to sand a helmet before painting?
The sanding of a welding helmet reduces its ability of protection. It weakens the outer shell of the helmet. Therefore, we don’t recommend such practices. You must choose such paint color that you don’t need to remove the previous paint.
Is it safe to spray a welding helmet?
If you have removed the lens and headgear from the welding helmet then it is fine. But if there is only tape on the lens and headgear then, we don’t recommend spray paint because it can leak and cause harm to the lens.
Can you paint a plastic helmet?
Yes, you can paint the plastic welding helmet but make sure that the outer shell is clear, smooth and compatible with the paint. Always choose such type of paint that has matches the helmet’s outer surface.
” content_last_edited=”on|phone” _builder_version=”4.27.3″ _module_preset=”default” header_2_font_size=”25px” header_3_line_height=”1.2em” width=”100%” custom_padding=”|||0px||” hover_enabled=”0″ header_2_line_height_tablet=”1.4em” header_2_line_height_phone=”1.2em” header_2_line_height_last_edited=”on|phone” global_colors_info=”{}” sticky_enabled=”0″]
Some welders especially welding students, want to see their welding helmets in different colors rather than the standard black. Because they want to show off their welding helmets and like to buy the best welding helmets. If you have some creativity and proper guidance on how to paint a welding helmet, then it’s not a big task. This blog post will show you how to paint your old welding helmet with a glossy finish. It’s quick and easy; follow some of these simple steps.
The average lifespan of a welding helmet is around five years. After that time, the paint begins to disintegrate. Therefore, it is good to repaint your welding helmet every few years to keep it new and good-looking. Painting any object is fun and satisfying, but it becomes exciting when it’s something as important as protecting your eyes from sparks. So go ahead and get started by reading through these instructions to get an excellent result.
Things Needed to Paint a Welding Helmet
Products required before starting to paint a welding helmet
- Welding helmet
- Painter’s tape
- Spray can of the desired color
- Clean cloth for dust removal
- A primer that is fire-resistant
- Brush for paint
Don’t worry if you’re not a pro painter – we’ve got everything covered in our step-by-step guide!
Remove Lens and Headgear
Prepare the work area by covering it with newspaper or plastic wrap to save. When your work area is ready, it’s time to start masking off the areas of the welding helmet you don’t want to paint. So, remove the welding lens and headgear from the welding helmet and set them aside. The lens is sensitive and can be damaged by paint. Some people tape the lens and headgear, but it is good to remove them to ensure the helmet has a flat surface and avoid worry while painting a welding helmet.
Clean Welding Helmet and Lens
People who don’t give importance to cleaning before painting a welding helmet never get the expected result. Because by painting an unclear surface, you can’t get the desired results. Before painting a welding helmet, you must know how to clean a welding helmet lens. If the lens is clean, you will get a clear view of the working object. Before painting, you should have all washing materials like sandpaper or steel wool to clean the welding helmet before starting the job.
No one can deny the value of cleaning. It is an essential step if anyone wants to get an excellent painting result. Cleaning helps the paint stick to the surface and gives a glossy finish. You can also use water and a degreaser to get outstanding results. It will help the paint adhere to the surface.
Apply Primer to the Welding Helmet
Now your welding helmet is clean and ready for painting. The next step is to apply a coat of primer to the helmet. It will help the paint adhere better and give it a nice, even surface. People who don’t give much importance to this step never get the expected result.
Primer helps the undercoat adhere to the surface, and it also fills any tiny scratches or imperfections on the helmet. Therefore, a painter needs to apply primer before starting to paint a welding helmet. Always choose a primer that is fire resistant; otherwise, there are chances of catching fire to the welding helmet.
Apply the Filler Paint
The use of filler paint is essential for an even finish. Filler paints are made from a mixture of pigments and resin. It is spread over the surface of the primer on the helmet. When it dries up, it leaves behind tiny pores that act as another layer of protection against heat, fire and rust. If you are looking for excellent long-term painting results, give importance to this step.
Choose the Color of the Paint
Once the primer has dried, it’s time to paint the welding helmet. There are two options available for painters, whether using a paintbrush or spray. But we recommend spraying the welding helmet to get outstanding results. As you know it is the final step of the painting job, so it is vital to use good-quality paint.
Choose a color that you love and start painting in even strokes. The more coats of paint you apply, the glossier the helmet will be. However, make sure to allow each coat of paint to dry completely before applying the next one. So, the result will be a good finish. Here you can also read the guide on why people love tattoo design welding helmets.
Let it Desiccate
After spraying or brush painting, it is crucial to let the welding helmet dry for some hours. It will ensure that the paint cures properly and the helmet is ready for use. Please do not use the helmet until it has fully dried. A welding helmet is an essential safety gear for welders, so it should be treated carefully.
Don’t forget the lens and headgear; they should also be dry. When all parts have dried, reattach them and your newly painted welding helmet is ready to shield your eyes from dangerous sparks and other debris while working.
Conclusion of How to Paint a Welding Helmet
After reading this complete guide, you should be well aware of how to paint a welding helmet. This is the best way to paint a welding helmet and is also very useful for beginners. You will get great results and your welding helmet will give you a new look. So, follow this guide and give a new color to your old welding helmet. Also, check some valuable insights about funny welding helmets.
FAQs
Do you have to sand a helmet before painting?
The sanding of a welding helmet reduces its ability to protect. It weakens the outer shell of the helmet. Therefore, we don’t recommend such practices. You must choose such a paint color that you don’t need to remove the previous paint.
Is it safe to spray a welding helmet?
If you have removed the lens and headgear from the welding helmet then it is fine. But if there is only tape on the lens and headgear then, we don’t recommend spray paint because it can leak and cause harm to the lens.
Can you paint a plastic helmet?
Yes, you can paint the plastic welding helmet but make sure that the outer shell is clear, smooth and compatible with the paint. Always choose a type of paint that matches the helmet’s outer surface.
[/et_pb_text][/et_pb_column][/et_pb_row][/et_pb_section]

James is a welding expert, accomplished author, and trusted guide with over 8 years of experience in the industry. With his in-depth knowledge and engaging writing style, James has become a true authority in the field, offering readers and clients invaluable expertise and insights to take their welding skills to new heights.